
Free Crochet Balloon Dog Pattern: The Perfect Retro Decor Piece for Your Home
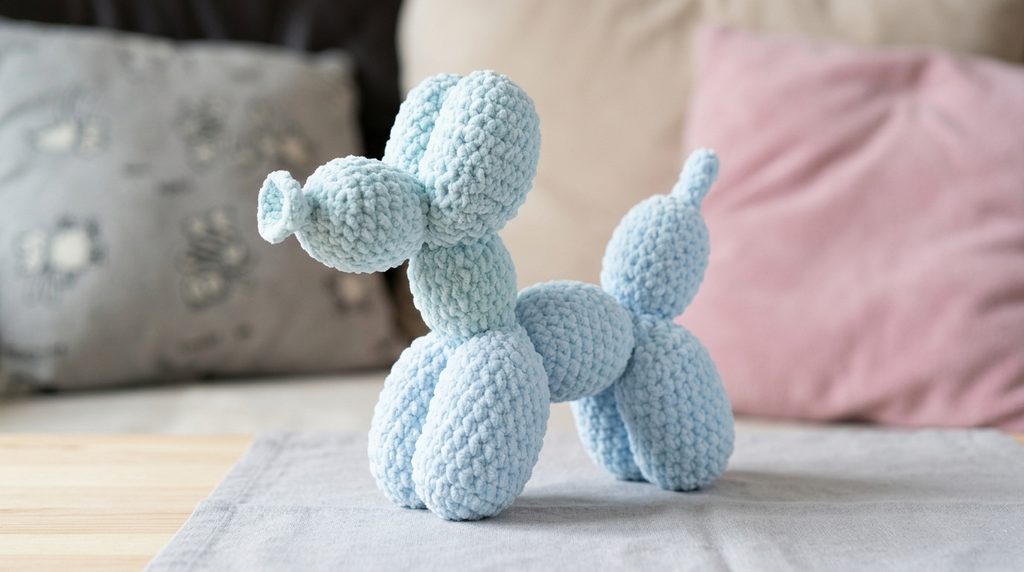
Retro yet timeless, the balloon dog has taken social media by storm! If you’ve seen these cute plushies popping up on your feed, you’ll love how easy they are to recreate. This free crochet balloon dog pattern is worked entirely in continuous rounds using basic stitches like single crochet, increases, and decreases.
Made with soft chenille yarn, this project turns out ultra-plush and squeezable, holding its balloon-like shape without sewing.
Why You’ll Love This Free Crochet Balloon Dog Pattern
- Beginner-Friendly Stitches: Uses standard single crochet, increases, and decreases — no advanced stitches needed and no sewing at all.
- No Complex Assembly: Crochet one long, continuous strand of balloon segments, then twist and assemble into the final shape.
- Customizable Styles: Use plush chenille or velvet yarn for a trendy, squishy finish, or classic worsted-weight cotton/acrylic yarn for sharp, defined balloon segments.
- Great Craft Fair Seller: Balloon dogs are highly viral, visually unique, and quick to work up, making them top sellers at markets and craft shows.
Pattern Overview & Skill Level
| Feature | Details |
| Skill Level | Easy / Advanced Beginner |
| Terminology | Standard US Crochet Terms |
| Time Required | 2 – 3.5 Hours |
| Finished Size | ~7–9 inches (18–23 cm) tall (using super bulky chenille yarn) |
| Category | Free Amigurumi Crochet Pattern / Retro Home Decor |
Pro-Tip for Assembly: When stuffing the segments, stuff the main body, neck, snout, and tail base firmly. Stuff the legs and ears medium-soft so they remain pliable enough to fold and twist neatly during assembly.
Materials Needed
- Yarn: Super bulky chenille/plush yarn (e.g., Premier Parfait Chunky or Bernat Velvet). Note: Standard worsted weight 100% cotton or acrylic yarn also works great with a smaller hook!
- Crochet Hook: 4.5 mm (US 7) to 5.0 mm (US H-8) hook for chenille yarn (or 3.5 mm / US E-4 for worsted cotton).
- Stitch Markers: Stitch markers to mark the start of continuous rounds.
- Stuffing: Polyester fiberfill.
- Scissors
Abbreviations (US Crochet Terms)
- MR: Magic Ring
- ch: Chain
- sc: Single Crochet
- inc: Increase (work 2 sc in the same stitch)
- dec / invdec: Decrease / Invisible Decrease
- sl st: Slip Stitch
- FO: Fasten Off
- [ ]: Total stitch count at the end of the round
Step-by-Step Free Crochet Balloon Dog Pattern
Work in continuous rounds. Place a stitch marker in the first stitch of each round to track your progress.
Part 1: The Continuous Body Strand
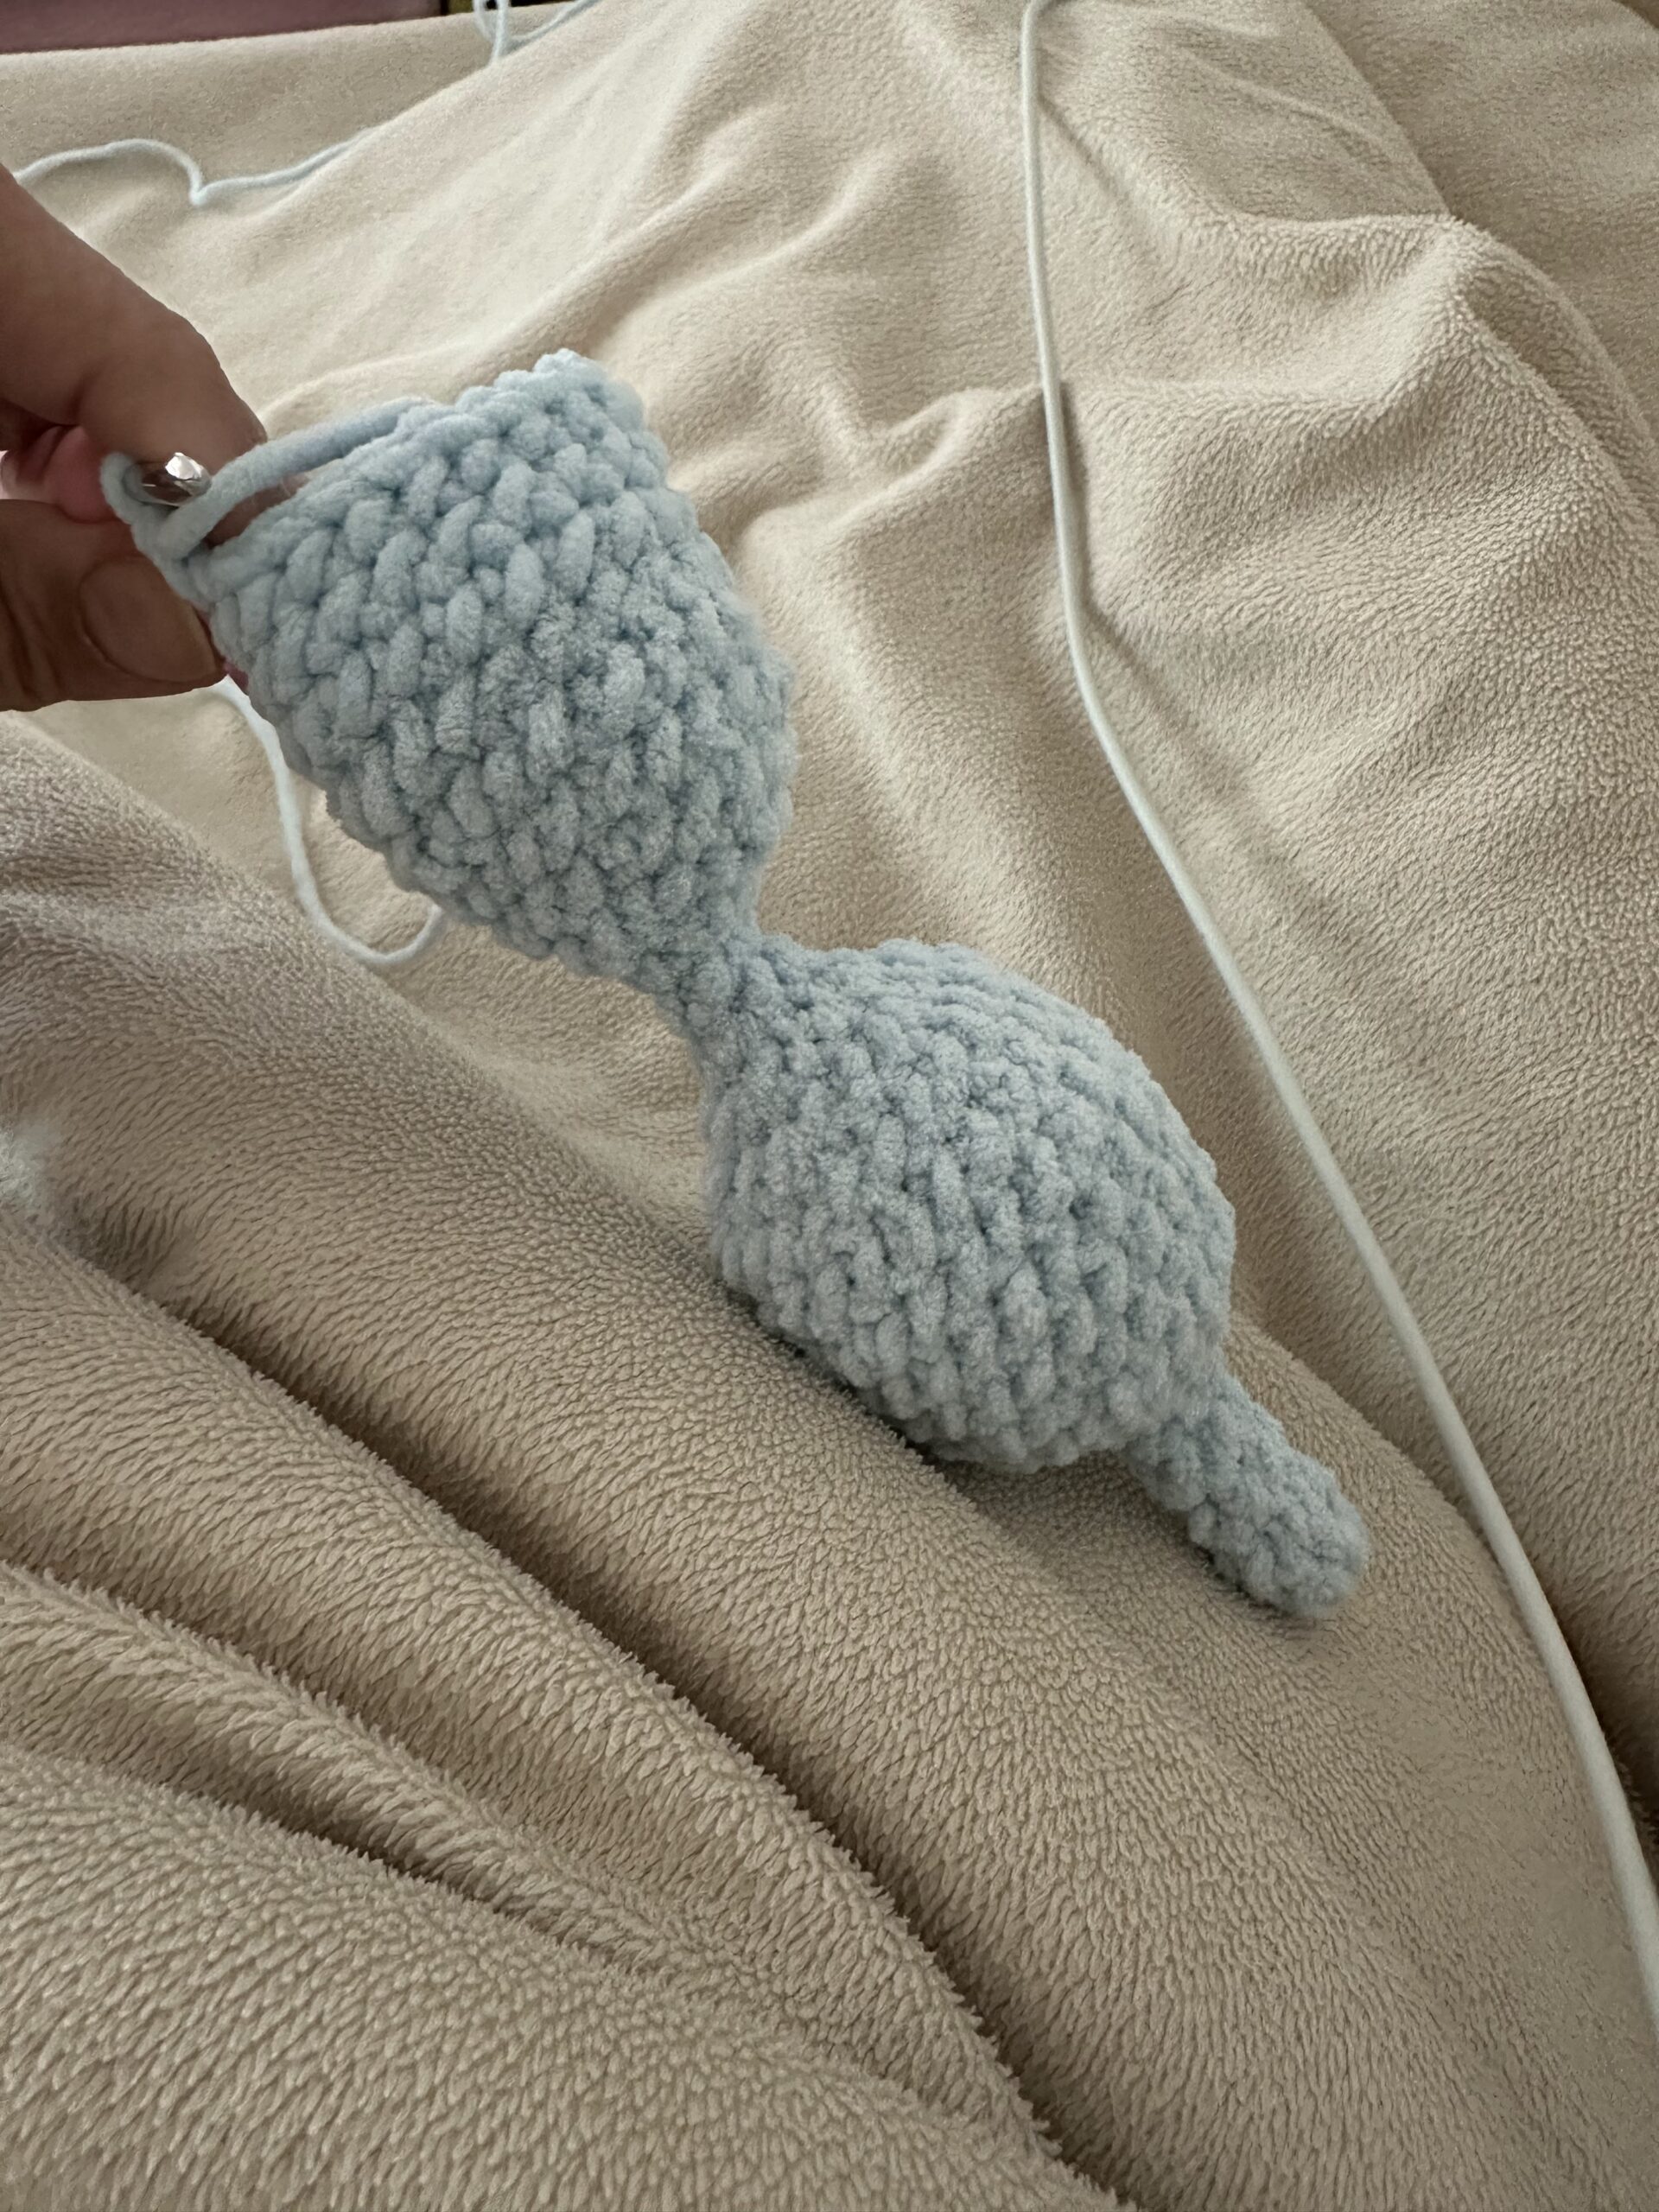
Tail (Start)
- R1: MR, 6 sc [6]
- R2–R5: 6 sc (4 rounds) [6]
Segment 1: Tail Base / Back End
- R6: inc in each st around [12]
- R7: (1 sc, inc) × 6 [18]
- R8: (2 sc, inc) × 6 [24]
- R9–R14: 24 sc (6 rounds) [24]
- R15: (2 sc, dec) × 6 [18]
- R16: (1 sc, dec) × 6 [12]
- Stuff firmly with fiberfill.
- R17: dec × 6 [6]
Connecting Joint 1
- R17a–R17b: 6 sc (2 rounds) [6]
Segment 2: Back Leg 1
- R18: inc in each st around [12]
- R19: (1 sc, inc) × 6 [18]
- R20: (2 sc, inc) × 6 [24]
- R21–R26: 24 sc (6 rounds) [24]
- R27: (2 sc, dec) × 6 [18]
- R28: (1 sc, dec) × 6 [12]
- Stuff moderately (keep flexible for folding).
- R29: dec × 6 [6]
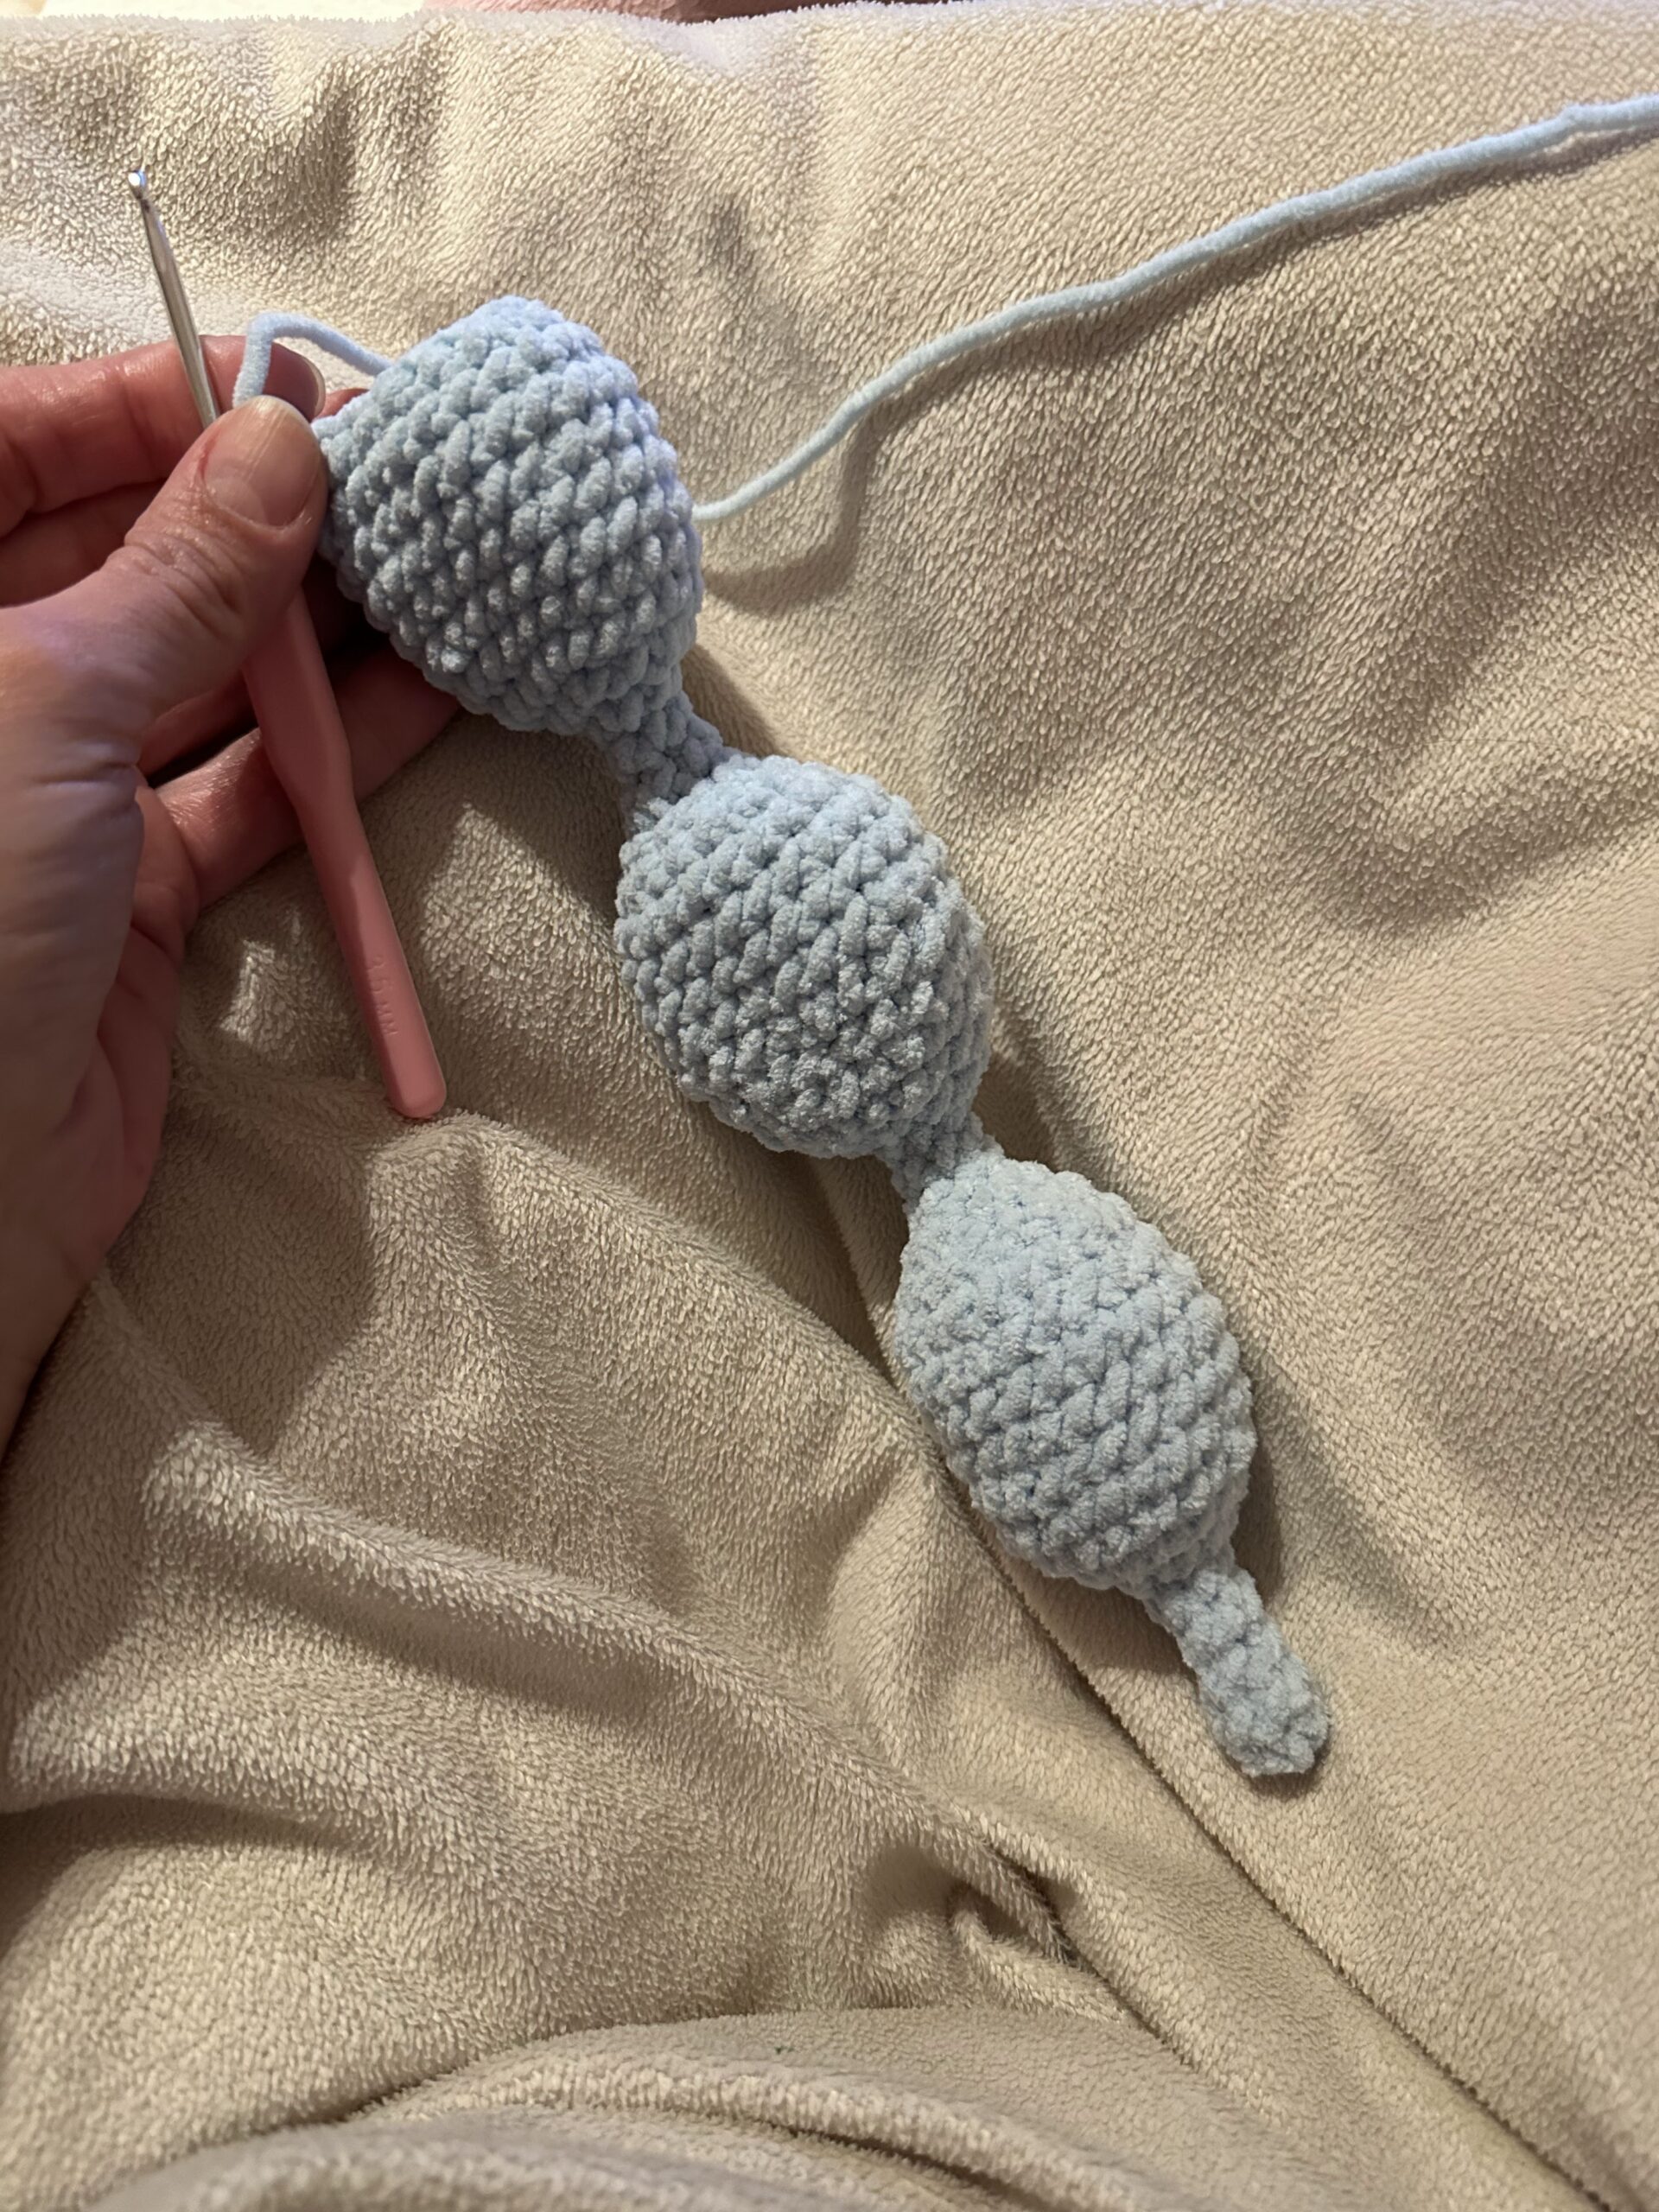
Connecting Joint 2
- R29a–R29b: 6 sc (2 rounds) [6]
Segment 3: Back Leg 2
- R30: inc in each st around [12]
- R31: (1 sc, inc) × 6 [18]
- R32: (2 sc, inc) × 6 [24]
- R33–R38: 24 sc (6 rounds) [24]
- R39: (2 sc, dec) × 6 [18]
- R40: (1 sc, dec) × 6 [12]
- Stuff moderately.
- R41: dec × 6 [6]
Connecting Joint 3
- R41a–R41b: 6 sc (2 rounds) [6]
Segment 4: Main Body / Torso
- R42: inc in each st around [12]
- R43: (1 sc, inc) × 6 [18]
- R44: (2 sc, inc) × 6 [24]
- R45–R52: 24 sc (8 rounds) [24]
- R53: (2 sc, dec) × 6 [18]
- R54: (1 sc, dec) × 6 [12]
- Stuff firmly with fiberfill.
- R55: dec × 6 [6]
Connecting Joint 4
- R55a–R55b: 6 sc (2 rounds) [6]
Segment 5: Front Leg 1
- R56: inc in each st around [12]
- R57: (1 sc, inc) × 6 [18]
- R58: (2 sc, inc) × 6 [24]
- R59–R64: 24 sc (6 rounds) [24]
- R65: (2 sc, dec) × 6 [18]
- R66: (1 sc, dec) × 6 [12]
- Stuff moderately.
- R67: dec × 6 [6]
Connecting Joint 5
- R67a–R67b: 6 sc (2 rounds) [6]
Segment 6: Front Leg 2
- R68: inc in each st around [12]
- R69: (1 sc, inc) × 6 [18]
- R70: (2 sc, inc) × 6 [24]
- R71–R76: 24 sc (6 rounds) [24]
- R77: (2 sc, dec) × 6 [18]
- R78: (1 sc, dec) × 6 [12]
- Stuff moderately.
- R79: dec × 6 [6]
Connecting Joint 6
- R79a–R79b: 6 sc (2 rounds) [6]
Segment 7: Neck
- R80: inc in each st around [12]
- R81: (1 sc, inc) × 6 [18]
- R82: (2 sc, inc) × 6 [24]
- R83–R86: 24 sc (4 rounds) [24]
- R87: (2 sc, dec) × 6 [18]
- R88: (1 sc, dec) × 6 [12]
- Stuff firmly.
- R89: dec × 6 [6]
Connecting Joint 7
- R89a–R89b: 6 sc (2 rounds) [6]
Segment 8: Ear 1
- R90: inc in each st around [12]
- R91: (1 sc, inc) × 6 [18]
- R92: (2 sc, inc) × 6 [24]
- R93–R98: 24 sc (6 rounds) [24]
- R99: (2 sc, dec) × 6 [18]
- R100: (1 sc, dec) × 6 [12]
- Stuff moderately.
- R101: dec × 6 [6]
Connecting Joint 8
- R101a–R101b: 6 sc (2 rounds) [6]
Segment 9: Ear 2
- R102: inc in each st around [12]
- R103: (1 sc, inc) × 6 [18]
- R104: (2 sc, inc) × 6 [24]
- R105–R110: 24 sc (6 rounds) [24]
- R111: (2 sc, dec) × 6 [18]
- R112: (1 sc, dec) × 6 [12]
- Stuff moderately.
- R113: dec × 6 [6]
Connecting Joint 9
- R113a–R113b: 6 sc (2 rounds) [6]
Segment 10: Snout & Balloon Knot (Finish)
- R114: inc in each st around [12]
- R115: (1 sc, inc) × 6 [18]
- R116: (2 sc, inc) × 6 [24]
- R117–R122: 24 sc (6 rounds) [24]
- R123: (2 sc, dec) × 6 [18]
- R124: (1 sc, dec) × 6 [12]
- Stuff firmly.
- R125: dec × 6 [6]
- R126: sc in each st around [6]
- R127: inc in each st around [12]
- R128: (1 sc, inc) × 6, sl st to first st [18] (Forms the flared balloon knot tip)
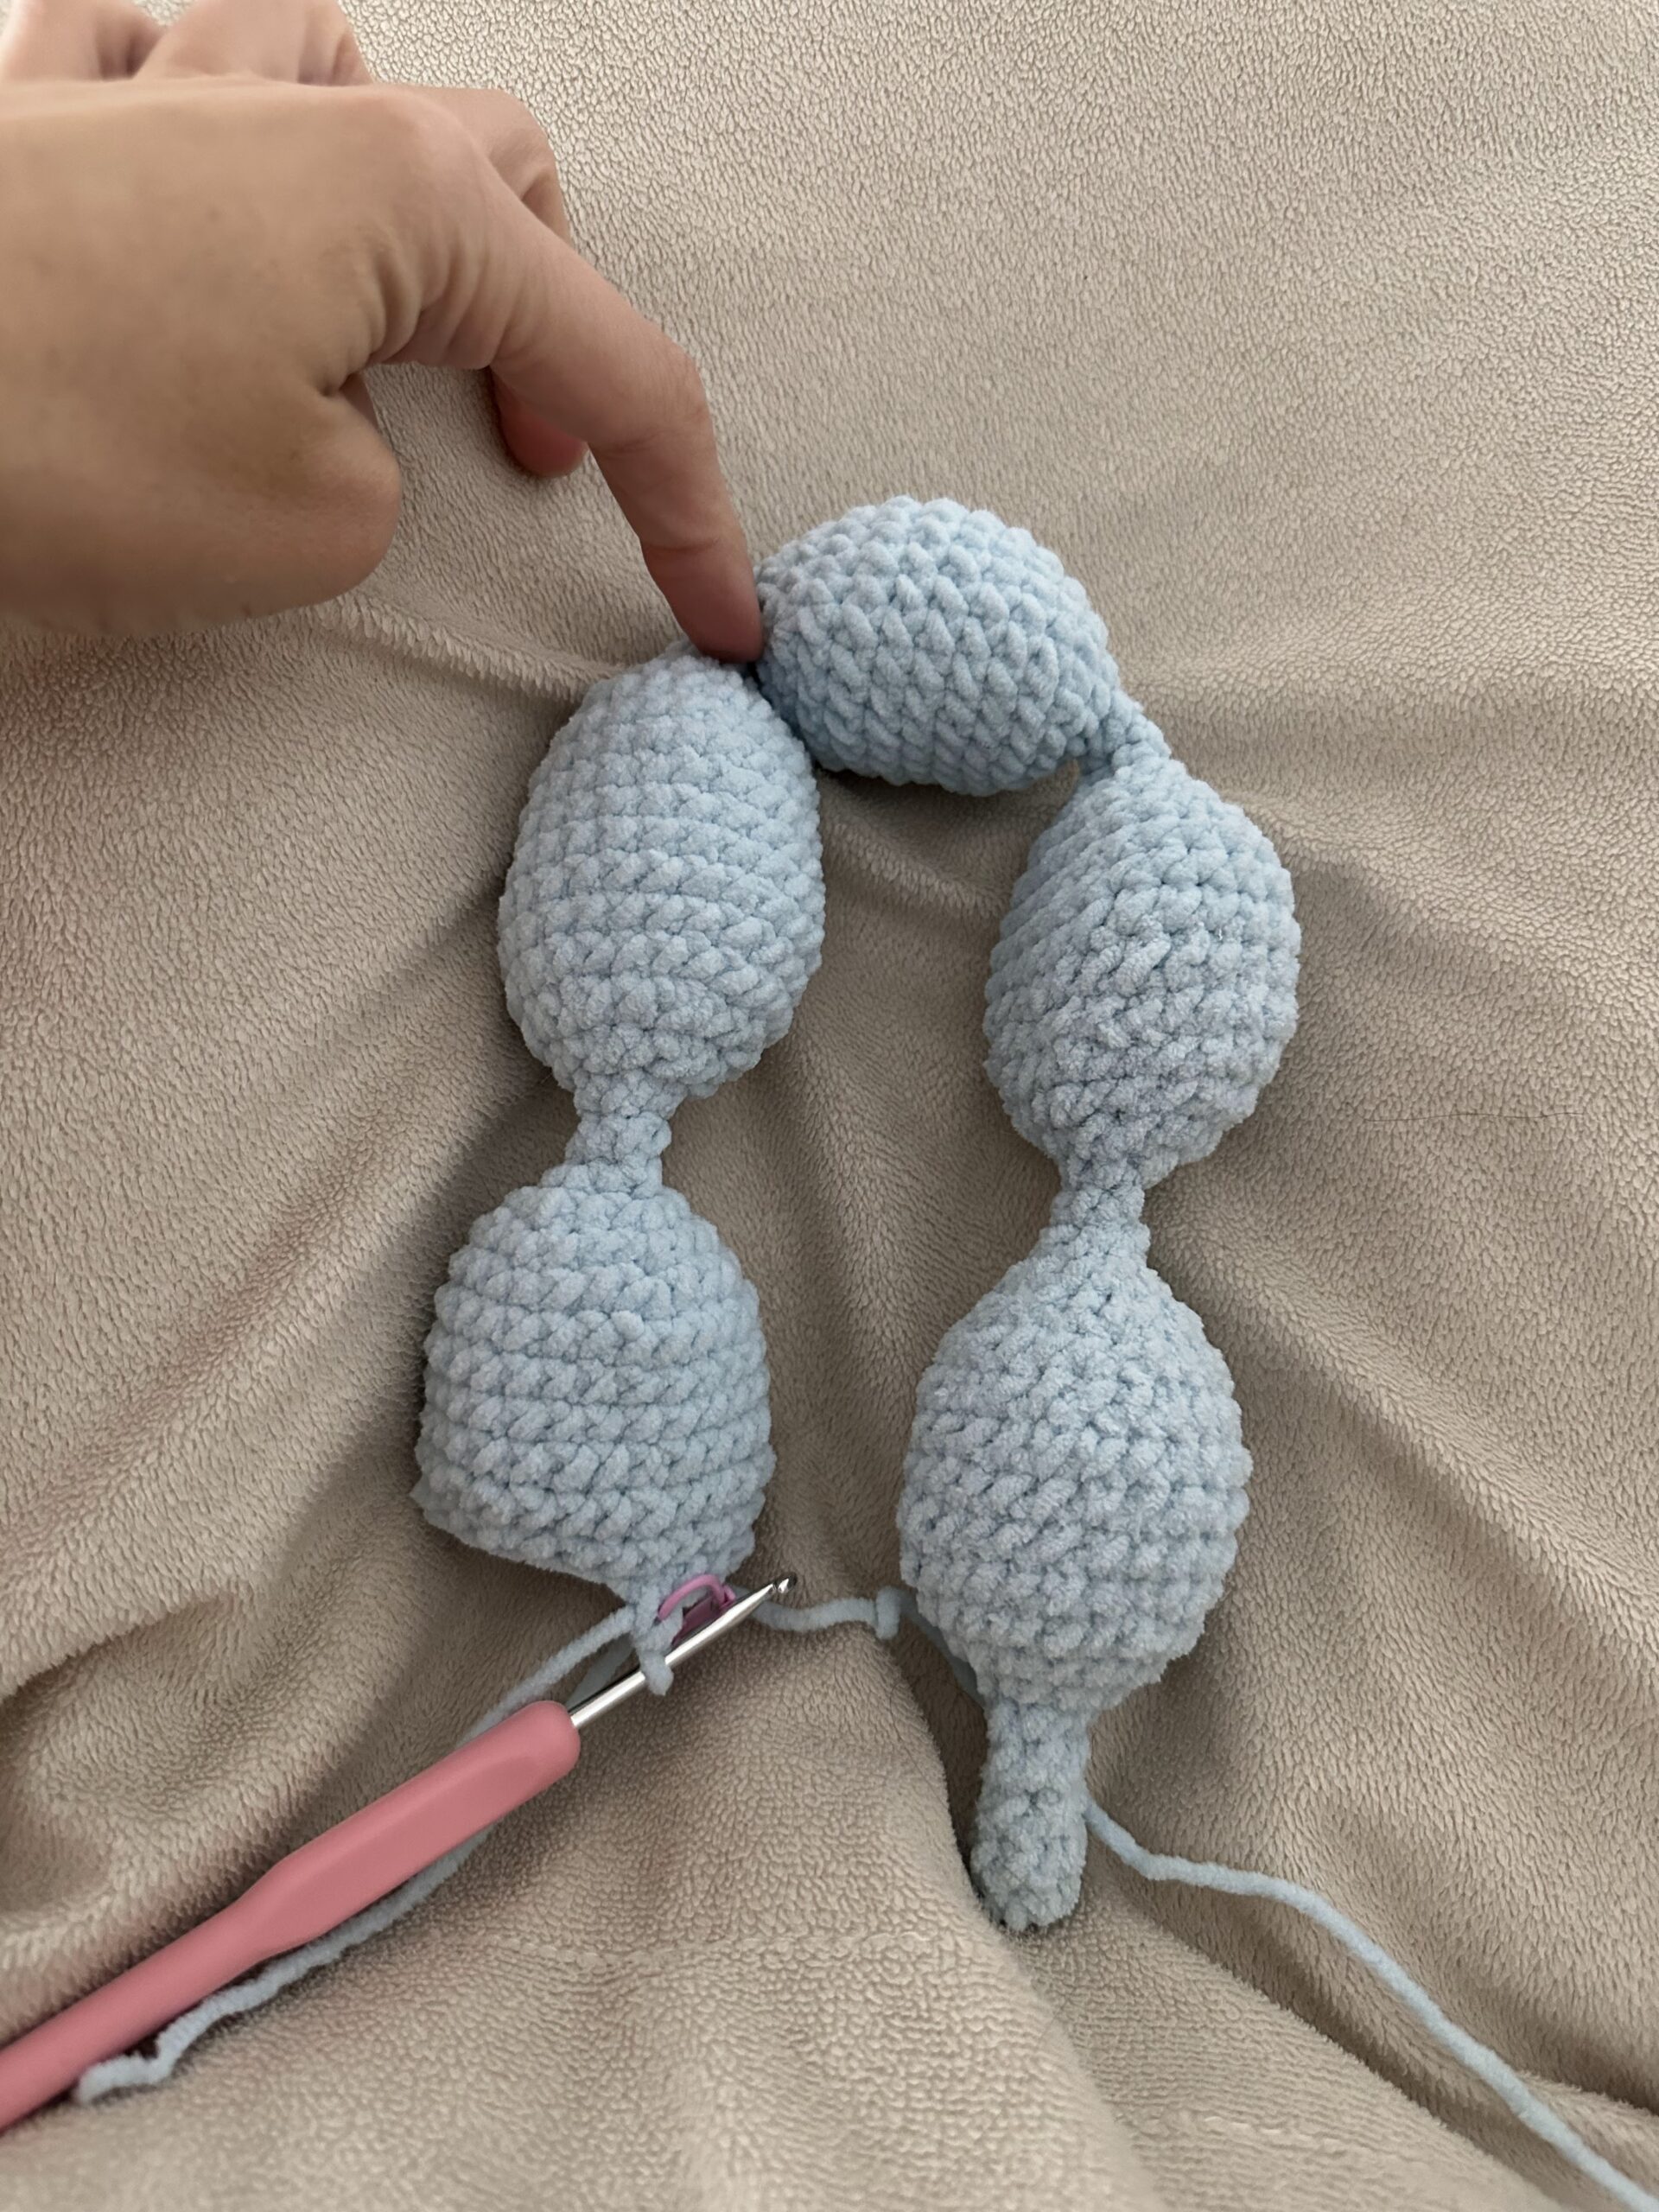
Fasten off, weave the yarn tail through the final stitches to secure, pull tight, and weave in your ends. You now have a single continuous strand consisting of 10 bulbous balloon segments!
Part 2: Assembly & Shaping
- Back Legs: Take Segment 2 (Back Leg 1) and Segment 3 (Back Leg 2) and fold them downward side-by-side. Bring Connecting Joint 1 and Connecting Joint 3 together, twisting the two legs down into a pair. Now, squeeze the tail through the legs and pull it through.
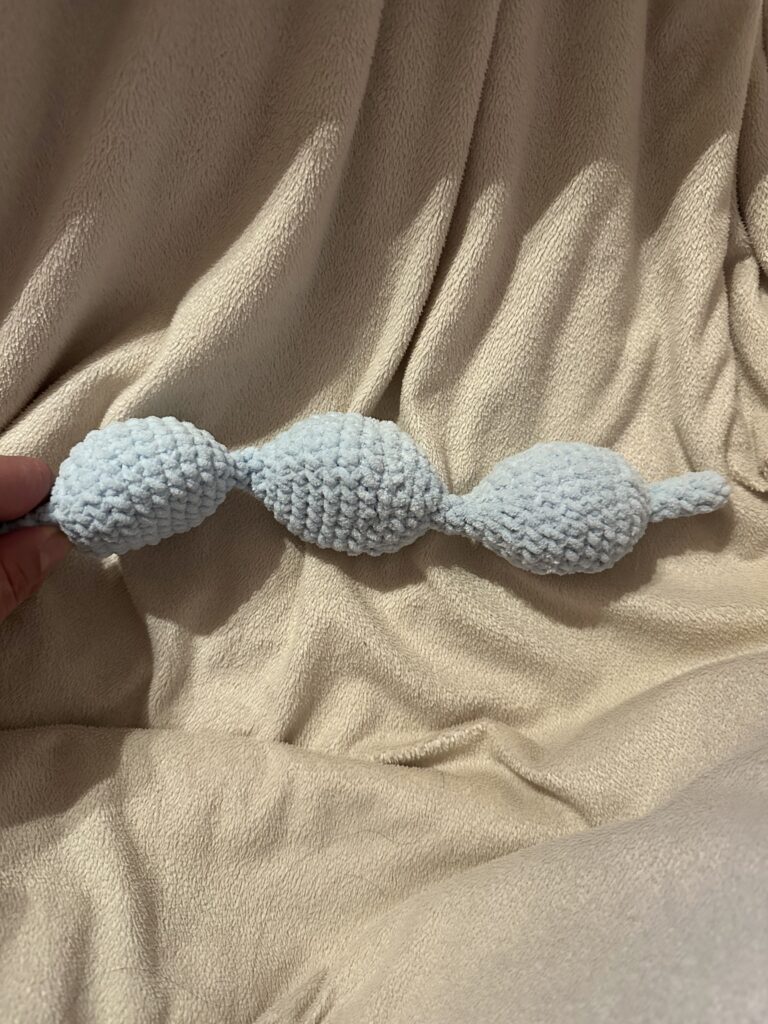
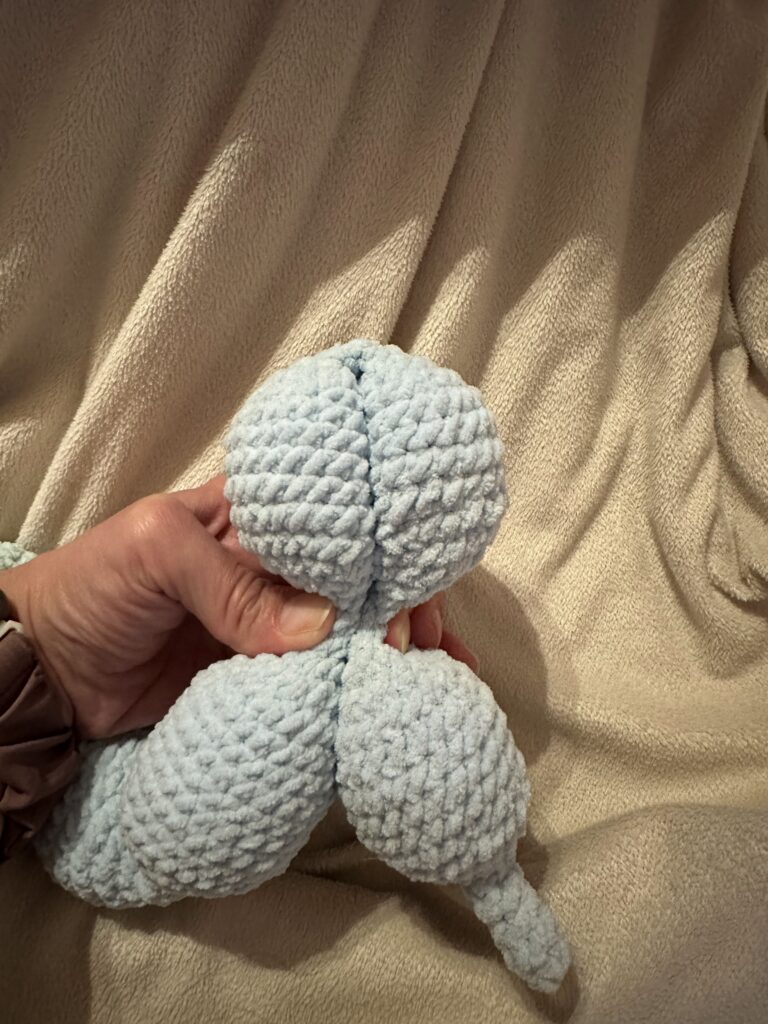
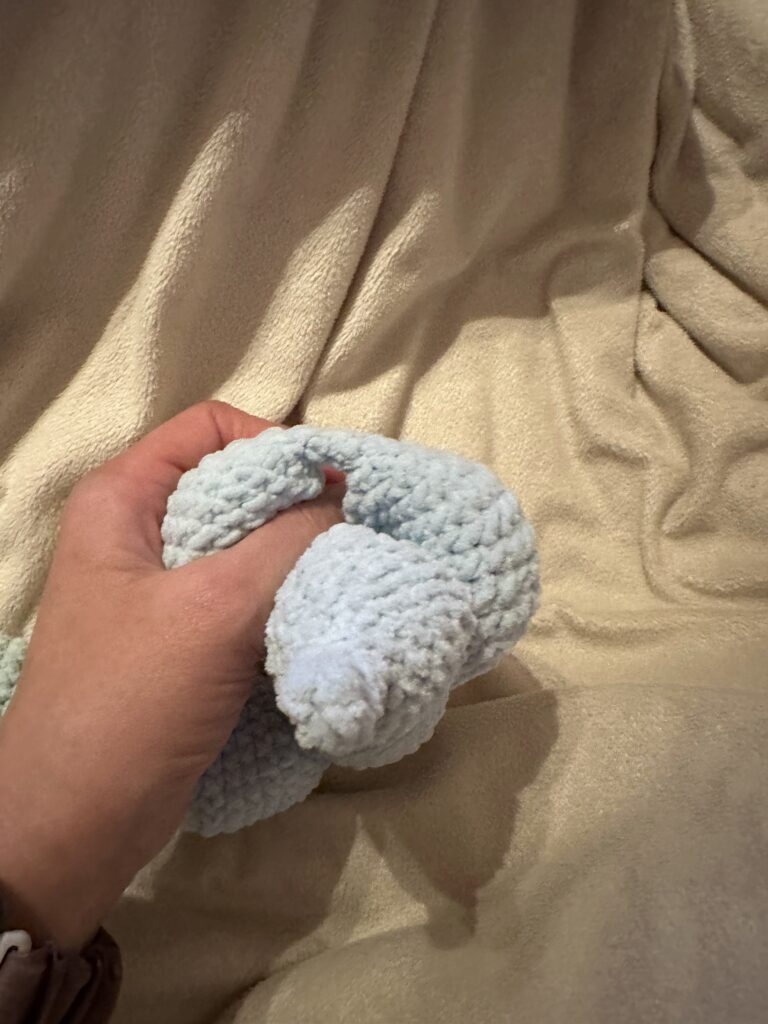
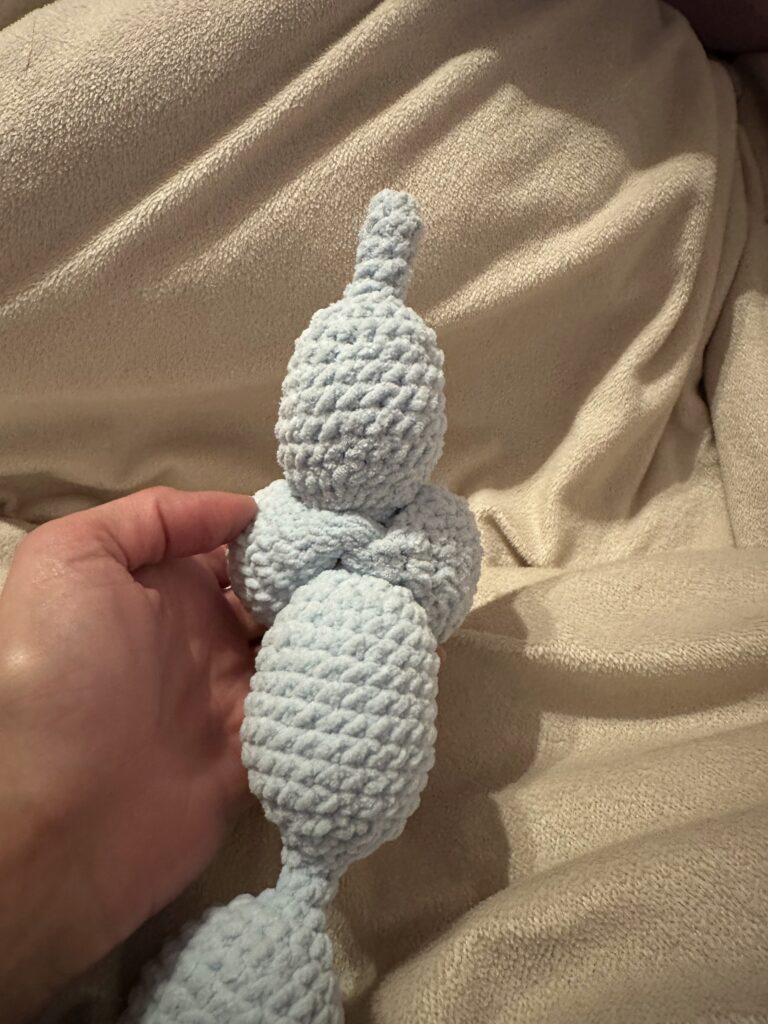
- Front Legs: Take Segment 5 (Front Leg 1) and Segment 6 (Front Leg 2) and repeat the same fold and twist downward at Connecting Joint 4 and Connecting Joint 6. Now, squeeze the snout, ears, and neck between the legs and pull them through.
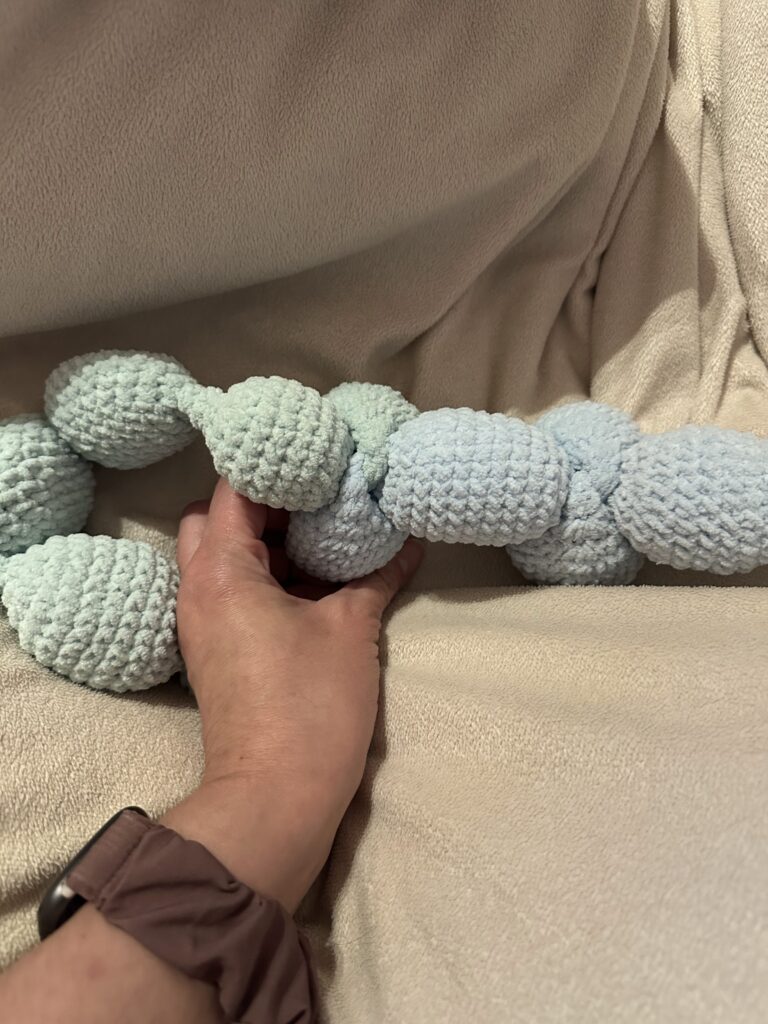
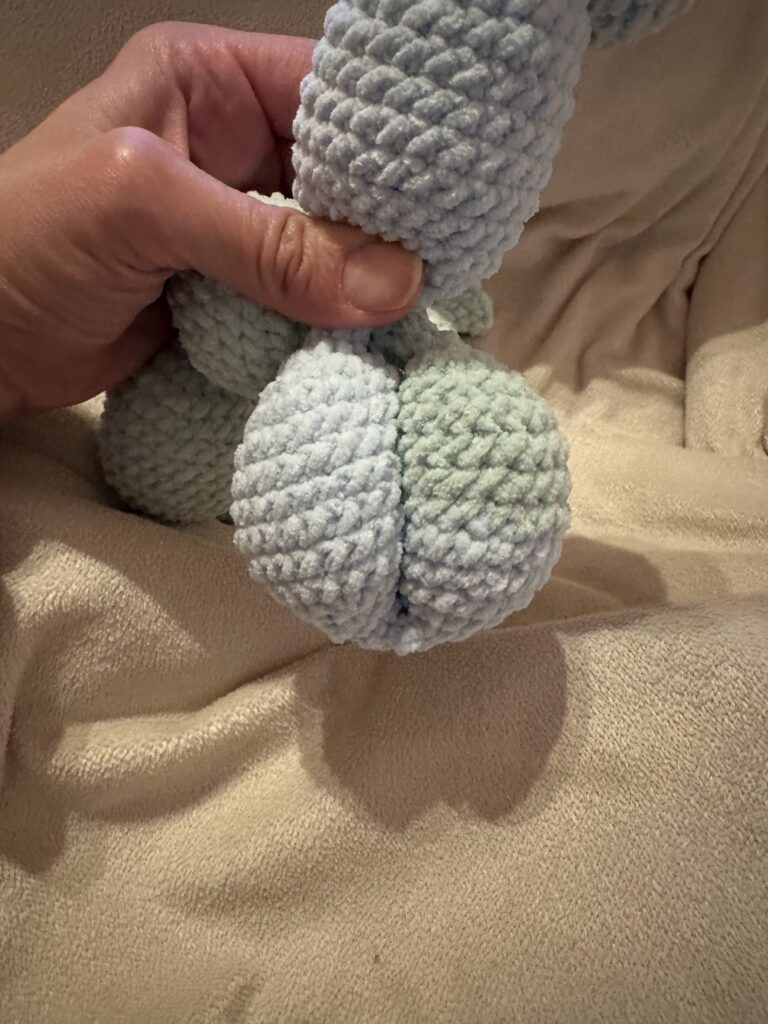
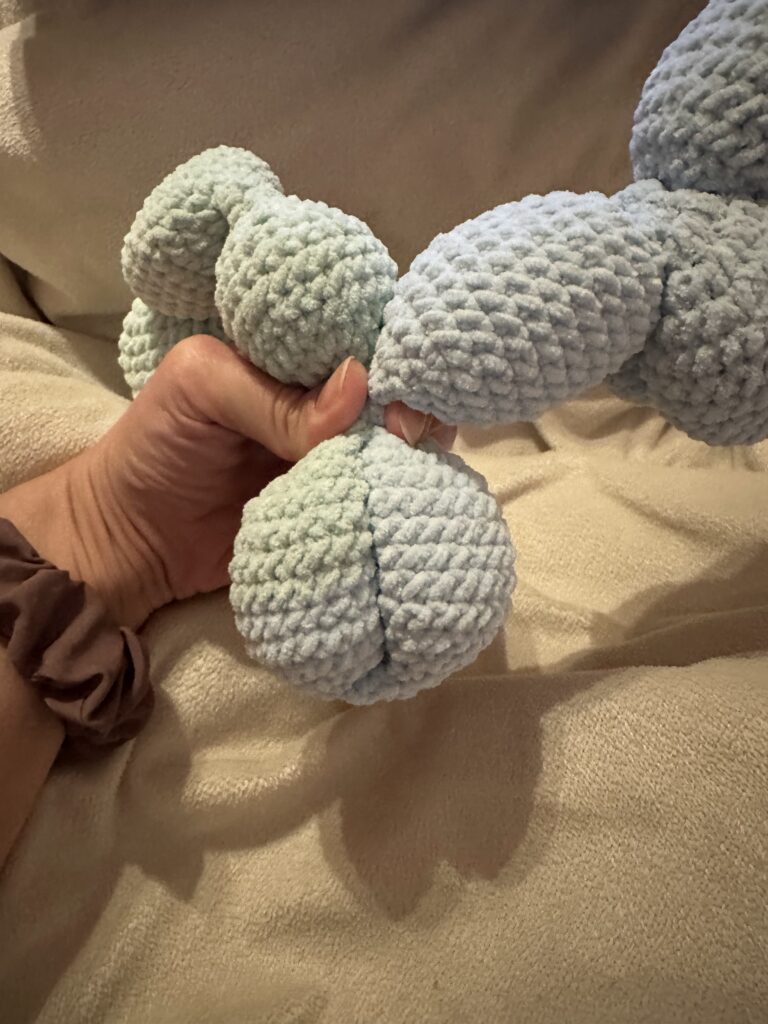
- Ears: Take Segment 8 (Ear 1) and Segment 9 (Ear 2) and fold them down together above the neck at Connecting Joint 7 and Connecting Joint 9 to form the ear pair, and pull the snout through the ears.
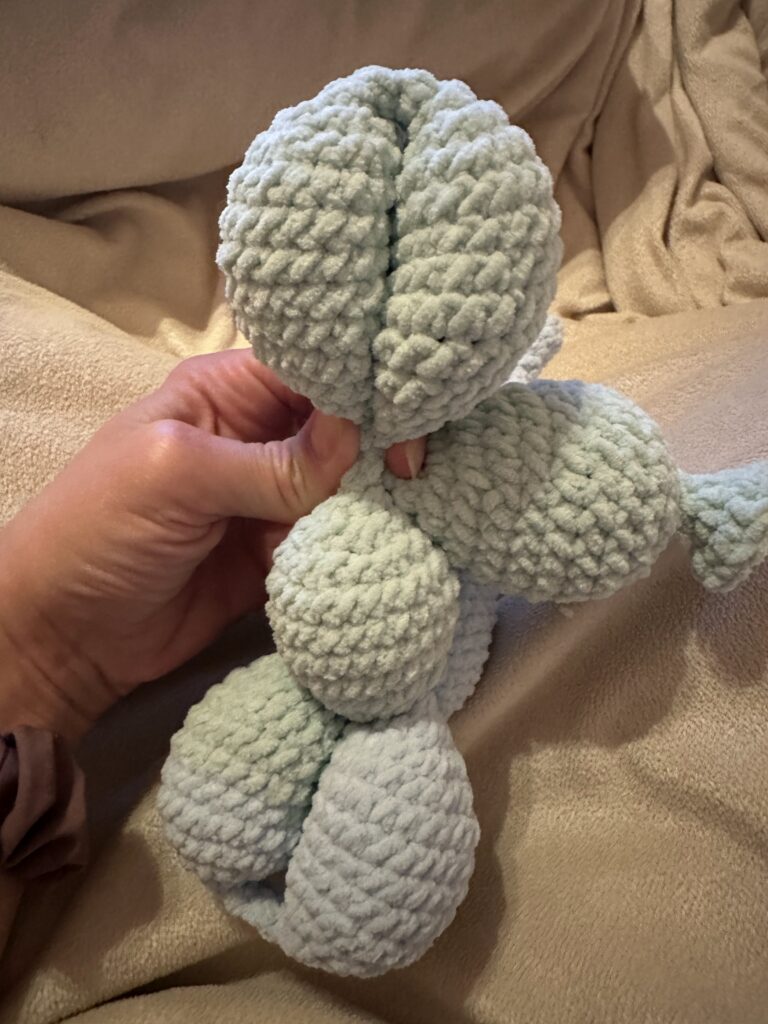
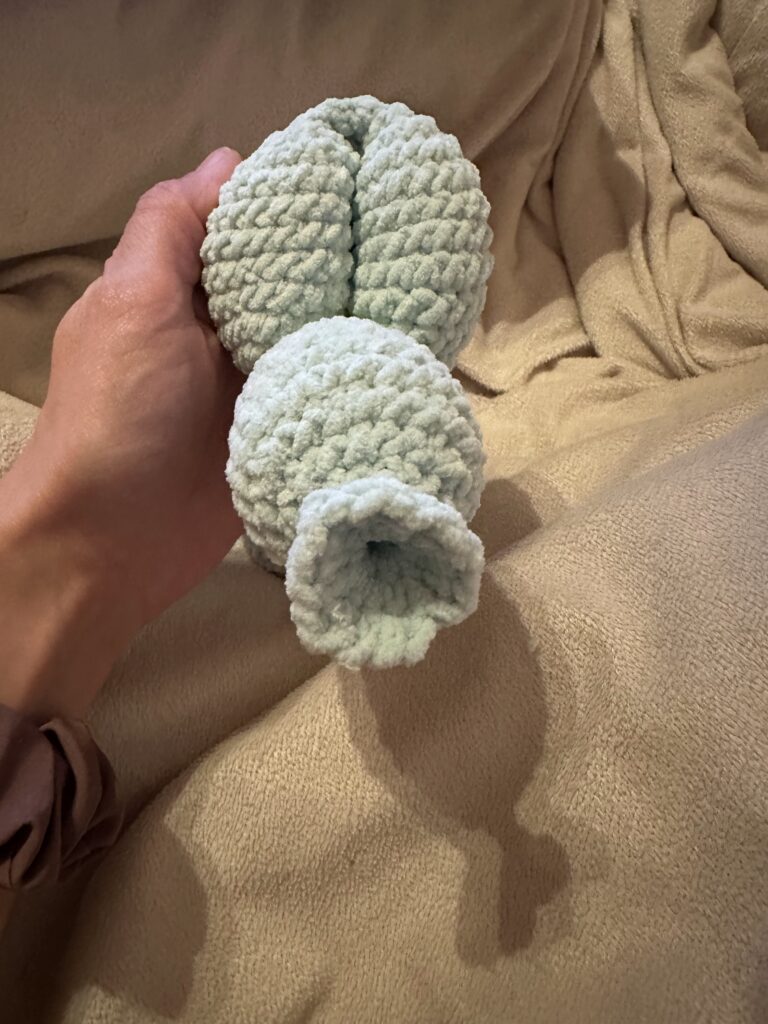
- Your retro plush balloon dog is finished!