Free Crochet Christmas Tree Pattern: Timeless Crochet Christmas Home Decor!
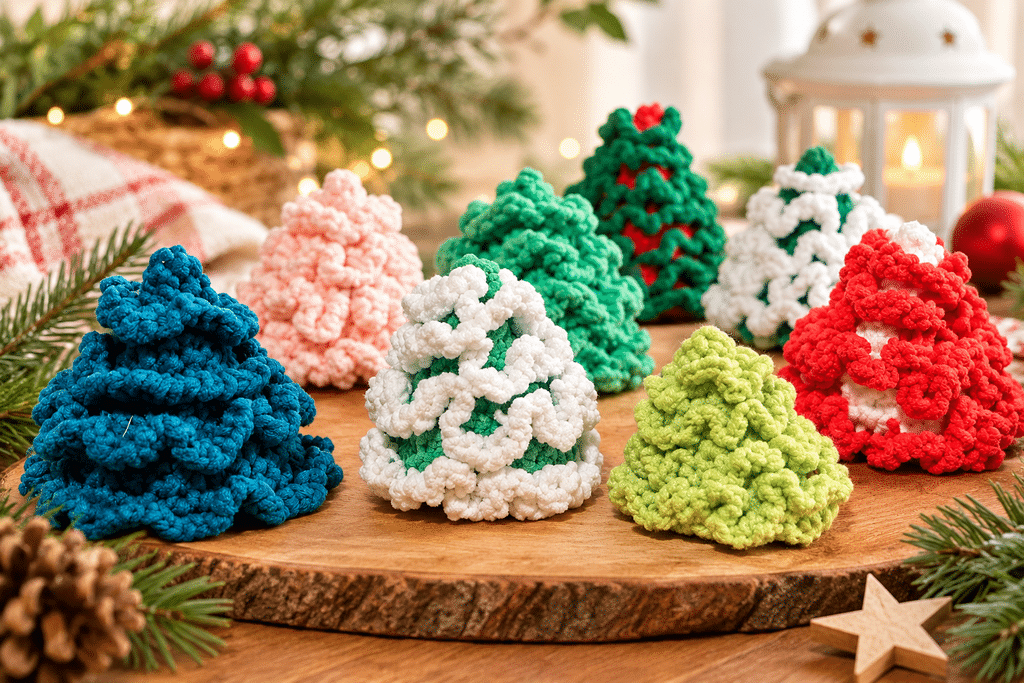
It’s the most wonderful time of the year! One reason the festive season feels so special is the cozy Christmas home decor. Classic handmade pieces are timeless – you will love bringing them out year after year to make your home feel warm and festive.
This free crochet Christmas tree pattern adds a chic, rustic touch to any mantel, holiday table, or tiered tray display. Worked in continuous rounds from top to bottom, this project uses back-loop stitches to easily add lush, snowy frills along each tier. Beginner-friendly and available in two sizes: Small and Tall.
Whether you are crafting last-minute handmade holiday gifts, decorating your living room, or whipping up quick best-sellers for your upcoming winter craft fairs, these textured Christmas trees are a fast and fun project.
Why You’ll Love This Free Crochet Christmas Tree Pattern
- Beginner-Friendly Stitches: Uses standard single crochet, increases, decreases, and back-loop techniques.
- No Sewing: The tree body is worked in continuous rounds, with the frills worked directly into the unused front loops.
- Customizable Styles: Use classic worsted weight cotton/acrylic for crisp definition, or chenille/velvet yarn for a soft, plush look.
- Great Craft Fair Seller: Holiday home decor items sell consistently well at winter markets due to low material costs and high visual appeal.
Pattern Overview & Skill Level
| Feature | Details |
| Skill Level | Easy / Advanced Beginner |
| Terminology | Standard US Crochet Terms |
| Time Required | 1.5 – 2 Hours (depending on size) |
| Finished Size | Small: ~5.5 inches (14 cm) tall | Tall: ~8 inches (20 cm) tall |
| Category | Free Crochet Pattern / Holiday Home Decor |
Pro-Tip for Displaying: For trees that stand firm on tables or tiered trays, insert a round cardboard circle into the bottom before closing.
Materials Needed
- Yarn:
- Main Color (Green): Approx. 50–90 yards of chenille/plush yarn in forest green, sage, or dark olive. You can even use red for a candy cane look! You can use any Christmasy color you like.
- Frill Color (White/Cream): Approx. 20–35 yards of white or ivory chenille/plush yarn for the snowy edges, or white chenille yarn.
- Crochet Hook: 3.5 mm (US E-4) or 4.0 mm (US G-6) hook (adjust to match your yarn weight and preferred tension).
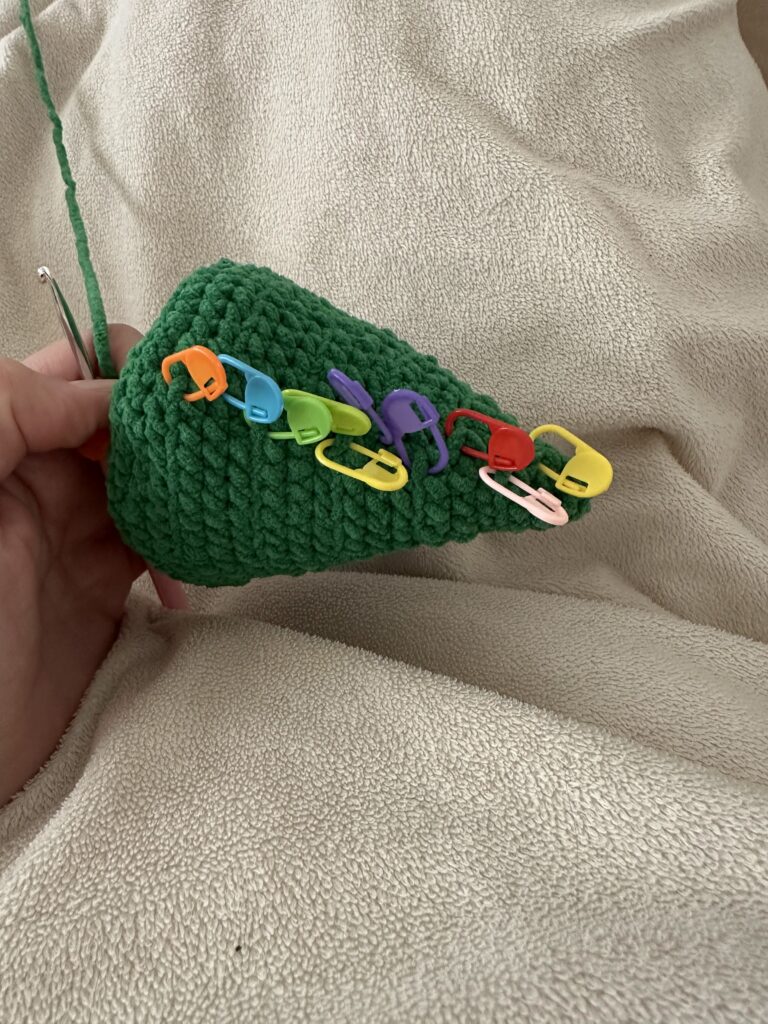
- Stitch Markers: 1 marker to keep track of continuous rounds, plus 6–8 extra markers to temporarily hold open front loops.
- Scissors.
Abbreviations (US Crochet Terms)
- MR: Magic Ring
- ch: Chain
- sc: Single Crochet
- inc: Increase (work 2 sc in the same stitch)
- invdec: Invisible Decrease
- BLO: Back Loop Only
- FLO: Front Loop Only
- sl st: Slip Stitch
- FO: Fasten Off
- [ ]: Total stitch count at the end of the round
Step-by-Step Free Crochet Christmas Tree Pattern
When working in continuous rounds, place a stitch marker in the first stitch of every round to keep track of your count. It´s best if you buy a multipack of stitch markers for your crochet projects.
1. Small Crochet Christmas Tree Main Part
Worked from the top down in continuous rounds.
- Round 1: 6 sc in MR [6]
- Round 2: (1 sc, 1 inc) × 3 [9]
- Round 3: (2 sc, 1 inc) × 3 [12]
- Round 4: BLO – 12 sc around [12] (Note: Mark the FLO of this round to locate it later for frills).
- Round 5: Working in both loops: (1 sc, 1 inc) × 6 [18]
- Round 6: 18 sc around [18]
- Round 7: BLO – (2 sc, 1 inc) × 6 [24] (Mark FLO sts)
- Round 8: Working in both loops: 24 sc around [24]
- Round 9: (3 sc, 1 inc) × 6 [30]
- Round 10: BLO – 30 sc around [30] (Mark FLO sts)
- Round 11: Working in both loops: (4 sc, 1 inc) × 6 [36]
- Round 12: 36 sc around [36]
- Round 13: BLO – (5 sc, 1 inc) × 6 [42] (Mark FLO sts)
- Round 14: Working in both loops: 42 sc around [42]
- Round 15: (6 sc, 1 inc) × 6 [48]
- Round 16: BLO – 48 sc around [48] (Mark FLO sts)
- Round 17: Working in both loops: (7 sc, 1 inc) × 6 [54]
- Round 18: 54 sc around [54]
- Round 19 (Bottom / Base Decrease): BLO – (1 sc, 1 invdec) × 18 [36] (Mark FLO sts for bottom frill)
- Round 20: Working in both loops: (2 sc, 1 invdec) × 9 [27]
- Round 21: (1 sc, 1 invdec) × 9 [18]
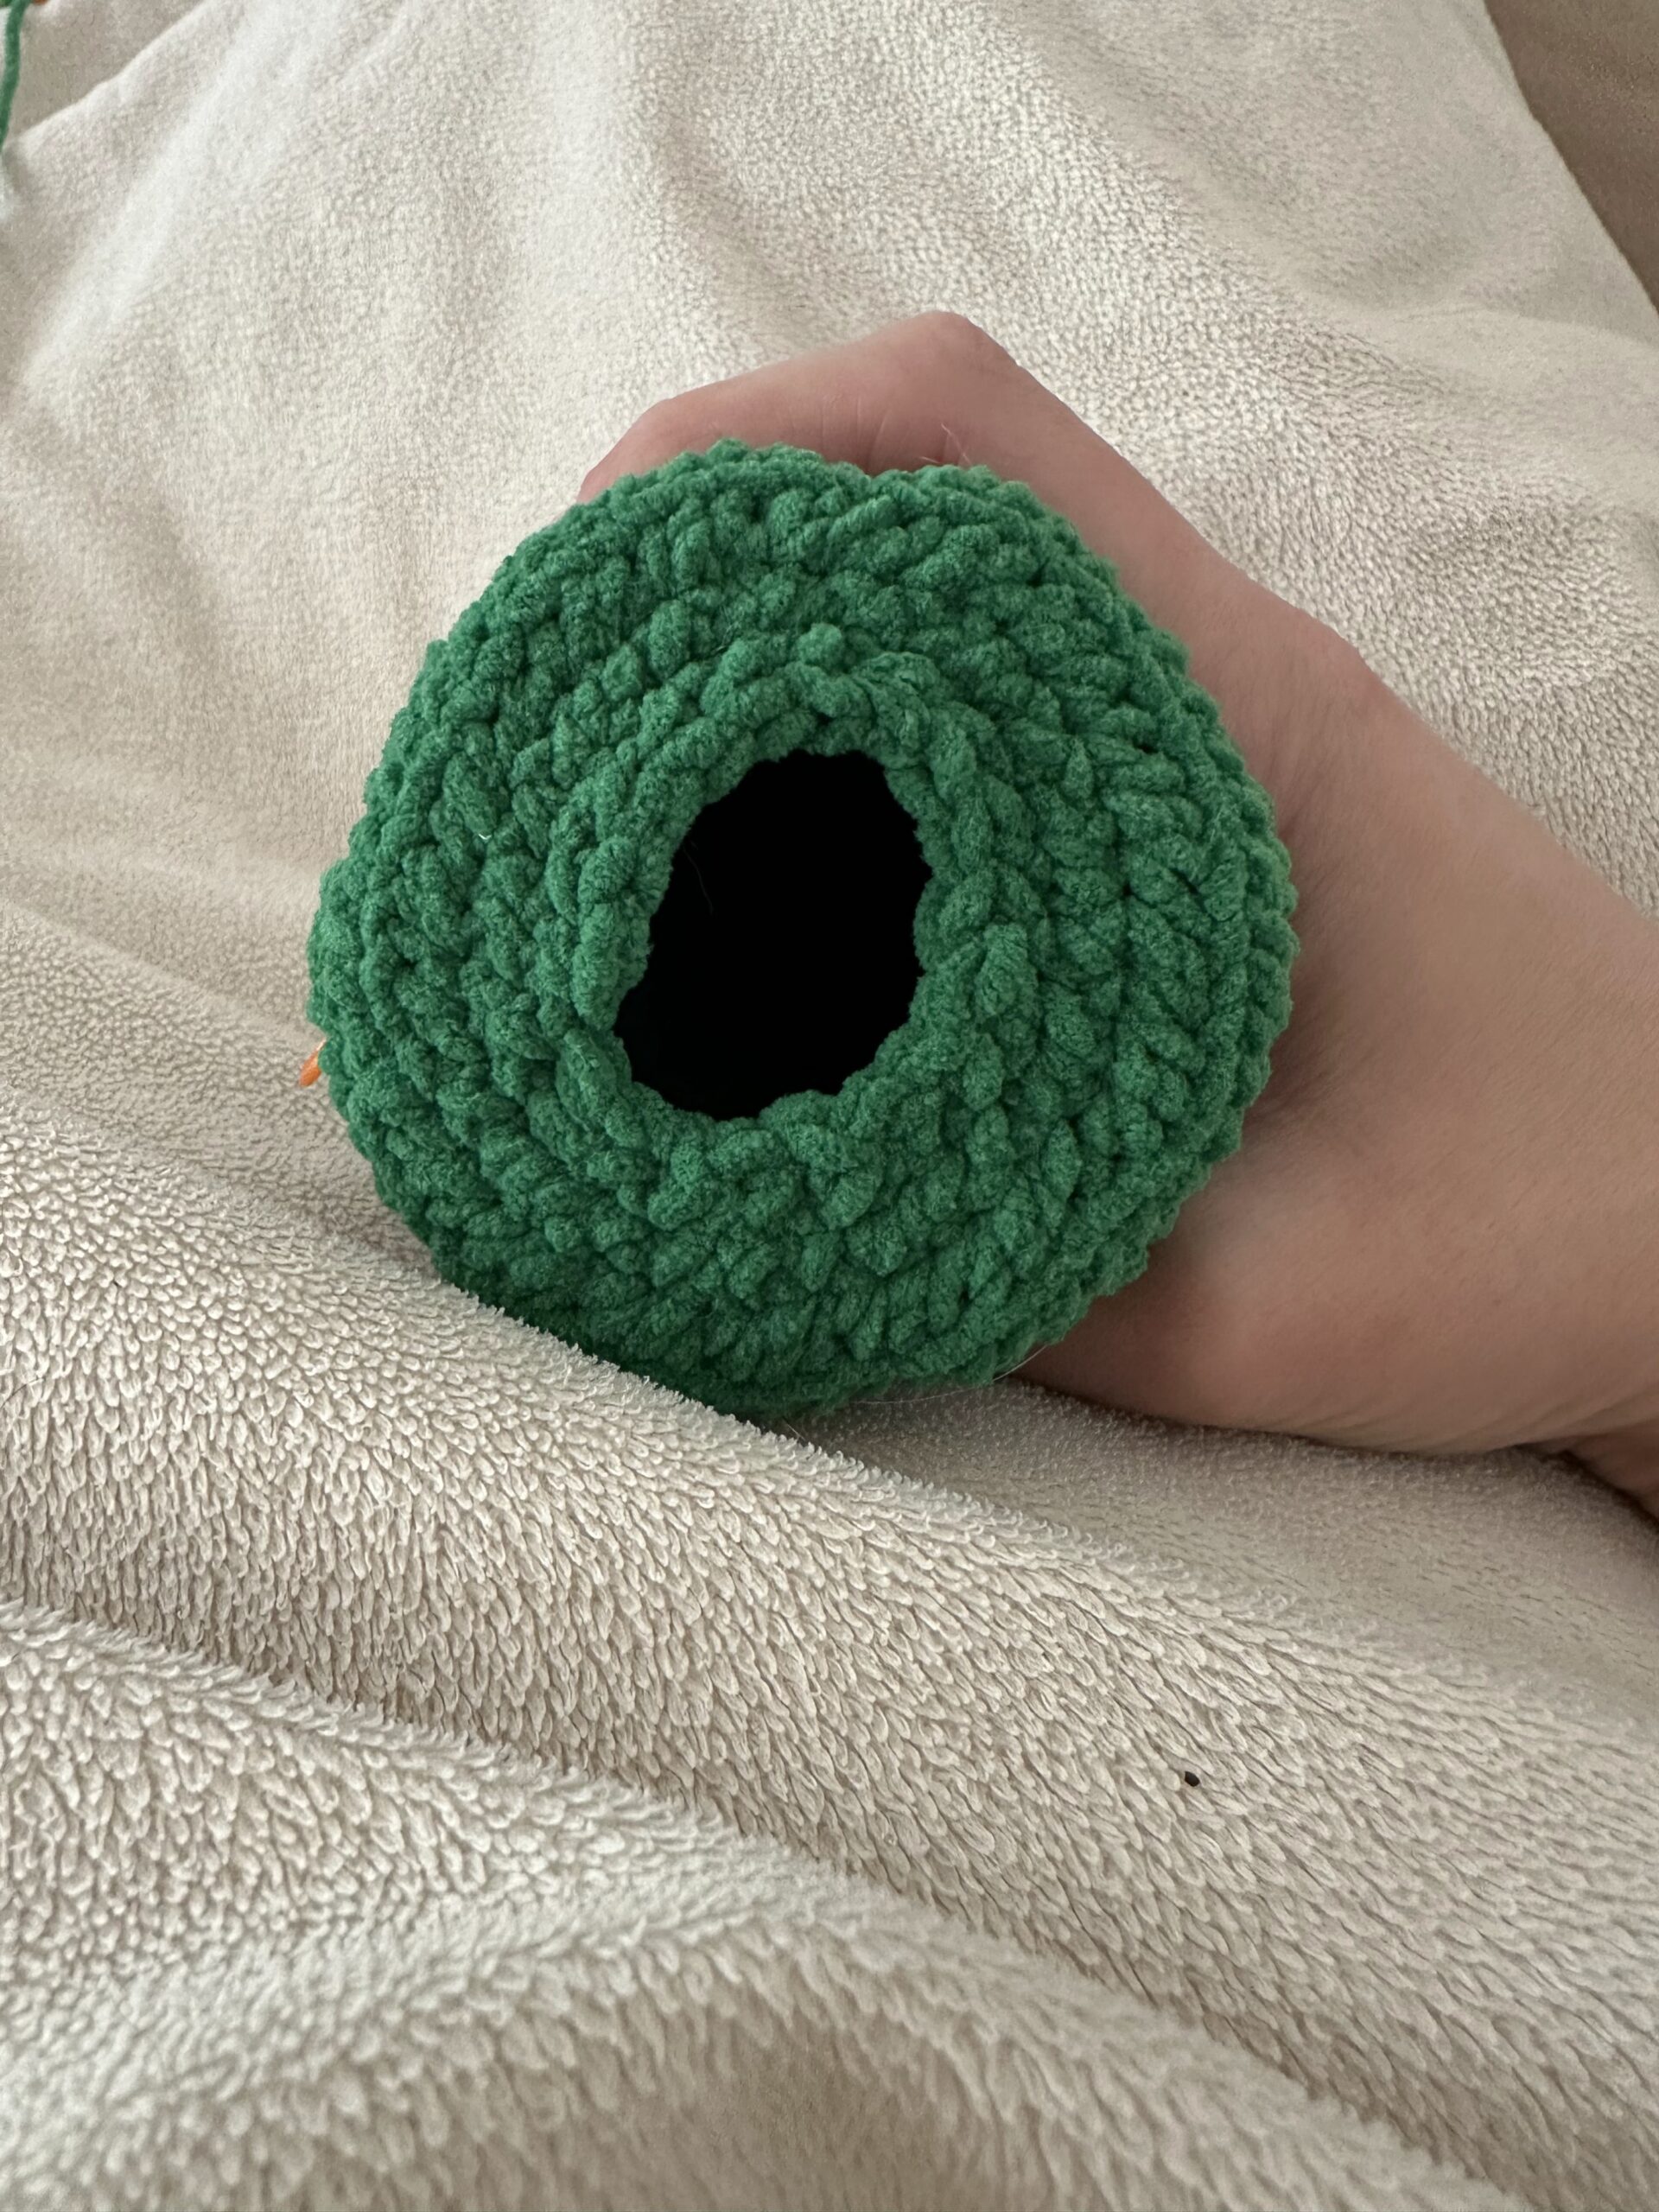
- Fasten off and weave in the ends. You don´t have to stuff the tree since it stands on its own.
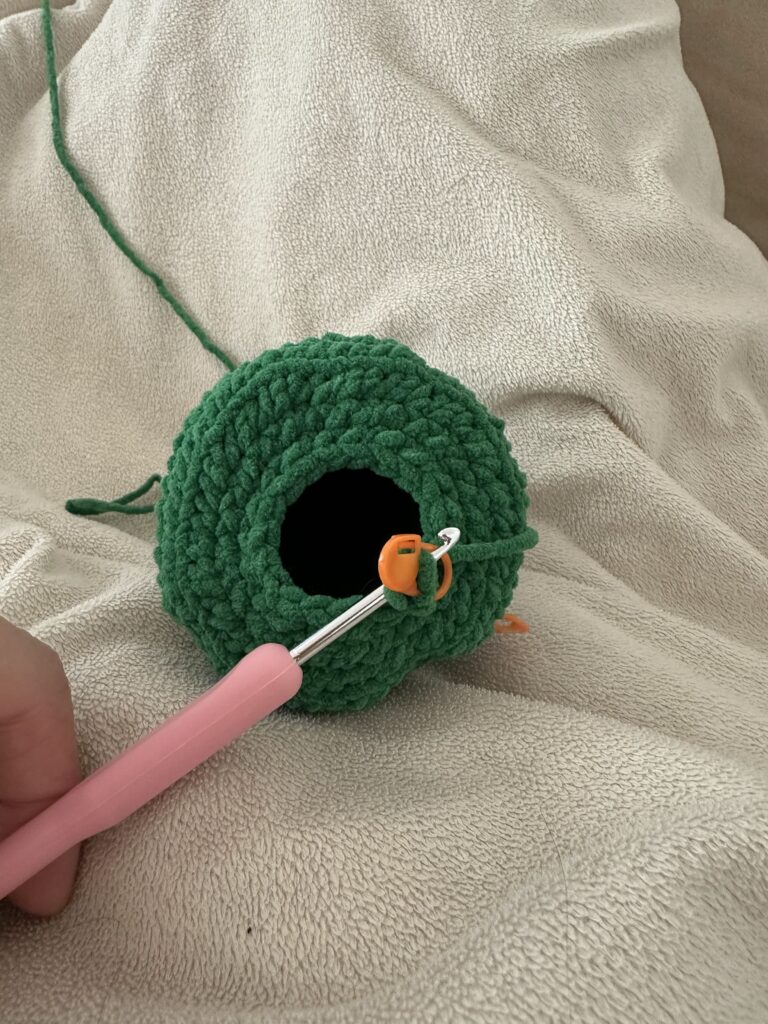
2. Large / Tall Crochet Christmas Tree
Follow Rounds 1–18 of the Small Tree, then continue expanding:
- Round 19: BLO – (8 sc, 1 inc) × 6 [60] (Mark FLO sts)
- Round 20: Working in both loops: 60 sc around [60]
- Round 21: (9 sc, 1 inc) × 6 [66]
- Round 22: BLO – 66 sc around [66] (Mark FLO sts)
- Round 23: Working in both loops: (10 sc, 1 inc) × 6 [72]
- Round 24: 72 sc around [72]
- Round 25 (Bottom / Base Decrease): BLO – (2 sc, 1 invdec) × 18 [54] (Mark FLO sts for bottom frill)
- Round 26: Working in both loops: (1 sc, 1 invdec) × 18 [36]
- Round 27: (2 sc, 1 invdec) × 9 [27]
- Round 28: (1 sc, 1 invdec) × 9 [18]
- Fasten off and weave in the ends. You don´t have to stuff the tree since it stands on its own
3. Snowy Tree Frills (White Yarn)
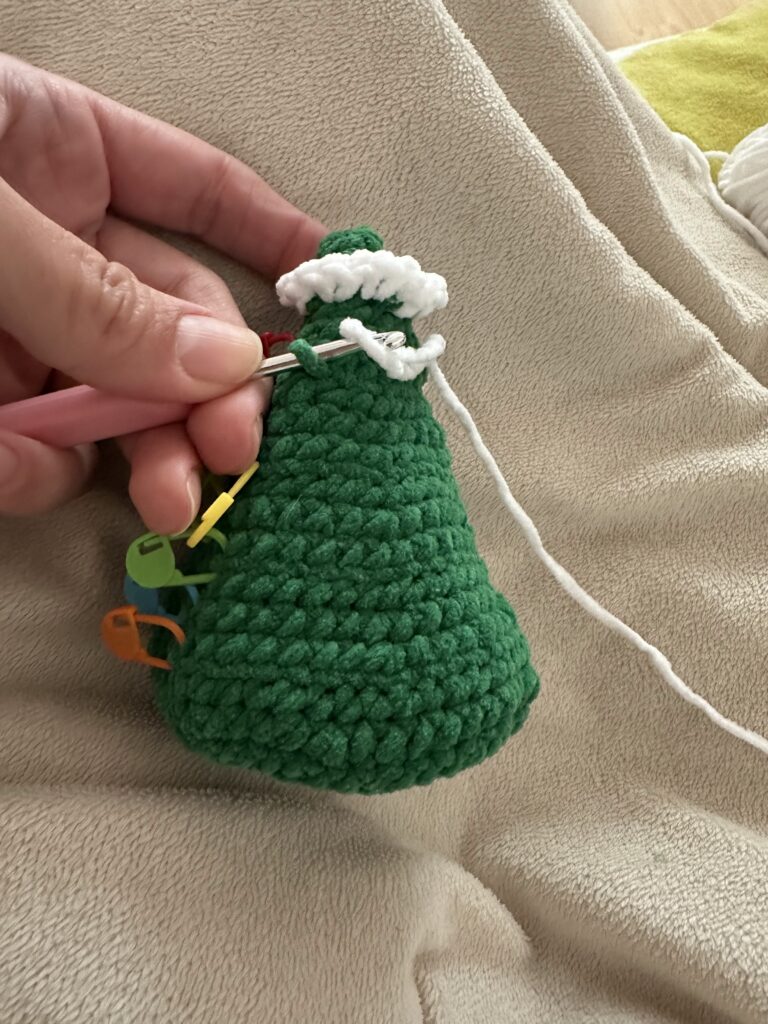
Attach white yarn to the unstitched Front Loops (FLO) left exposed on the tree body.
- Start at the top tier frill and work down toward the bottom.
- Join white yarn in the first front loop with a slip stitch, ch 1.
- Work 3 sc into every front loop across the round.
- Join with a sl st to the first sc, fasten off, and weave in ends.
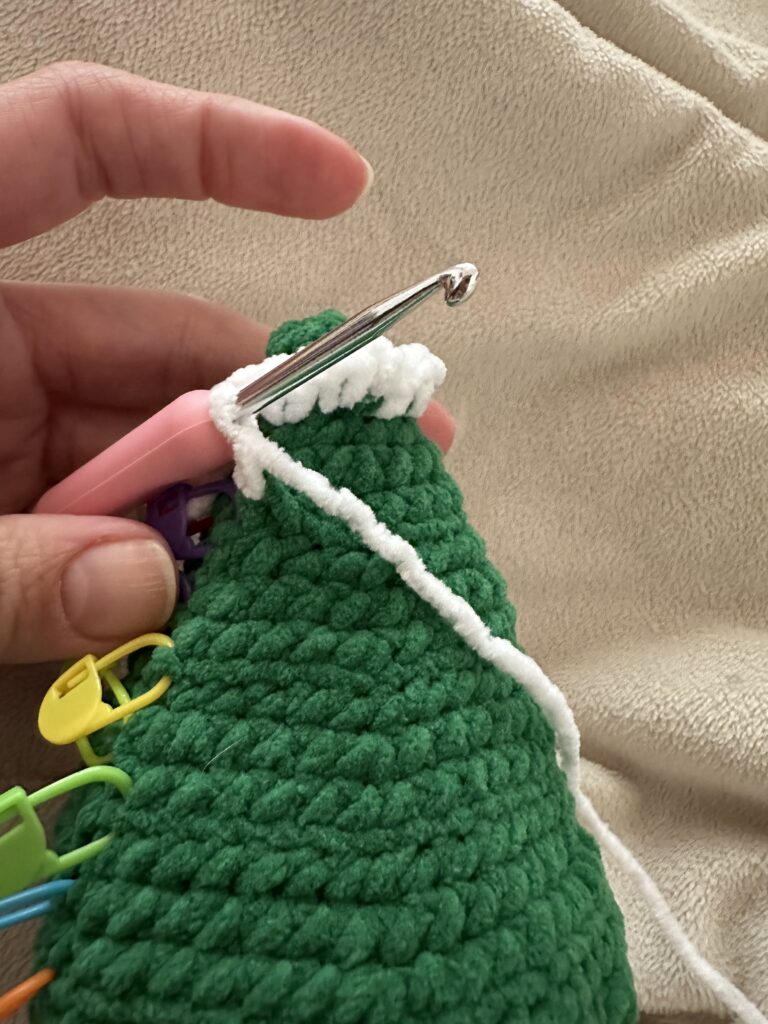
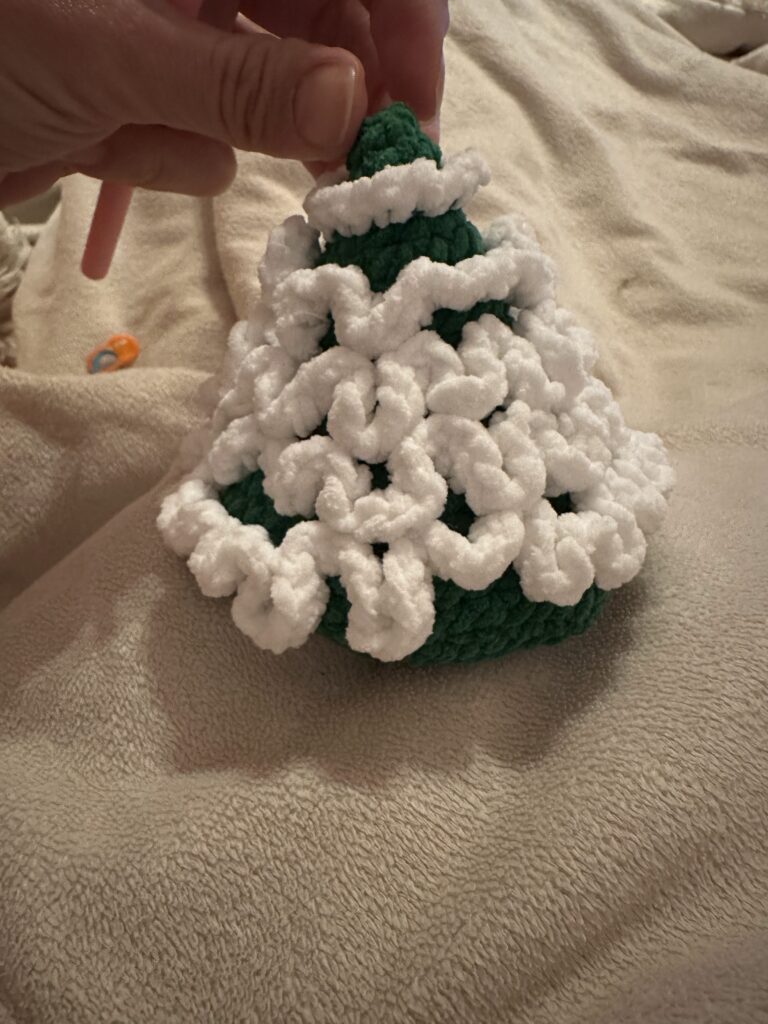
Tip: Stagger your yarn attachment points on different sides of the tree for each tier so the starting seams do not align vertically down the tree.
Frequently Asked Questions (FAQ)
What yarn works best for crochet Christmas trees?
Medium worsted-weight yarn (Category 4) in cotton or acrylic works best for crisp stitch definition and structure. For a plush modern style, velvet or chenille yarns create cozy oversized trees.
How do I make my crochet Christmas tree stand up straight?
To ensure your tree stays upright, insert a circular piece of thick cardboard or thin plastic mesh into the flat bottom base before stuffing. Adding weighted poly pellets inside the base also lowers the center of gravity.