Free Crochet Pattern: No-Sew Amigurumi Crochet Spider, Creepy, Cute & Easy to Make!
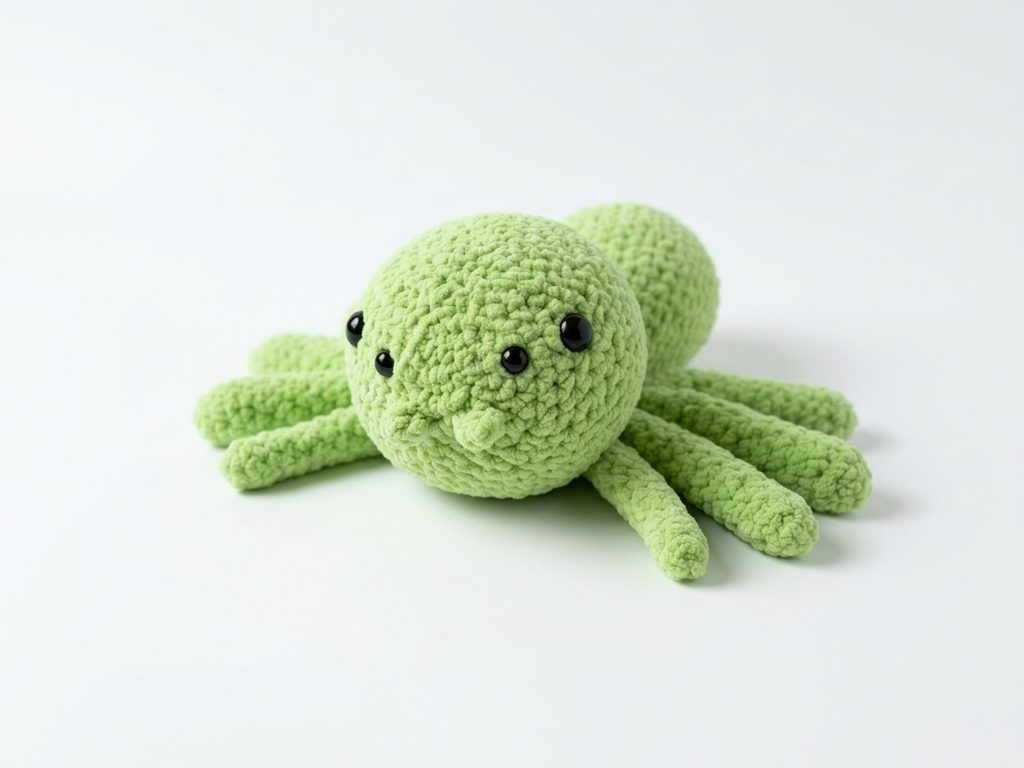
Welcome to the ultimate guide for crocheting your very own No-Sew Amigurumi Crochet Spider! Whether you are making spooky Halloween decor, a cute fuzzy friend, or a fun gift for a creature lover, this free crochet pattern is quick, engaging, and completely stress-free.
The best part about this pattern? No assembly or sewing is required for the legs and body! By making the legs first, you will seamlessly attach them directly to the body as you crochet.
Why You’ll Love This Free Crochet Spider Pattern
- 100% No-Sew Design: The body, head, fangs, and all 8 legs are crocheted as one seamless piece – no assembly required!
- Natural, Dynamic Legs: Unstuffed, dual-sized legs let your spider drape realistically and sit flat without stiff wire inserts.
- Beginner-Friendly Techniques: Uses foundational stitches (single crochet, increase, decrease, chain) paired with straightforward join-as-you-go leg attachments.
- Top Craft Fair & Etsy Seller: Insect and Halloween plushies rank high on Pinterest, TikTok, and craft market trends. Fast to make and super visual, this project is a proven bestseller!
Pattern Overview & Sizing Guide
| Feature | Details |
| Skill Level | Easy / Intermediate |
| Terminology | Standard US Crochet Terms |
| Time Required | 2 – 3 Hours |
| Finished Size | Approx. 5–7 inches (13–18 cm) wide including legs |
| Category | Free Crochet Amigurumi Pattern / Halloween & Toy Decor |
Pro-Tip for Seamless Leg Attachment: When attaching the legs in Rounds 24–27, press the opening of the leg flat, align it with your body round, and insert your hook through both leg loops and the body stitch simultaneously. Keep your working tension tight on these attachment stitches to prevent gaps or loose loops!
Materials & Tools
- Yarn: Use any color you like.
- Crochet Hook: 3.5 mm (US E-4) for worsted weight OR 5.0 mm (US H-8) for plush yarn.
- Safety Eyes: 2 pairs total (2 smaller eyes, e.g., 6 mm; 2 larger eyes, e.g., 10 mm).
- Stuffing: Premium Polyester Fiberfill (stuff the head and body firmly, leave legs unstuffed).
- Tools: Tapestry needle, scissors, stitch markers.
Abbreviations (US Crochet Terms)
- ch: Chain
- sc: Single Crochet
- inc: Increase (2 sc in same stitch)
- dec: Invisible Decrease (sc 2 stitches together)
- sl st: Slip Stitch
- MR: Magic Ring
- st(s): Stitch(es)
- [ ]: Total stitch count at end of round
Free Amigurumi Crochet Spider Pattern
Note: Do NOT stuff the legs. Stuffing them will make them stick out unnaturally. Keep the legs flat so they dangle and position easily!
Step 1: The Legs (Make 8)
Shorter Front Legs (Make 4)
- Round 1: 6 sc in MR [6]
- Rounds 2–12 (11 rounds): 1 sc in each st around [6]
- Fasten off.
Bigger Back Legs (Make 4)
- Round 1: 6 sc in MR [6]
- Round 2: Inc in each st around [12]
- Rounds 3–16 (14 rounds): 1 sc in each st around [12]
- Fasten off.
Step 2: Head & Body
Worked continuously in the round from the nose back to the body.
- Round 1: 6 sc in MR [6]
- Round 2: Inc in each st around [12]
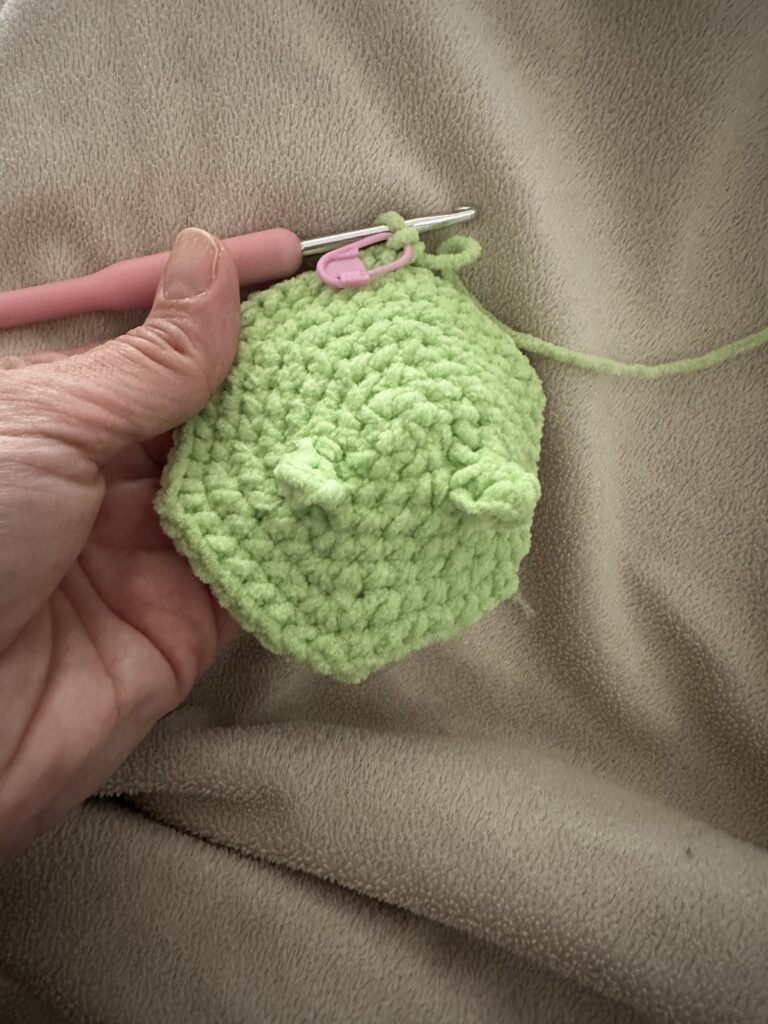
- Round 3 (Fangs): 1 sc, 1 inc, 1 sc, ch 3 (starting from the 2nd ch from the hook: 2 sc down the chain), 1 inc, 1 sc, 1 inc, ch 3 (starting from the 2nd ch from the hook: 2 sc down the chain), 1 sc, 1 inc, 1 sc, 1 inc, 1 sc, 1 inc [18]
- Round 4: Working strictly behind the fangs, [2 sc, 1 inc] x 6 [24]
- Round 5: [3 sc, 1 inc] x 6 [30]
- Round 6: [4 sc, 1 inc] x 6 [36]
- Round 7: [5 sc, 1 inc] x 6 [42]
- Round 8: [6 sc, 1 inc] x 6 [48]
- Rounds 9–20 (12 rounds): 1 sc in each st around [48]
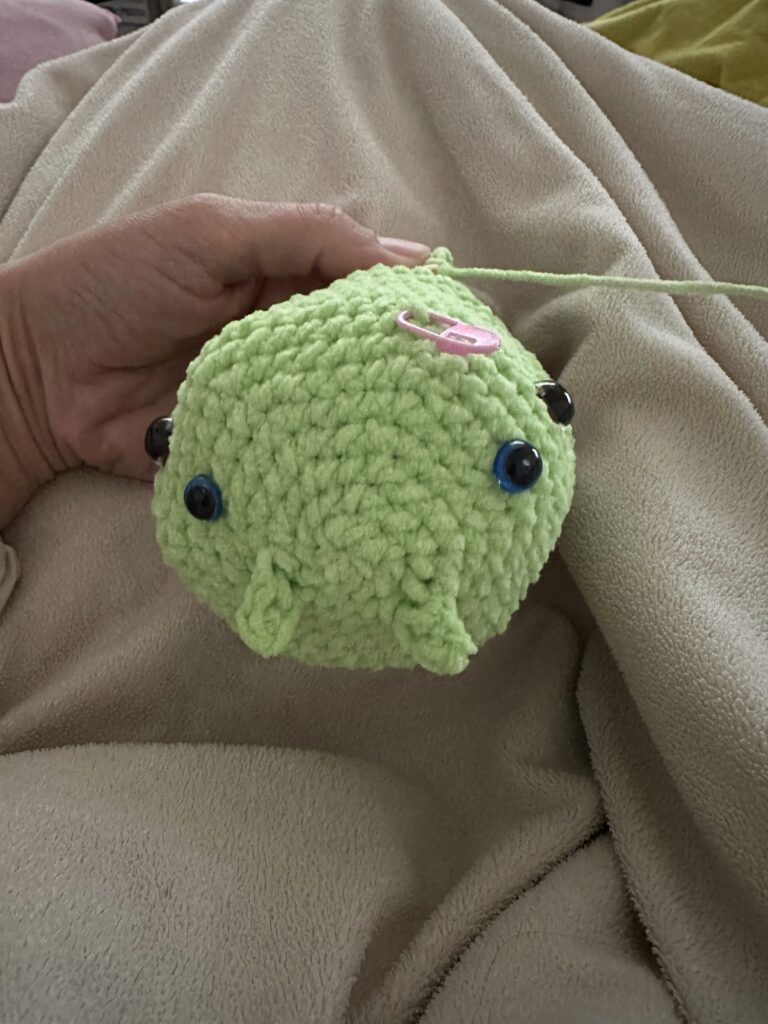
Safety Eye Placement
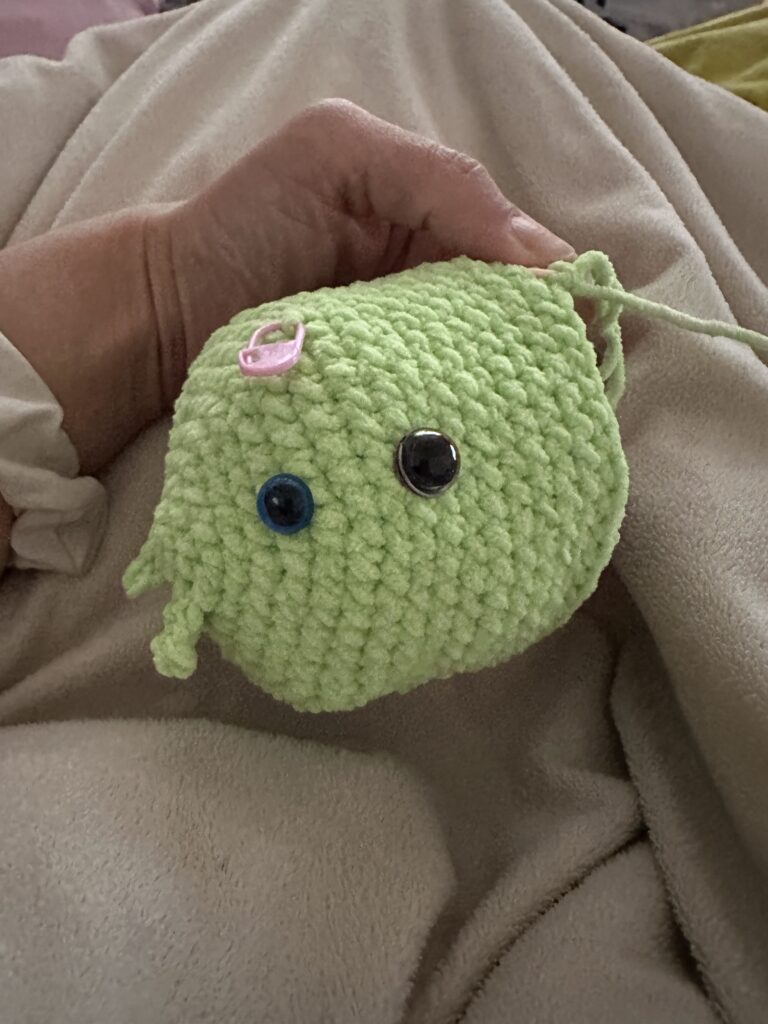
- Smaller Eyes (Pair 1): Place between Rounds 6 and 7, positioned diagonally behind the fangs.
- Larger Eyes (Pair 2): Place between Rounds 10 and 11, centered slightly wider than the front pair.
- Round 21: [6 sc, 1 dec] x 6 [42]
- Round 22: [5 sc, 1 dec] x 6 [36]
- Round 23: [4 sc, 1 dec] x 6 [30]
Firmly stuff the head with fiberfill before continuing to attach the legs.
Step 3: Leg Attachment Rounds
To attach a leg, hold it flat against the working edge and insert your hook through both layers of the leg AND the body stitch, completing a standard single crochet.
- Round 24 (Attaching Front Legs 1 & 2):
- [3 sc, 1 dec] x 2
- Attach Leg 1 across 2 st (with 2 sc)
- 1 sc, 1 dec
- 2 sc
- Attach Leg 2 across 2 st (with 2 sc)
- 1 dec, 2 sc, 1 sc, 1 dec, 3 sc, 1 dec [25]
- Round 25 (Attaching Front Legs 3 & 4):
- 8 sc
- Attach Leg 3 across 2 st (with 2 sc)
- 4 sc
- Attach Leg 4 across 2 st (with 2 sc)
- 8 sc [24]
- Round 26 (Attaching Back Legs 5 & 6):
- 7 sc
- Attach Leg 5 across 4 st (with 4 sc)
- 3 sc
- Attach Leg 6 across 4 st (with 4 sc)
- 8 sc [26]
- Round 27 (Attaching Back Legs 7 & 8):
- 7 sc
- Attach Leg 7 across 4 st (with 4 sc)
- 3 sc
- Attach Leg 8 across 4 st (with 4 sc)
- 8 sc [26]
- Round 28: 1 sc in each st around [26]
Step 4: Abdomen & Closing
- Round 29: [3 sc, 1 inc] x 6, 2 sc [32]
- Rounds 30–40 (11 rounds): 1 sc in each st around [32]
- Round 41: [6 sc, 1 dec] x 4 [28]
- Round 42: [5 sc, 1 dec] x 4 [24]
- Round 43: [4 sc, 1 dec] x 4 [20]
- Round 44: [3 sc, 1 dec] x 4 [16]
- Round 45: [2 sc, 1 dec] x 4 [12]
Stuff the remaining body firmly with fiberfill.
- Round 46: [1 sc, 1 dec] x 4 [8]
- Round 47: Dec around [4]
Fasten off, weave the tail through the front loops of the remaining stitches, pull tight to close the hole, and hide the end inside the body.
Frequently Asked Questions (FAQ)
Q: Is this amigurumi spider pattern beginner-friendly?
A: Yes! It uses basic single crochet stitches and decreases. The main feature is attaching the legs as you go, which requires some tension control but avoids sewing altogether.
Q: Do I need to stuff the spider legs?
A: No, leave the legs unstuffed. Unstuffed legs lie flat, drape nicely, and attach cleanly to the body without bulging.
Q: Can I use velvet or chenille plush yarn for this pattern?
A: Absolutely! Using blanket or plush yarn will turn this cute spider into a giant, squishy plushie. Just adjust your hook size to match your yarn (typically 5.0-6.5 mm).
Q: How do I attach the legs smoothly without gaps?
A: Ensure you keep your tension firm when crocheting through both the leg wall and the body stitch simultaneously.
Copyright & Terms of Use
© 2026 Cute Crochet Patterns. All rights reserved.
This pattern, including all text, images, and instructions, is for personal use only. You may not sell, redistribute, copy, share, or claim this pattern (or any part of it) as your own in any format, digital or printed.
Selling Finished Products: You may sell finished handmade items created using this pattern! If you sell online, please credit Cute Crochet Patterns as the designer and link back to this blog post. Mass production or commercial manufacturing using this design is strictly prohibited.