Twisted Star Stitch Earwarmer: Free Crochet Headband Pattern
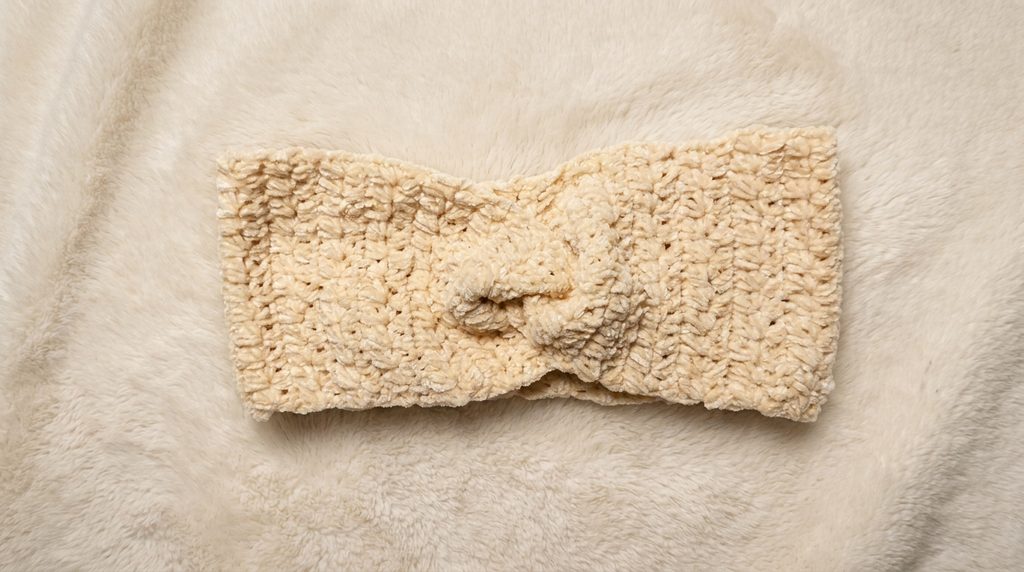
Looking for a cozy, stylish winter accessory you can finish fast? The Twisted Star Stitch Earwarmer is the ultimate weekend crochet project! With a rich, textured star stitch and a modern front twist, this handmade headband keeps your ears warm without messing up your hair.
Whether you’re crafting a last-minute gift or treating yourself to a trendy cold-weather accessory, this free crochet earwarmer pattern is beginner-friendly and quick to complete.
Pattern Overview & Sizing Guide
| Feature | Details |
| Skill Level | Easy / Intermediate |
| Terminology | Standard US Crochet Terms |
| Time Required | 1 – 1.5 Hours |
| Finished Size | Approx. 5 inches (13 cm) wide |
| Category | Free Crochet Pattern / Winter Accessories |
Why You’ll Love This Crochet Earwarmer Pattern
- Gorgeous Texture: The star stitch (also known as the daisy stitch) creates a thick, solid fabric with a luxurious pattern.
- Modern Twist Detail: The stylish front seam gives this headband a professional, boutique finish with minimal effort.
- Easily Customizable: Works for any head size – from toddlers to adults – simply by adjusting your row count.
- Quick & Scrap-Friendly: Uses less than one skein of yarn, making it a budget-friendly project!
Choosing the Best Yarn & Hook
For this sample pattern, I used Velvet Yarn (Category 5/Bulky). Velvet yarn makes an extraordinarily soft, plush headband that feels amazing against your skin!
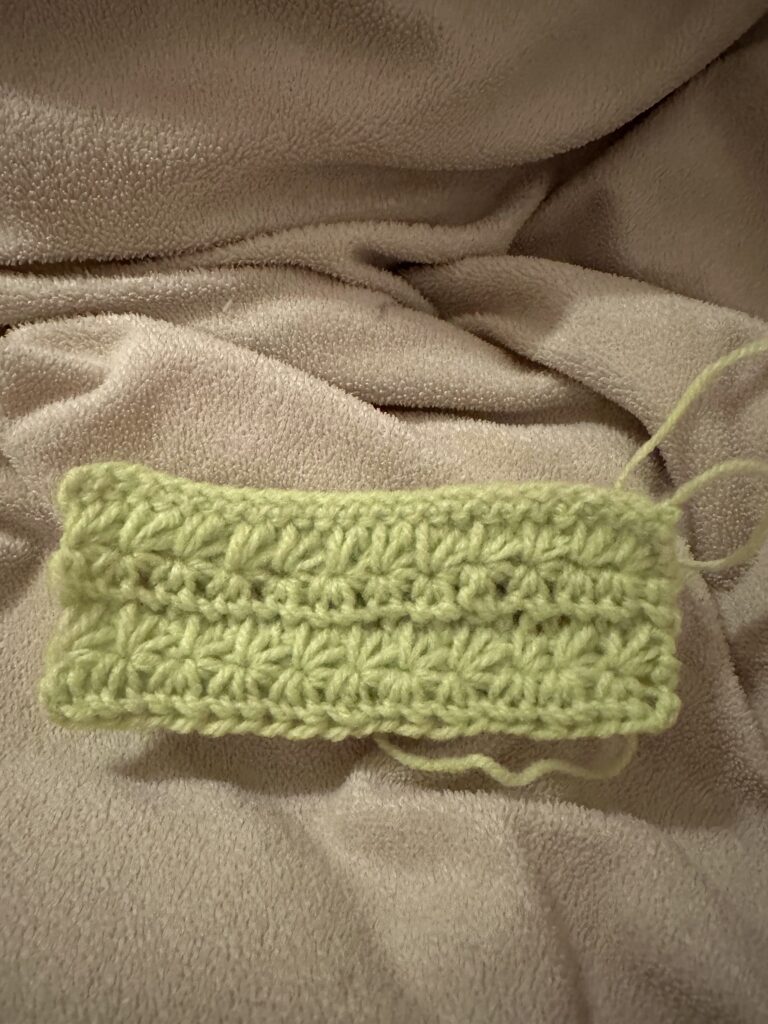
Pro Crafting Tip: While velvet yarn feels heavenly, its fluffy texture can sometimes hide stitch definition. If you want those crisp, clearly defined “star” rays to pop visually, use a twisted, standard acrylic, wool, or cotton blend yarn (Worsted Weight or Bulky). Straight, well-twisted plies show off intricate stitchwork best!
Pattern Materials Needed
- Yarn: 1 Skein of Velvet Yarn (or standard Worsted/Bulky weight yarn of choice)
- Crochet Hook: 5.5 mm (I-9) or 6.0 mm (J-10) hook (or hook size recommended for your yarn weight)
- Notions: Yarn needle (tapestry needle) with a large eye, scissors.
Pattern Details & Abbreviations
This pattern is written in standard US Crochet Terms.
- ch: chain
- sc: single crochet
- hdc: half double crochet
- st(s): stitch(es)
- yo: yarn over
- Star Stitch: Multi-loop star cluster (explained in step-by-step detail below)
Sizing & Gauge
- Width: Approx. 4 to 4.5 inches (10–11 cm)
- Length: Adjustable. Measure around the circumference of your head (minus 1–2 inches for negative ease so it stays snug).
- Sample Size: 22 foundation chains yielded a comfortable adult fit measuring approx. 19 inches long before sewing.
Step-by-Step Star Stitch Tutorial
The star stitch looks intricate, but once you memorize the sequence, it becomes a relaxing rhythm.
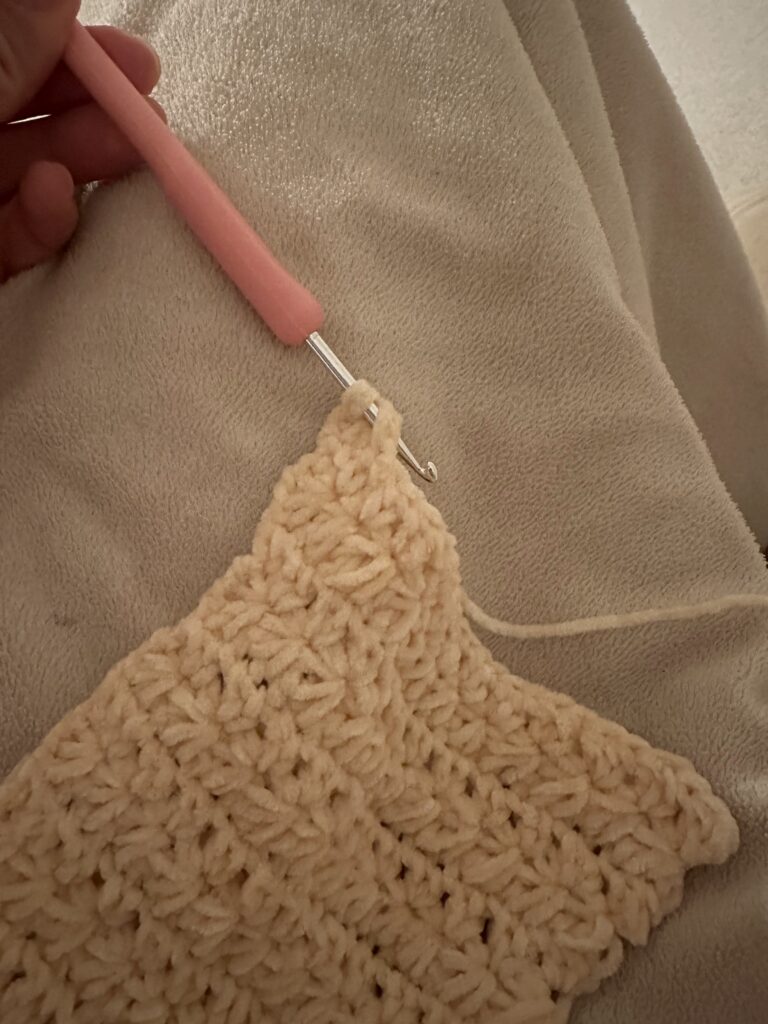
How to Work the First Star Stitch of a Row
- Chain 3 at the turn.
- Insert hook into the 2nd chain from the hook, yo, and pull up a loop (2 loops on hook).
- Insert hook into the 3rd chain from the hook, yo, and pull up a loop (3 loops on hook).
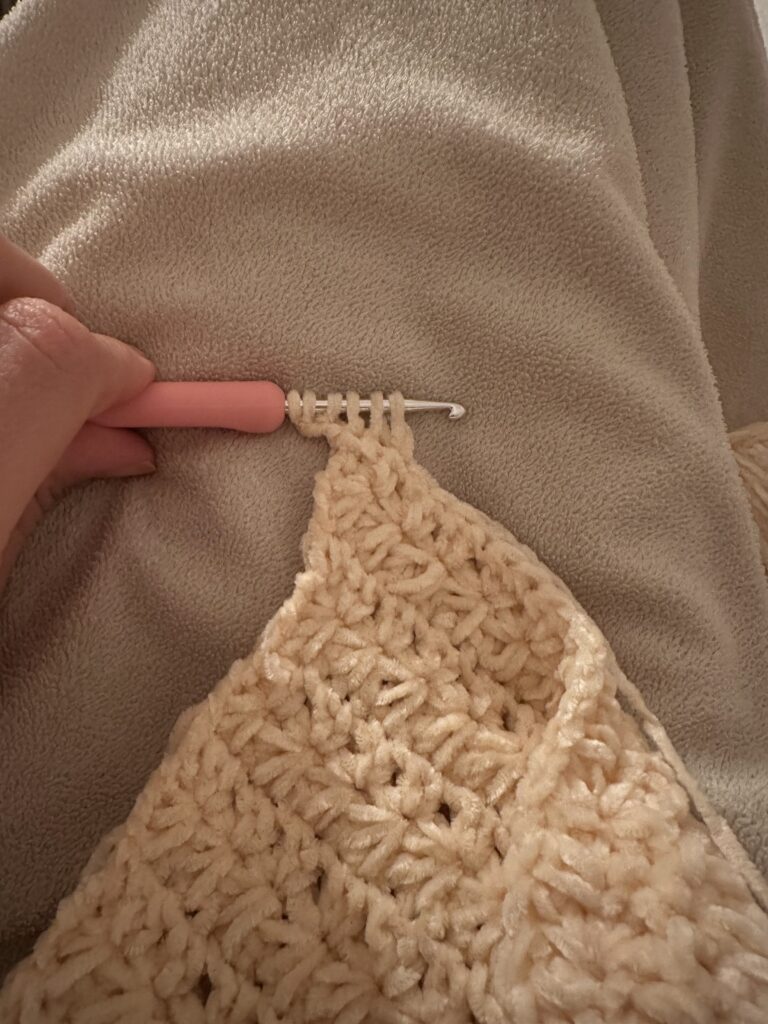
- Insert hook into the 1st stitch of the row, yo, and pull up a loop (4 loops on hook).
- Insert hook into the 2nd stitch, yo, and pull up a loop (5 loops on hook).
- Insert hook into the 3rd stitch, yo, and pull up a loop (6 loops on hook).
- Complete the star: Yo, pull through all 6 loops on your hook, then ch 1 to close and lock the star. This single chain creates the central “eye” of your star stitch!
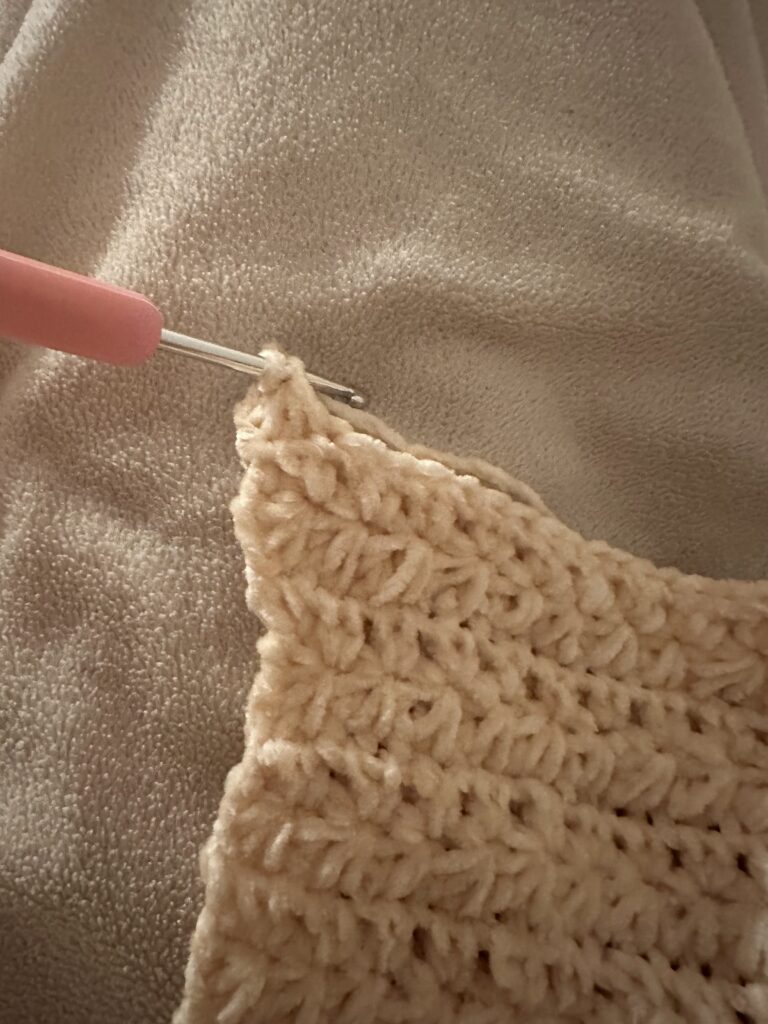
How to Work Subsequent Star Stitches Across the Row
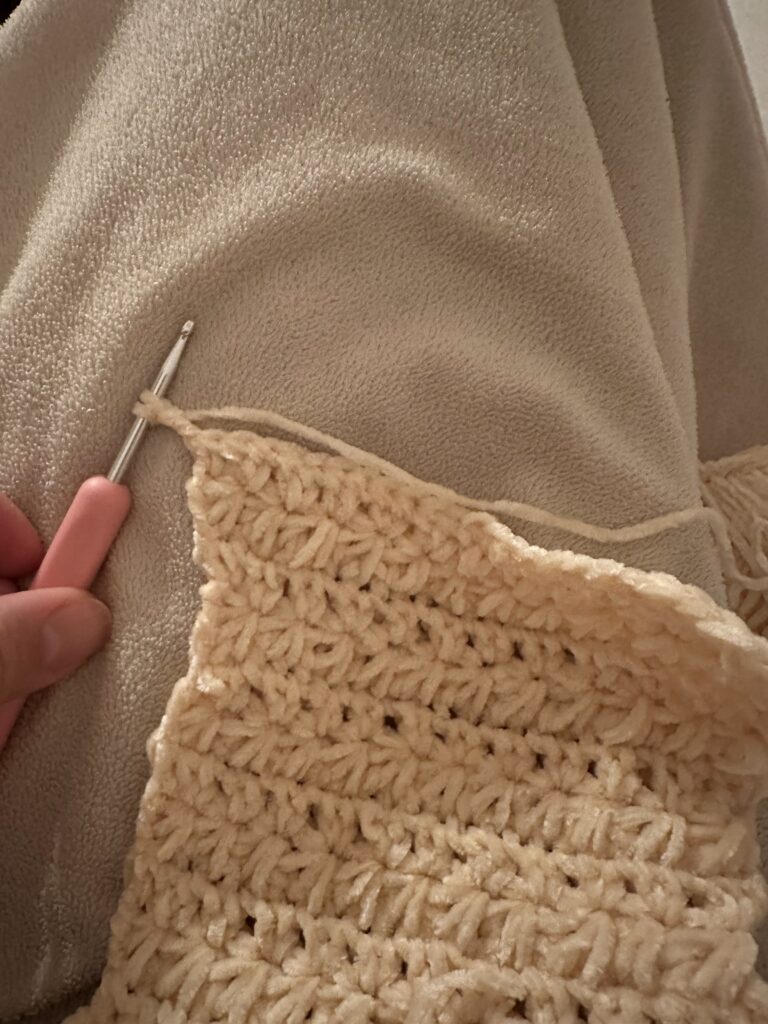
For every remaining star across the row, remember this 5-point sequence to gather your 6 loops:
- The Eye: Insert hook directly into the center “eye” (ch-1 lock) of the previous star; pull up a loop.
- The Post: Insert hook between the last two vertical posts behind the eye; pull up a loop.
- The Share: Insert hook into the exact same stitch where the last leg of the previous star landed; pull up a loop.
- Advance 1: Insert hook into the next open stitch down the row; pull up a loop.
- Advance 2: Insert hook into the second open stitch down the row; pull up a loop.
- Finish: You now have 6 loops on your hook. Yo, pull through all 6 loops, and ch 1 to lock the star.
Twisted Star Stitch Earwarmer Instructions
Foundation Row
Chain an even number of chains until you reach your desired earwarmer width.
- Sample uses: Chain 22 (for a cozy adult width with velvet yarn).
Round / Row 1
- Single crochet (sc) in the 2nd chain from the hook and in each chain across.
- At the end of the row, ch 3 and turn.
Round / Row 2 (Star Stitch Row)
- Work your First Star Stitch using the chain-3 turning chain and first few stitches (as described in the tutorial above).
- Work Subsequent Star Stitches across the row until you reach the final stitch.
- Work 1 hdc into the very last stitch of the row to give your edge a clean, straight finish.
- Ch 2 (or ch 1) and turn.
Round / Row 3 (Eye Expansion Row)
- Work 2 hdc into the eye (the center ch-1 space) of each star stitch across the row.
- Work 1 hdc into the top of the turning chain at the end of the row.
- Ch 3 and turn.
Repeating the Pattern
- Repeat Row 2 and Row 3 sequentially until your earwarmer reaches your desired length around your head.
- Note on sample: The sample earwarmer repeated this 2-row sequence 15 times (for a total of 30 rounds), which creates a snug, warm adult size!
- When Fastening Off, leave a long tail for sewing the twisted seam of your crochet earwarmer
How to Form the Magic Twisted Seam
The signature twist in modern crochet headbands looks complex, but it is incredibly easy to construct using a folded sandwich seam!
Step-by-Step Twist Assembly
- Lay Flat: Lay your finished crochet rectangle flat on a table with the right side facing up.
- Bring Ends Together: Bring the two short ends of the rectangle toward the center so they meet in the middle.
- Form “C” Shapes: Pinch each short end in half to create a horizontal “C” shape on the left and an inverted “C” shape on the right.
- Interlock the Ends: Slide the two ends into each other, interlocking the four layers like a sandwich stack:
- Layer 1 (Front – Left side)
- Layer 2 (Middle – Right side)
- Layer 3 (Middle – Left side)
- Layer 4 (Back – Right side)
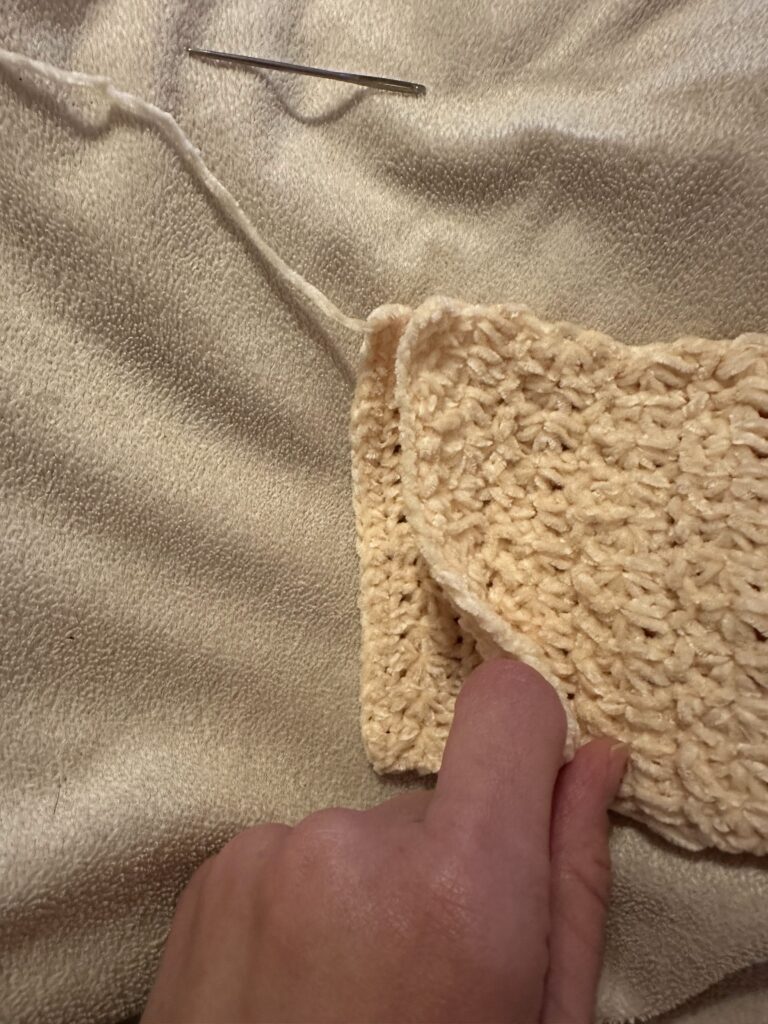
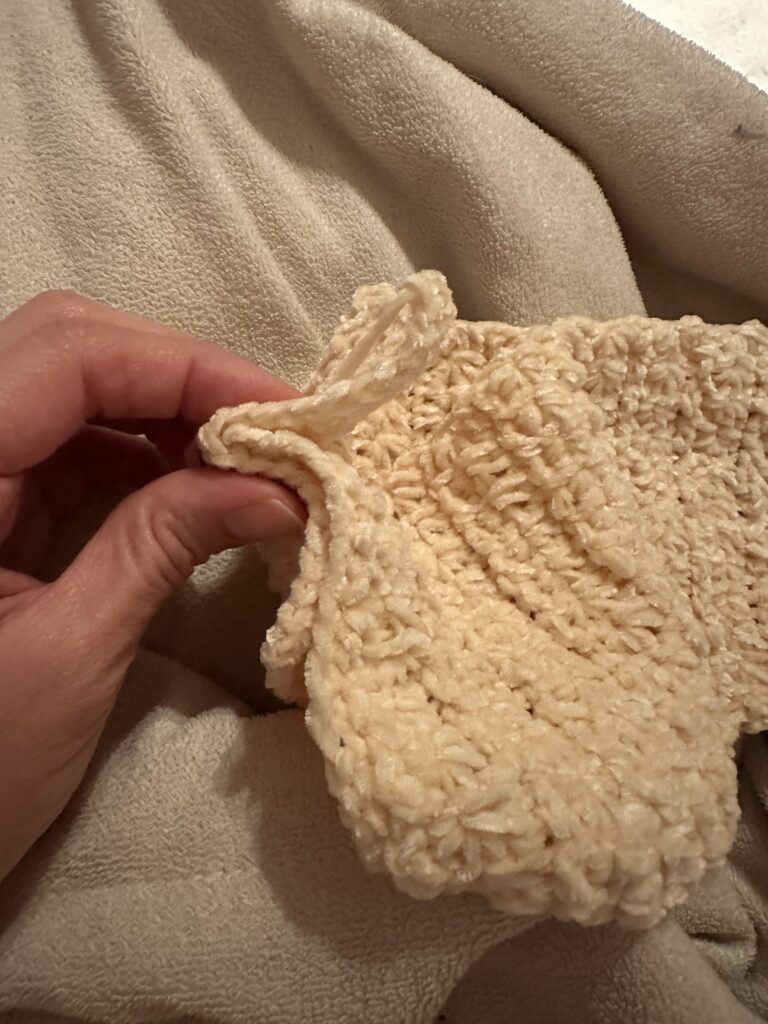
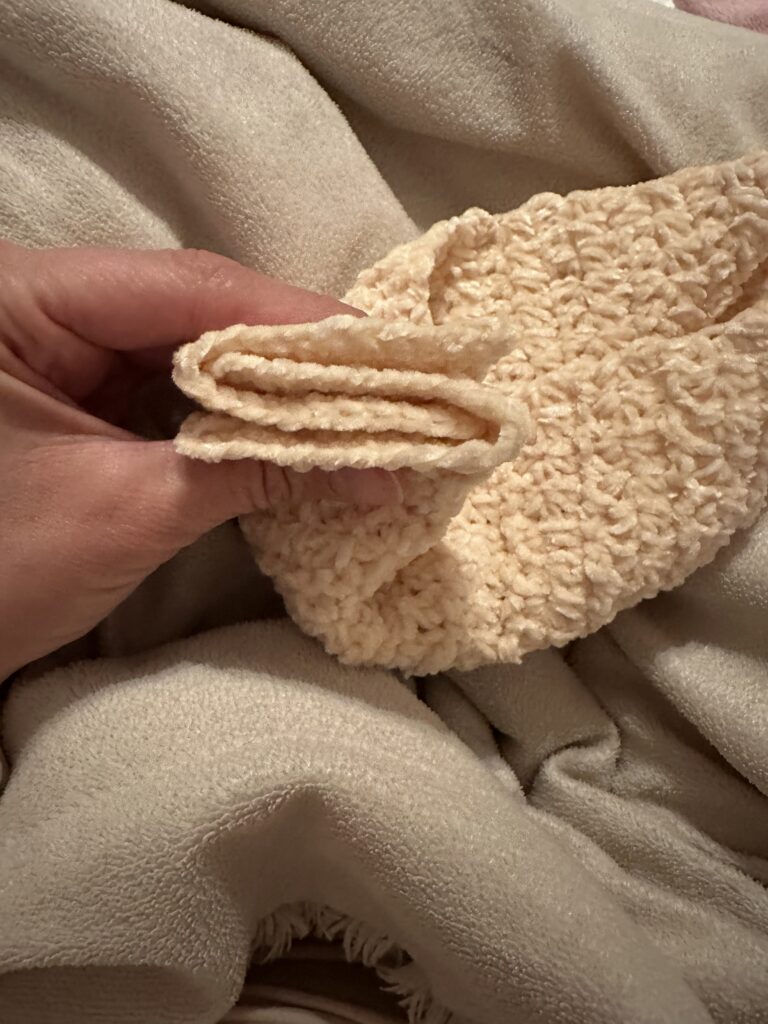
- Sew across: Using a yarn needle and a long tail of yarn, stitch through all four layers at once using a mattress stitch or whip stitch. Ensure your needle catches every layer so no raw edges pull loose.
- Secure & Flip: Fasten off your yarn, weave in all loose ends securely, and turn the headband inside out.
Voilà! Your seamless, beautifully twisted star-stitch earwarmer is ready to wear!
Styling & Care Tips
- How to Wear: Position the twist directly in the front center for a chic turban style, or wear it slightly off-center for a casual look.
- Washing Velvet Yarn: Hand wash your velvet earwarmer in cold water with mild detergent and lay flat on a towel to dry. Avoid high heat to preserve the velvety sheen.
Save This Pattern to Pinterest!
Loved this project? Don’t forget to pin this pattern to your Crochet Board on Pinterest so you can find it later!