Free Crochet Amigurumi Turtle Pattern: Cute No-Sew Sea Turtle
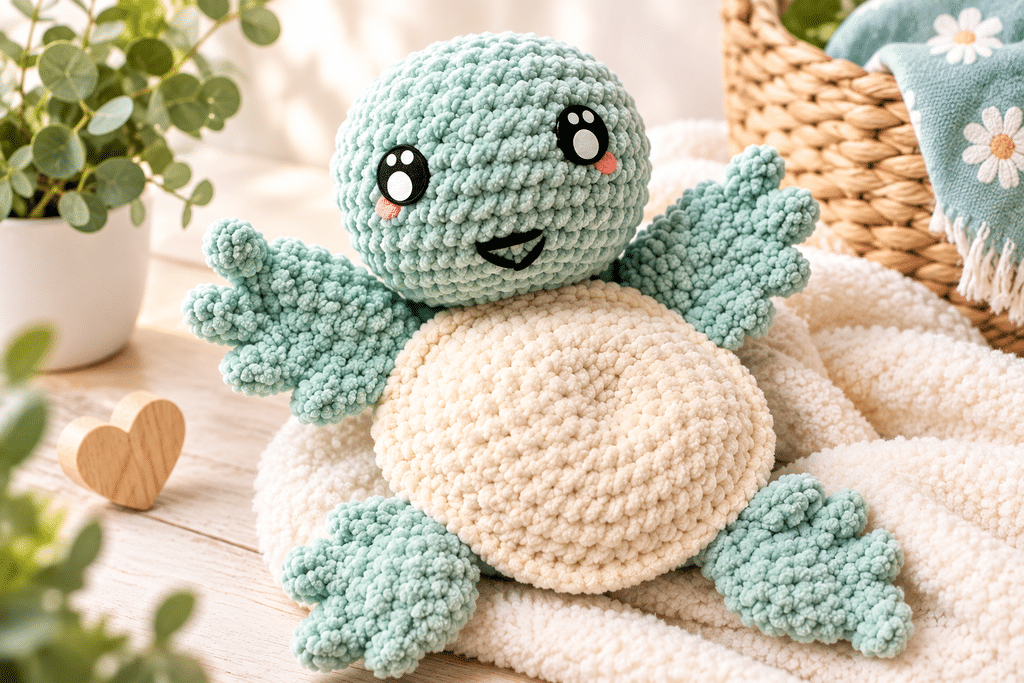
Looking for your next viral crochet project? This free no-sew crochet amigurumi turtle pattern is as fun to make as it is soft to hold! With its adorable kawaii eyes, custom frilled fins, and velvety chenille texture, this plushie is taking feeds and craft markets by storm. Best of all, no limb assembly is required for the limbs — you’ll crochet the fins directly into the shell for a fast, hassle-free finish!
Why You’ll Love This Free Crochet Amigurumi Turtle Pattern
- 100% No-Sew Body & Fins: The fins are crocheted directly into the body seam as you join the top and bottom shells—saving you time and hassle.
- Beginner-Friendly Stitches: Uses standard single crochet, increases, and decreases. Perfect for advanced beginners looking for an easy plushie project.
- Customizable Styles: Use plush chenille or velvet yarn for a trendy, squishy finish, or classic worsted-weight cotton/acrylic yarn for sharp, defined stitches.
- Great Craft Fair & Etsy Seller: Sea turtles go viral easily, are universally loved, and work up quickly, making them top sellers at craft fairs, market pop-ups, and online handmade shops.
Pattern Overview & Skill Level
| Feature | Details |
| Skill Level | Easy / Advanced Beginner |
| Terminology | Standard US Crochet Terms |
| Time Required | 1.5 – 2.5 Hours |
| Finished Size | ~7–9 inches (18–23 cm) long (using super bulky chenille yarn) |
| Category | Free Amigurumi Crochet Pattern / Plushie & Nursery Decor |
Pro-Tip for No-Sew Joining: Keep the unworked edge of your fins completely free of frills. When placing them between the top and bottom shell layers, make sure the front side of the fin faces downward so the decorative waves fan outward correctly when stuffed.
Materials & Tools
- Yarn:
- Main Color (Turquoise): ~50 g super bulky chenille yarn.
- Shell Color (Brown): ~45 g super bulky chenille yarn.
- Belly Color (White/Cream): ~40 g super bulky chenille yarn.
- Note: Standard worsted weight 100% cotton or acrylic yarn also works great with a 3.5 mm hook!
- Crochet Hook: 4.5 mm (US 7) to 5.0 mm (US H-8) hook for chenille yarn (or 3.5 mm / US E-4 for worsted cotton).
- Safety Eyes: 12 mm or 14 mm “sparkle/glitter” safety eyes.
- Embroidery Accent: A small amount of black yarn (for the mouth) and pink yarn (for the cheeks).
- Polyester fiberfill stuffing
- Stitch markers
- Scissors
Abbreviations (US Crochet Terms)
- MR: Magic Ring
- ch: Chain
- sc: Single Crochet
- hdc: Half Double Crochet
- inc: Increase (work 2 sc in the same stitch)
- dec / invdec: Decrease / Invisible Decrease
- sl st: Slip Stitch
- FO: Fasten Off
- [ ]: Total stitch count at the end of the round
Step-by-Step Free Crochet Amigurumi Turtle Pattern
Work in continuous rounds. Place a stitch marker in the first stitch of each round to track your progress.
Step 1: Fins (Make 4)
Using Turquoise Chenille Yarn.
- R1: 6 sc in MR. [6]
- R2: Inc x6. [12]
- R3: (1 sc, inc) x6. [18]
- R4: 1 sc, inc, (2 sc, inc) x5, 1 sc. [24]
- Fold & Close: Fold fin flat in half. Sc 11 stitches across both layers to close the top edge. [11]
- Frill Edging: (ch 2, 3 hdc into 1st ch of chain, sl st in next 2 sts) x5 across the folded curved edge.
- Leave the remaining flat base edge unworked so it can be crocheted into the body seam later. Fasten off.
Step 2: Back Shell (Top)
Using Brown Chenille Yarn.
- R1: 6 sc in MR. [6]
- R2: Inc x6. [12]
- R3: (1 sc, inc) x6. [18]
- R4: (2 sc, inc) x6. [24]
- R5: (3 sc, inc) x6. [30]
- R6: (4 sc, inc) x6. [36]
- R7: (5 sc, inc) x6. [42]
- R8: (6 sc, inc) x6. [48]
- R9: (7 sc, inc) x6. [54]
- R10–R12 (3 rounds): Sc in all 54 sts. [54]
- Fasten off and weave in the end.
Step 3: Belly Shell (Bottom)
Using White / Cream Chenille Yarn.
- R1: 6 sc in MR. [6]
- R2: Inc x6. [12]
- R3: (1 sc, inc) x6. [18]
- R4: (2 sc, inc) x6. [24]
- R5: (3 sc, inc) x6. [30]
- R6: (4 sc, inc) x6. [36]
- R7: (5 sc, inc) x6. [42]
- R8: (6 sc, inc) x6. [48]
- R9: (7 sc, inc) x6. [54]
- Do NOT fasten off. Continue directly to Body Assembly.
Step 4: Shell Assembly & Fin Attachment (No-Sew)
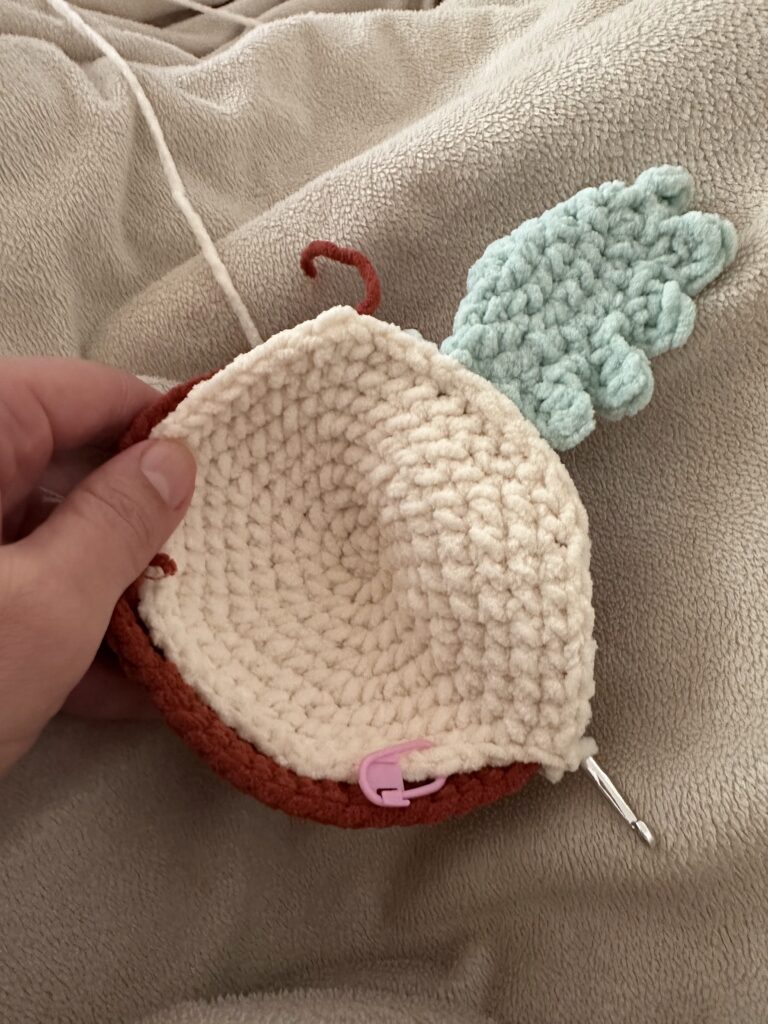
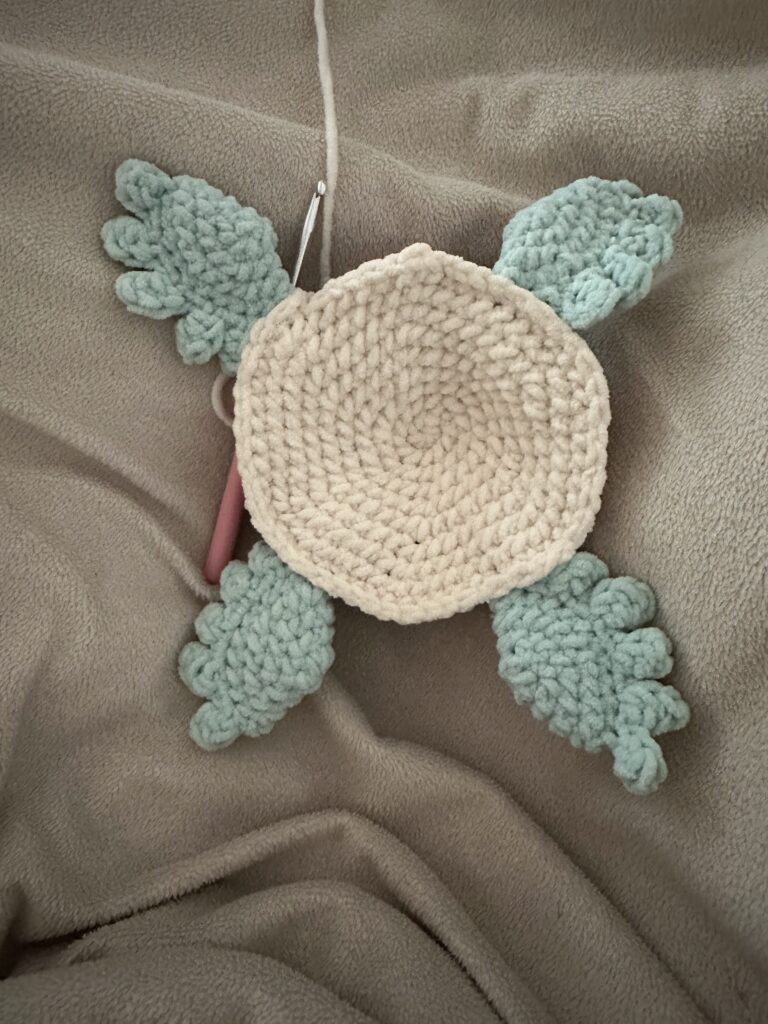
Place the Belly Shell on top of the Back Shell (wrong sides together). You will sc through both layers around the outer edge [54 sts total] while attaching the fins:
- Back Edge: Sc 3 through both layers.
- Fin 1: Place 1st fin between layers (facing down). Sc 2 through belly, fin, and back shell.
- Side 1: Sc 14 through both layers.
- Fin 2: Place 2nd fin between layers. Sc 2 through all layers.
- Front Gap (Tail/Neck Alignment): Sc 10 through both layers.
- Fin 3: Place 3rd fin between layers. Sc 2 through all layers.
- Side 2: Sc 10 through both layers.
- Fin 4: Place 4th fin between layers. Sc 2 through all layers.
- Final Seam: Sc 9 through both layers.
- Stuffing: Stuff the shell firmly with polyester fiberfill.
- Head Opening: You should have an unworked opening of 10 stitches total (5 on the top shell, 5 on the bottom shell). Do not fasten off.
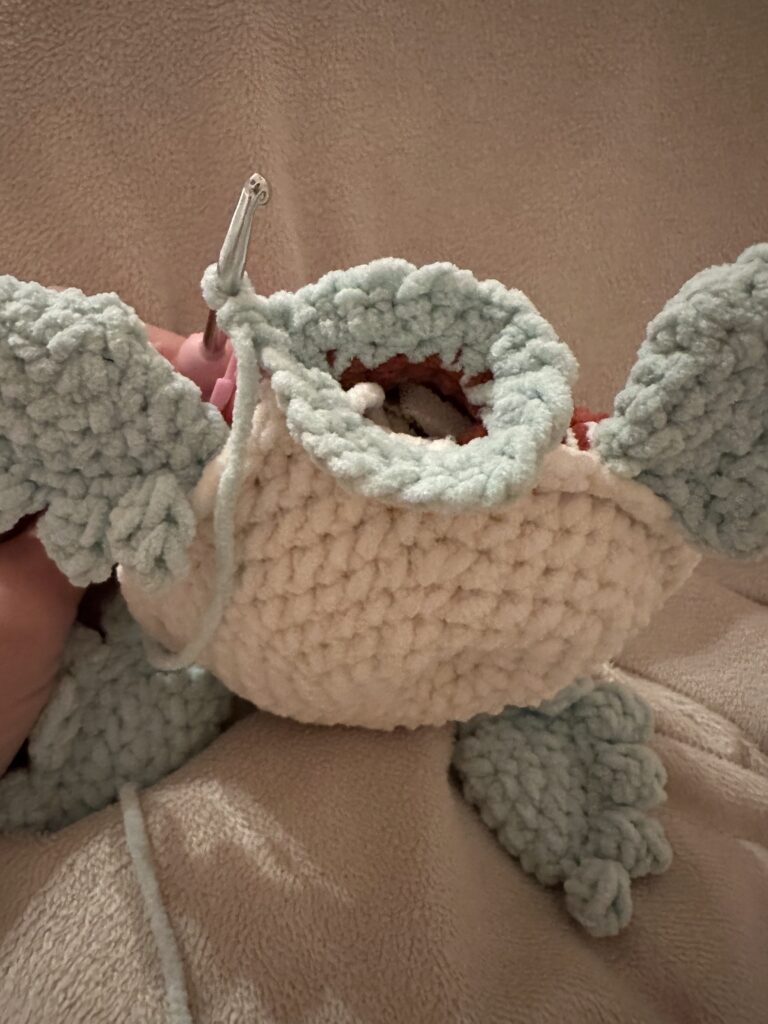
Step 5: Head
Switch to turquoise chenille yarn and work a slip stitch.
- R1: Sc in all 10 sts around the opening. [10]
- R2: Inc in all 10 sts. [20]
- R3: (1 sc, inc) x10. [30]
- R4: (2 sc, inc) x10. [40]
- R5–R13 (9 rounds): Sc in all 40 sts. [40]
- R14: (2 sc, dec) x10. [30]
- R15: Sc in all 30 sts. [30]
- R16: (1 sc, dec) x10. [20]
Kawaii Face Details:
- Safety Eyes: Insert 12 mm or 14 mm twinkle/glitter safety eyes between R9 and R10, spaced 8 stitches apart.
- Mouth: Embroider a simple “v” or curved line using black yarn centered between the eyes.
- Cheeks: Add small horizontal stitches with pink yarn directly under each eye.
- Stuffing: Firmly stuff the head with fiberfill.
- R17: (1 sc, dec) x6, sc 2. [14]
- R18: Dec x7. [7]
- Fasten off, weave the tail through the front loops of the remaining 7 stitches, pull tight to close, and hide the yarn end inside the head.