Amigurumi Pig – Low-Sew Free Crochet Pattern
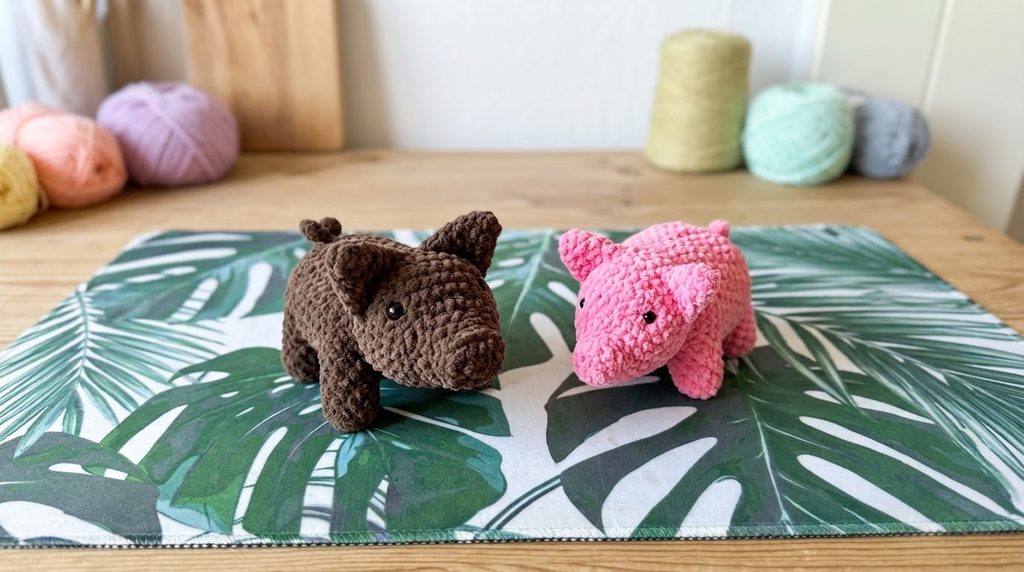
You´re looking for a quick, ridiculously adorable crochet project? My free low-sew amigurumi pig pattern is designed for seamless construction, making it perfect for beginner-to-intermediate crocheters who dislike sewing tiny parts together!
By crocheting the legs directly into the belly and joining the head seamlessly to the body, you get a sturdy, neat finished plushie in no time. Follow along step-by-step to create your very own pocket-sized plush pig.
Why You’ll Love This Low-Sew Free Amigurumi Pattern
- Minimal Sewing: The legs and head are crocheted directly into the body structure!
- Quick & Easy: Perfect for craft fairs, last-minute gifts, or stash-busting.
- Beginner-Friendly: Uses basic single crochet stitches, simple increases, and decreases.
- Customizable: Works amazingly well with plush velvet yarn, chenille, or classic worsted-weight acrylic.
Pattern Notes & Skill Level
| Feature | Details |
| Skill Level | Easy / Beginner |
| Terminology | Standard US Crochet Terms |
| Time Required | 1.5 – 2 Hours |
| Category | Free Amigurumi & Plushie Patterns |
| Execution Order: Important! | Crochet the parts in the exact order listed (Ears, Snout & Head, Legs, Belly/Body). This ensures the pieces are ready to be seamlessly joined as you work. |
| Finished Size | Approx. 5–6 inches (13–15 cm) using worsted-weight yarn, or larger using plush/chenille yarn. |
Materials Needed
- Yarn: I used pink & brown chenille yarn for my example amigurumi pigs. But as pigs in nature come in light pink, off-white, or even black, you can use those colors for your lucky amigurumi as well. For a special twist, you can use a small amount of darker pink for the snout. This free pattern also works with medium Worsted-Weight (Category 4) yarn.
- Crochet Hook: 3.5 mm (E-4) or 4.0 mm (G-6) depending on yarn weight and tension.
- Safety Eyes: 1 pair of safety eyes.
- Stuffing: Polyester Fiberfill stuffing.
- Tapestry Needle: For sewing the ears.
- Stitch Markers: Highly recommended to track continuous rounds!
- Scissors.
Abbreviations (US Terms)
- MR: Magic Ring
- ch: Chain
- sc: Single Crochet
- inc: Increase (2 single crochet in the same stitch)
- dec: Decrease (Invisible decrease recommended)
- sl st: Slip Stitch
- BLO: Back Loop Only
- FO: Fasten Off
- [ ]: Total stitch count at the end of the round
Step-by-Step Amigurumi Pig Pattern
1. Ears (Make 2)
Work in continuous spiral rounds. Do not stuff.
- Round 1: Start with a MR, work 4 sc into the ring [4]
- Round 2: (1 sc, 1 inc) x 2 [6]
- Round 3: (2 sc, 1 inc) x 2 [8]
- Round 4: (3 sc, 1 inc) x 2 [10]
- Round 5: (4 sc, 1 inc) x 2 [12]
FO, leaving a long tail for sewing later. Set ears aside.
2. Snout & Head
Start the head from an oval chain base.
- Chain 4
- Round 1: Starting in the 2nd ch from the hook: 2 sc st, 3 sc in last ch (Yes, you crochet 3 sc in one stitch). Working along the bottom side of the chain: 1 sc, 1 inc. Join with a sl st [8]
- Round 2: (1 sc, 3 inc) x 2 [14]
- Round 3: Working in BLO: 14 sc [14]. This step will form the amigurumi pig snout
- Round 4: 1 sc in each st around [14]
- Round 5: 3 sc, 8 inc, 3 sc [22]
- Round 6: 22 sc [22]. By this step you´ll start to see how the head forms.
- Round 7: 5 sc, (2 sc, 1 inc) x 4, 5 sc [26]
- Round 8: 5 sc, (1 inc, 3 sc) x 4, 5 sc [30]
- Rounds 9–12 (4 rounds): 30 sc [30]
- Round 13: 6 sc, (1 sc, 1 dec) x 6, 6 sc [24]
- Round 14: (4 sc, 1 dec) x 4 [20]
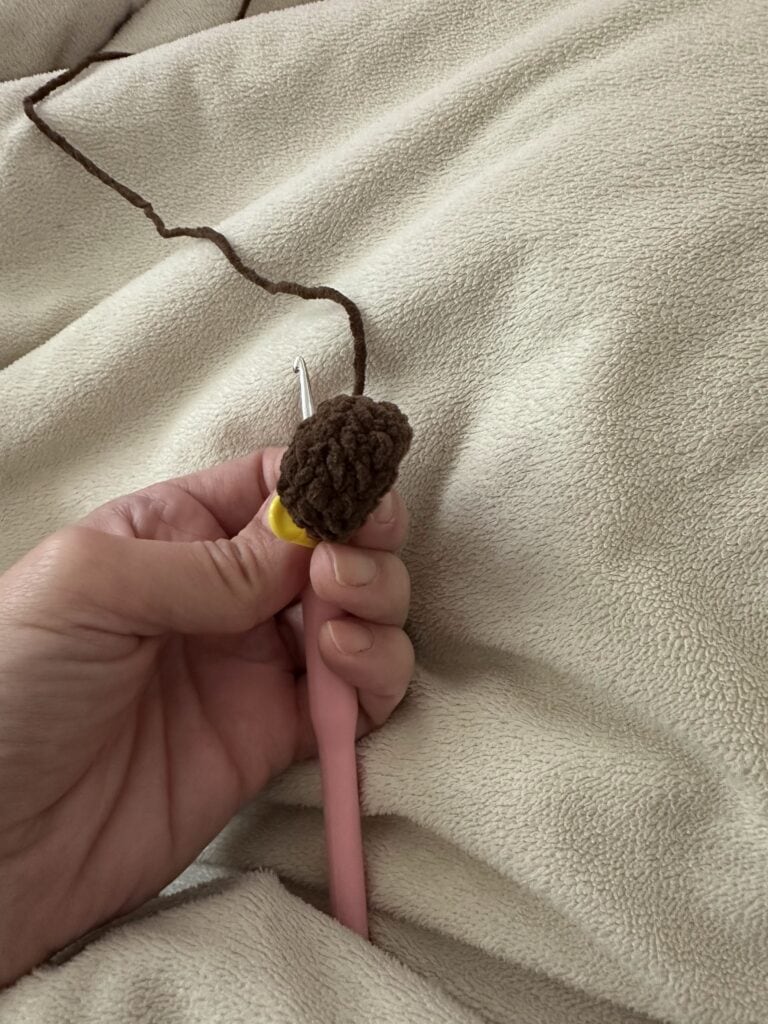
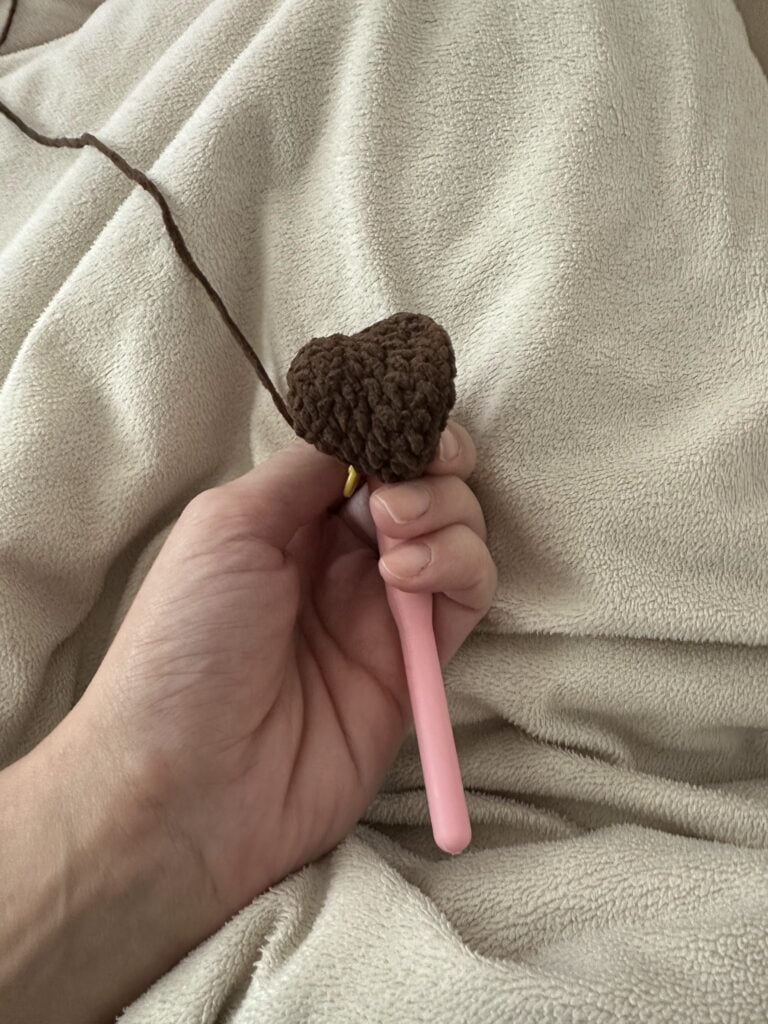
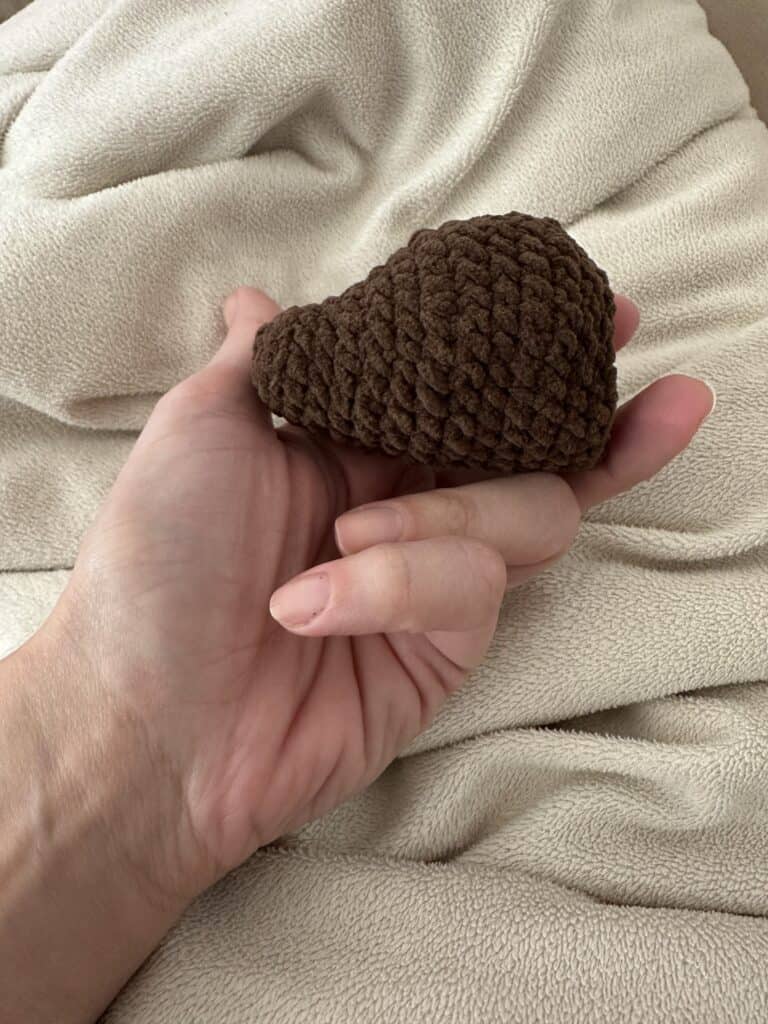
Eye Placement & Stuffing: Insert safety eyes between Rounds 8 and 9, spaced approximately 7 stitches apart. Decide how far or how high you want the eyes to sit. Stuff the head firmly with fiberfill.
FO and set aside.
3. Legs (Make 4)
Work in continuous spiral rounds.
- Round 1: Start with a MR, work 6 sc into the ring [6]
- Round 2: 1 inc in each st around [12]
- Round 3: Working in BLO: 12 sc [12]
- Rounds 4–7 (4 rounds): 12 sc [12]
FO. Stuff the legs lightly. Don’t stuff them too much yet; you can do it at the end. Set them aside.
4. Belly
- Round 1: Start with a MR, work 6 sc into the ring [6]
- Round 2: 1 inc in each st around [12]
- Round 3: (1 sc, 1 inc) x 6 [18]
- Round 4: (2 sc, 1 inc) x 6 [24]
- Round 5: (3sc, 1inc) x 6 [30]
Do NOT Fasten Off. Now join the legs to the belly.
Joining the Legs with the Belly
Joining Round:
To join the amigurumi pig legs, crochet through both the belly stitches and leg stitches simultaneously:
- Leg 1: Work 4 sc through the 1st leg and belly simultaneously.
- Space between two legs: Work 2 sc on belly only.
- Leg 2: Work 4 sc through the 2nd leg and belly.
- Space between the next two legs: Work 2 sc on belly only.
- Leg 3: Work 4 sc through the 3rd leg and belly.
- Space between the next two legs: Work 2 sc on belly only.
- Leg 4: Work 4 sc through the 4th leg and belly.
- Finish round by crocheting around the remaining 8 stitches [46 sts total around outer perimeter].
5. Body & Head Attachment for the Amigurumi Pig
- Round 1: 1 sc in each st around [46]
- Round 2: 34 sc around the body. Now join the head: Place the head against the body and work 8 sc through both body and head stitches simultaneously [46]
- Round 3: 1 sc in each st around [46]
- Round 4 (Neckline Decreases): 1 sc in each st around until reaching the neck/head join section; work (2 sc, 1 dec) x 4 over the neck stitches to shape the neck [42]
- Round 5: (3 sc, 1 dec) x 6, [36]
- Round 6: (2 sc, 1 dec) x 6, [30]. You can attach the tail of your amigurumi pig in two ways. Either chain 10 at the center of the back (see picture below) and crochet 9 sc back (this will automatically curl the tail), or follow the instructions in the next paragraph.
- Round 7: (1 sc, 1 dec) x 6 [24]
Stuffing: Stuff the body firmly now, ensuring the neck area is packed securely to support the head.
- Round 8: (1 sc, 1 dec) x 6 [18]
- Round 9: 6 dec [12]
- Round 10: dec around
FO, leave a short tail, weave through the front loops of the remaining stitches, pull tight to close, and weave in ends.
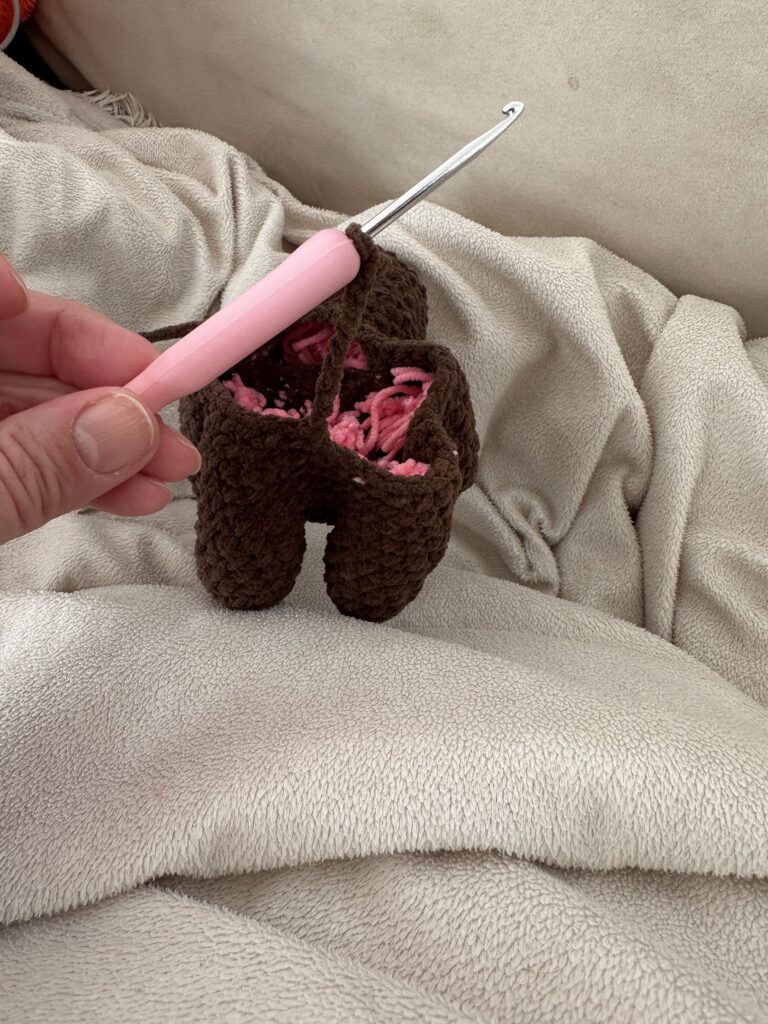
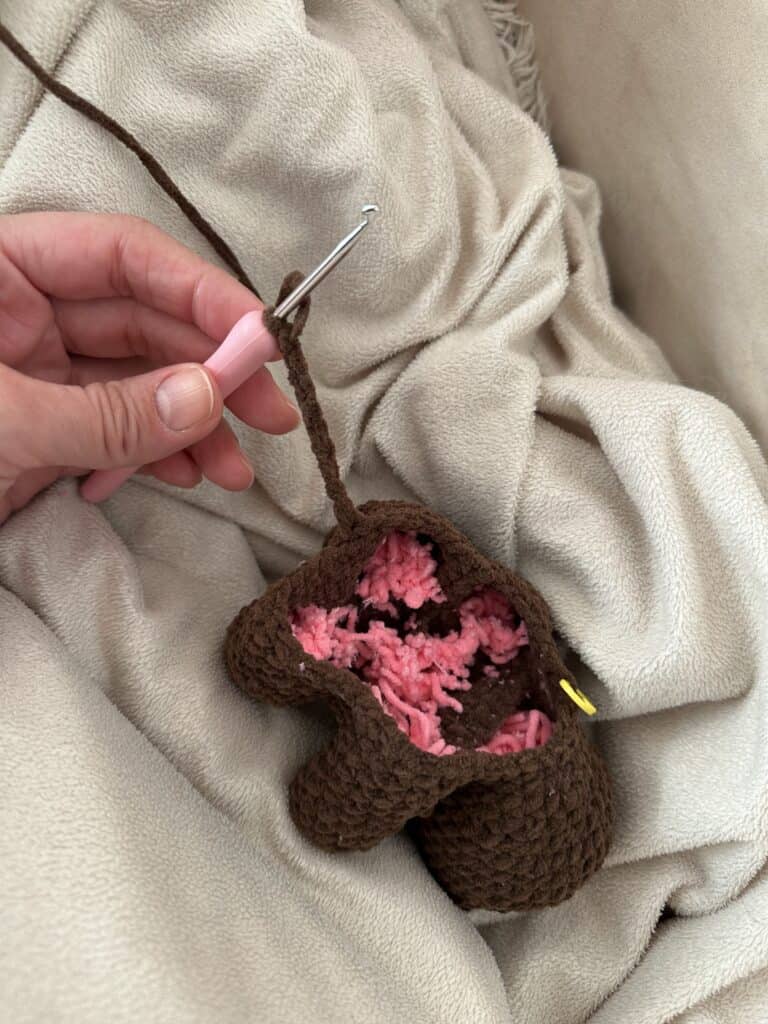
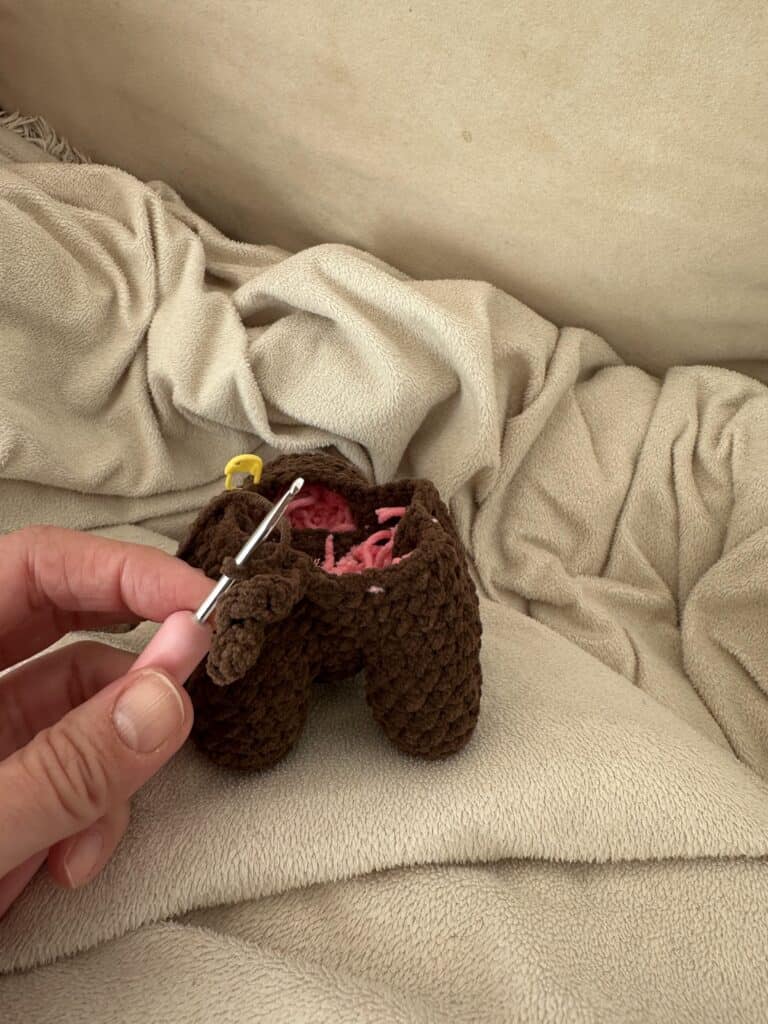
6. Finishing Touches: Ears & Tail
Sewing the Ears:
- Flatten ears and sew them between Rounds 11 and 12 on top of the head, tilted slightly forward.
Curly Pig Tail:
- Attach yarn to the center back of the body above the legs.
- Chain 10.
- Starting in the 2nd ch from the hook: Work 2 sc into each chain stitch back to the body. (This causes the chain to curl automatically!)
- Sl st to the body, FO, and weave in loose ends.
Amigurumi Tips for Success
- Use an Invisible Decrease: For a smooth, gap-free look, always make invisible decreases on amigurumi rounds (insert the hook into the front loops of the next two stitches only).
- Tight Tension: Keep your tension firm so stuffing doesn’t show through the stitches.
- Plush Option: If using plush velvet yarn, switch to a larger hook (around 4.5mm-5.0mm) and 12mm safety eyes.
Copyright & Terms of Use
© 2026 Cute Crochet Patterns. All rights reserved.
This pattern, including all text, images, and instructions, is for personal use only. You may not sell, redistribute, copy, share, or claim this pattern (or any part of it) as your own in any format, digital or printed.
Selling Finished Products: You may sell finished handmade items created using this pattern! If you sell online, please credit Cute Crochet Patterns as the designer and link back to this blog post. Mass production or commercial manufacturing using this design is strictly prohibited.
is there an extra SC in Round 2 of the snout/body? I’m getting 15 stitches, and I’m wondering if the last sc is just an indicator or an actual stitch?
Hi Kristin!
You are completely right; thanks for catching that! The trailing 1 sc at the end was a typo.
Round 2 should be: (1 sc, 3 inc) x2 [14]
That will use all 8 stitches from Round 1 and give you the correct total of 14 stitches for the round.
The pattern has been updated.
Thanks again for telling me!
Best wishes,
Mirjam
Thank you so much!!! This pattern is turning out so cute so far!
Hi!
Thank you so much for the comment! I´m glad you love the pattern 🙂
Best wishes,
Mirjam
Hi, it’s me again :]
For Section 5 – Body & Head Attachment, I am stuck on Rounds 3-4. I get Round 2, but then for Round 3, I seem to only be able to get 46 stitches around again if I go over the 8 joining stitches and leave the other 12 of the head open. If I go around the head for Round 3 (similar to the leg attachment), then it would be a total of 50 stitches, right?
I can’t figure out which arrangement of attachment stitches would get Round 4’s 16 stitches to decrease to 12 stitches for the neck decrease part.
Thank you!
Hi Kristin!
Here is a quick breakdown to help clear up Round 3 and Round 4:
Round 3 (46 stitches): For Round 3, you work around the remaining outer edge/stitches of both the head and body combined, skipping the 8 joined stitches in the middle (since those were used to join the two pieces together). The outer perimeter totals exactly 46 stitches.
Round 4 (42 stitches): The decrease sequence (2 sc, 1 dec) x 4 uses 16 original stitches (8 single crochets + 8 stitches made into 4 decreases) over the neck section to reduce that 16-stitch section to 12 stitches. Across the whole round, subtracting those 4 decreased stitches brings the total count from 46 down to 42.
Does this help? Let me know if you run into any other questions!
For Round 3, can help me fix where I am counting wrong?
After joining, the body section has 38 stitches of its own remaining (46 before, minus 8 joining).
The head section has 12 stitches of its own after joining (20 before, minus 8 joining).
So if I go around the outside perimeter of the head and body after joining, (skipping joining stitches), then I am getting 38+12=50 stitches.
Hi Kristin!
Thank you so much for pointing this out and writing out your math—you are completely right! The leftover unworked stitches from the body and head add up to 50 around the perimeter based on those initial counts, not 46.
If you are getting 50 stitches on Round 3, go ahead and use 50 for your count, and then adjust your decreases in Round 4 so it flows smoothly into the neck shaping (for example, working (3 sc, 1 dec) x 10 or adjusting the spacing to bring it down evenly).
Thanks again for being such a careful reader and helping catch that typo in the pattern text!
I will update it in the pattern 🙂
Thank you so much!! I really appreciate all your willingness to help. I am still new at this, and this cute little pig is going to be the first crochet project I have been able to complete, thanks to you!! :]
Thank you so much!! I really appreciate all your willingness to help. I am still new at this, and this cute little pig is going to be the first crochet project I actually complete, thanks to you!! :]
In re-reading this again, would it work if I did another row on just the head before joining, to bring that count down to 16? Or would that make it look weird with a long neck?
Thank you so much for the kind words, and I’m so happy to hear this will be your first completed crochet project! Also, I have to thank you for finding TWO mistakes in my pattern. 🥰
Regarding adding an extra row to the head before joining: adding another round of 20 stitches (or working another decrease round down to 16) wouldn’t break anything, but it would give the pig a noticeably longer, more cylindrical neck instead of keeping the head tucked snug against the body.
Since this is a low-sew, compact little pig design, a short neck looks best and keeps the head stable! If you want to avoid altering the shape too much, you can also just work the 8 joining stitches with whatever count you have, and then let Round 3 naturally smooth out the perimeter.
Let me know how it turns out—you’ve got this!