Donut Bag – Free Crochet Pattern for the Viral Egg Bag
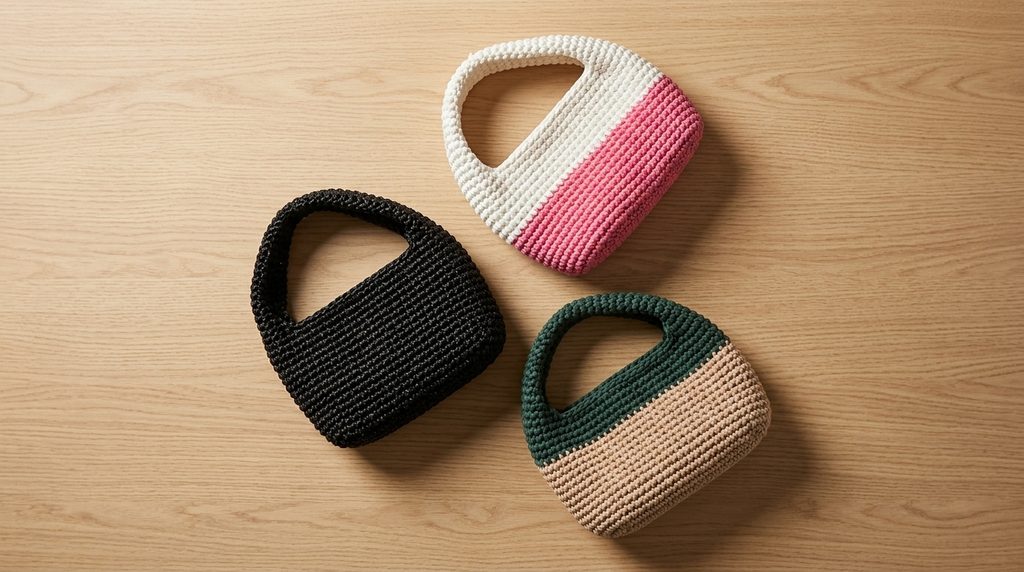
I think by now we’ve all seen the viral crochet donut bag (also known as the egg bag or O-bag) taking over our Instagram and TikTok feeds. With its unique circular silhouette and hollow cut-out handle, this trendy accessory is the ultimate statement piece. The best part? It looks like a high-end designer piece, but it is surprisingly quick and simple to make!
In this free crochet donut bag pattern, you will find a step-by-step, beginner-friendly guide to crafting your very own viral handbag in under two hours. Whether you use T-shirt yarn for a structured aesthetic or plush velvet yarn for a soft look, this pattern is fast, fun, and requires minimal sewing!
Pattern Quick Facts & Overview
| Feature | Details |
| Skill Level | Easy / Advanced Beginner |
| Terminology | Standard US Crochet Terms |
| Time Required | 1 – 1.5 Hours |
| Finished Size | Approx. 10 x 10 inches (25 x 25 cm) using T-shirt yarn |
| Construction | Worked in continuous spiral rounds with minimal seaming |
| Category | Free Crochet Bag Pattern / Fashion Accessories |
Why You’ll Love This Free Crochet Pattern
- Minimal Sewing: Worked almost entirely in one piece! The only seaming required is joining the handles at the top.
- Quick Weekend Project: Thanks to thick yarn and simple single crochet stitches, this bag works up in 60 to 90 minutes.
- Beginner-Friendly: Uses simple oval base increases, standard single crochet, and basic continuous spiral rounds.
- Highly Customizable: Perfect for recycled T-shirt yarn, ribbon yarn, velvet, or multiple strands of worsted-weight yarn.
Materials & Tools
- Yarn: For this size, I needed 4.5 rolls of T-shirt yarn for this small egg bag evening bag (Category 6/7).
- Alternative: 3 strands of worsted weight (#4) cotton yarn held together.
- Crochet Hook: 6.5 mm (K-10.5) to 8.0 mm (L-11), depending on yarn thickness and tension. (Note: Choose a hook slightly smaller than recommended for your yarn to keep stitches tight and structured).
- Stitch Markers: 4 to 6 stitch markers. The stitch markers are essential for this pattern. Especially for tracking the bottom part and the handle placement.
- Tapestry Needle: Large yarn needle for weaving in ends and seaming handles. Like I said, minimal sewing.
- Scissors
Abbreviations (US Terms)
- ch: Chain
- sc: Single Crochet
- inc: Increase (2 sc in the same stitch)
- sl st: Slip Stitch
- BLO: Back Loop Only
- FLO: Front Loop Only
- st(s): Stitch(es)
- rnd(s): Round(s)
- FO: Fasten Off
- [ ]: Total stitch count at the end of the round
Free Donut Bag / Egg Bag Crochet Pattern
Pattern Note: This project is worked in continuous spiral rounds. Do not join with a slip stitch or chain 1 at the end of rounds unless explicitly instructed. Use a stitch marker to mark the first stitch of every round and move it up as you work.
Phase 1: The Oval Base
Start by chaining 17
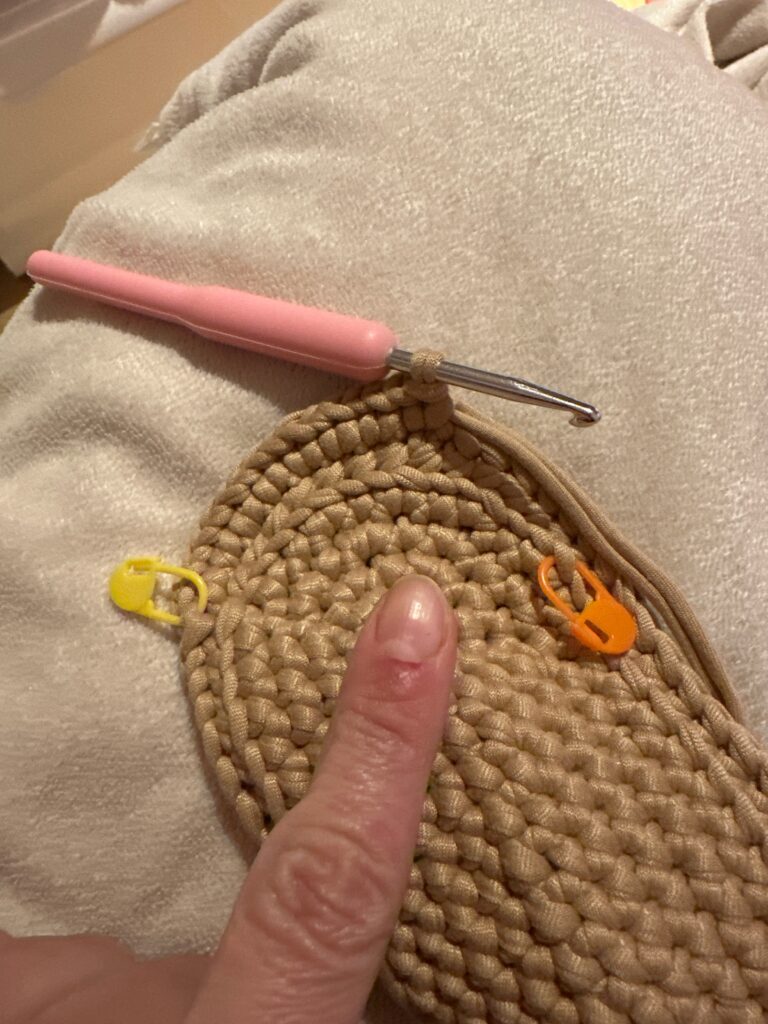
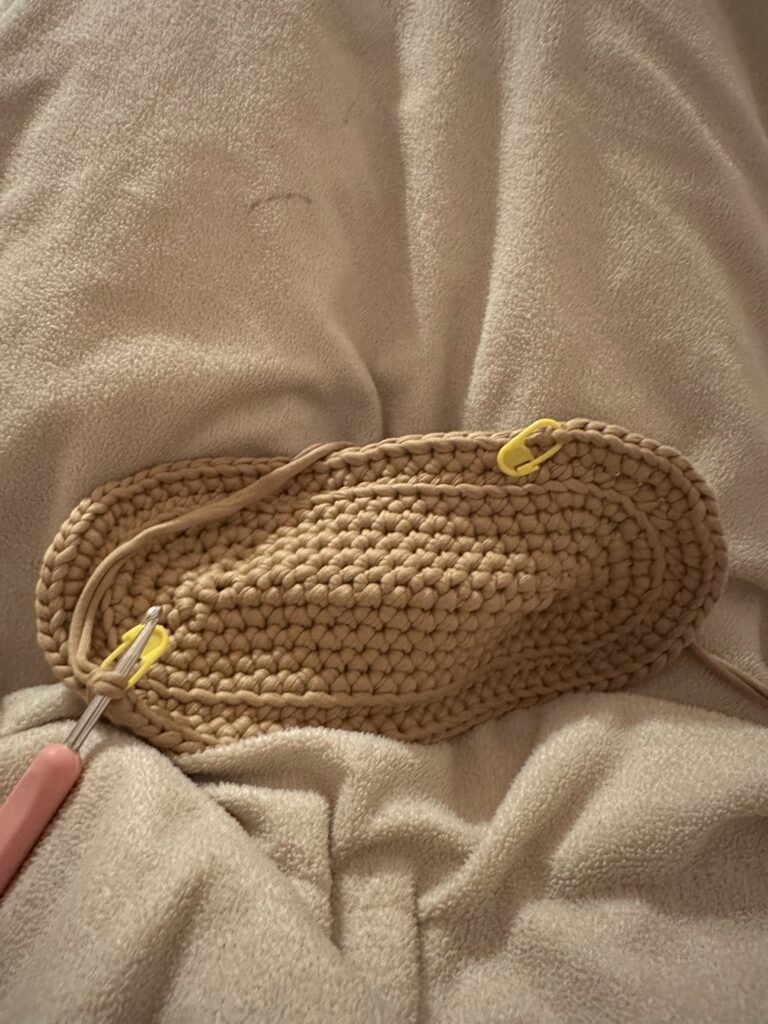
- Round 1: In the 2nd ch from the hook, work 3 sc into the same chain (mark the 1st and 3rd sts with stitch markers). Work 1 sc in each of the next 14 chains. In the last chain, work 3 sc into the same chain (mark the 1st and 3rd sts). Turning to work down the opposite side of the foundation chain, work 1 sc in each of the next 14 chains. [34 sts]
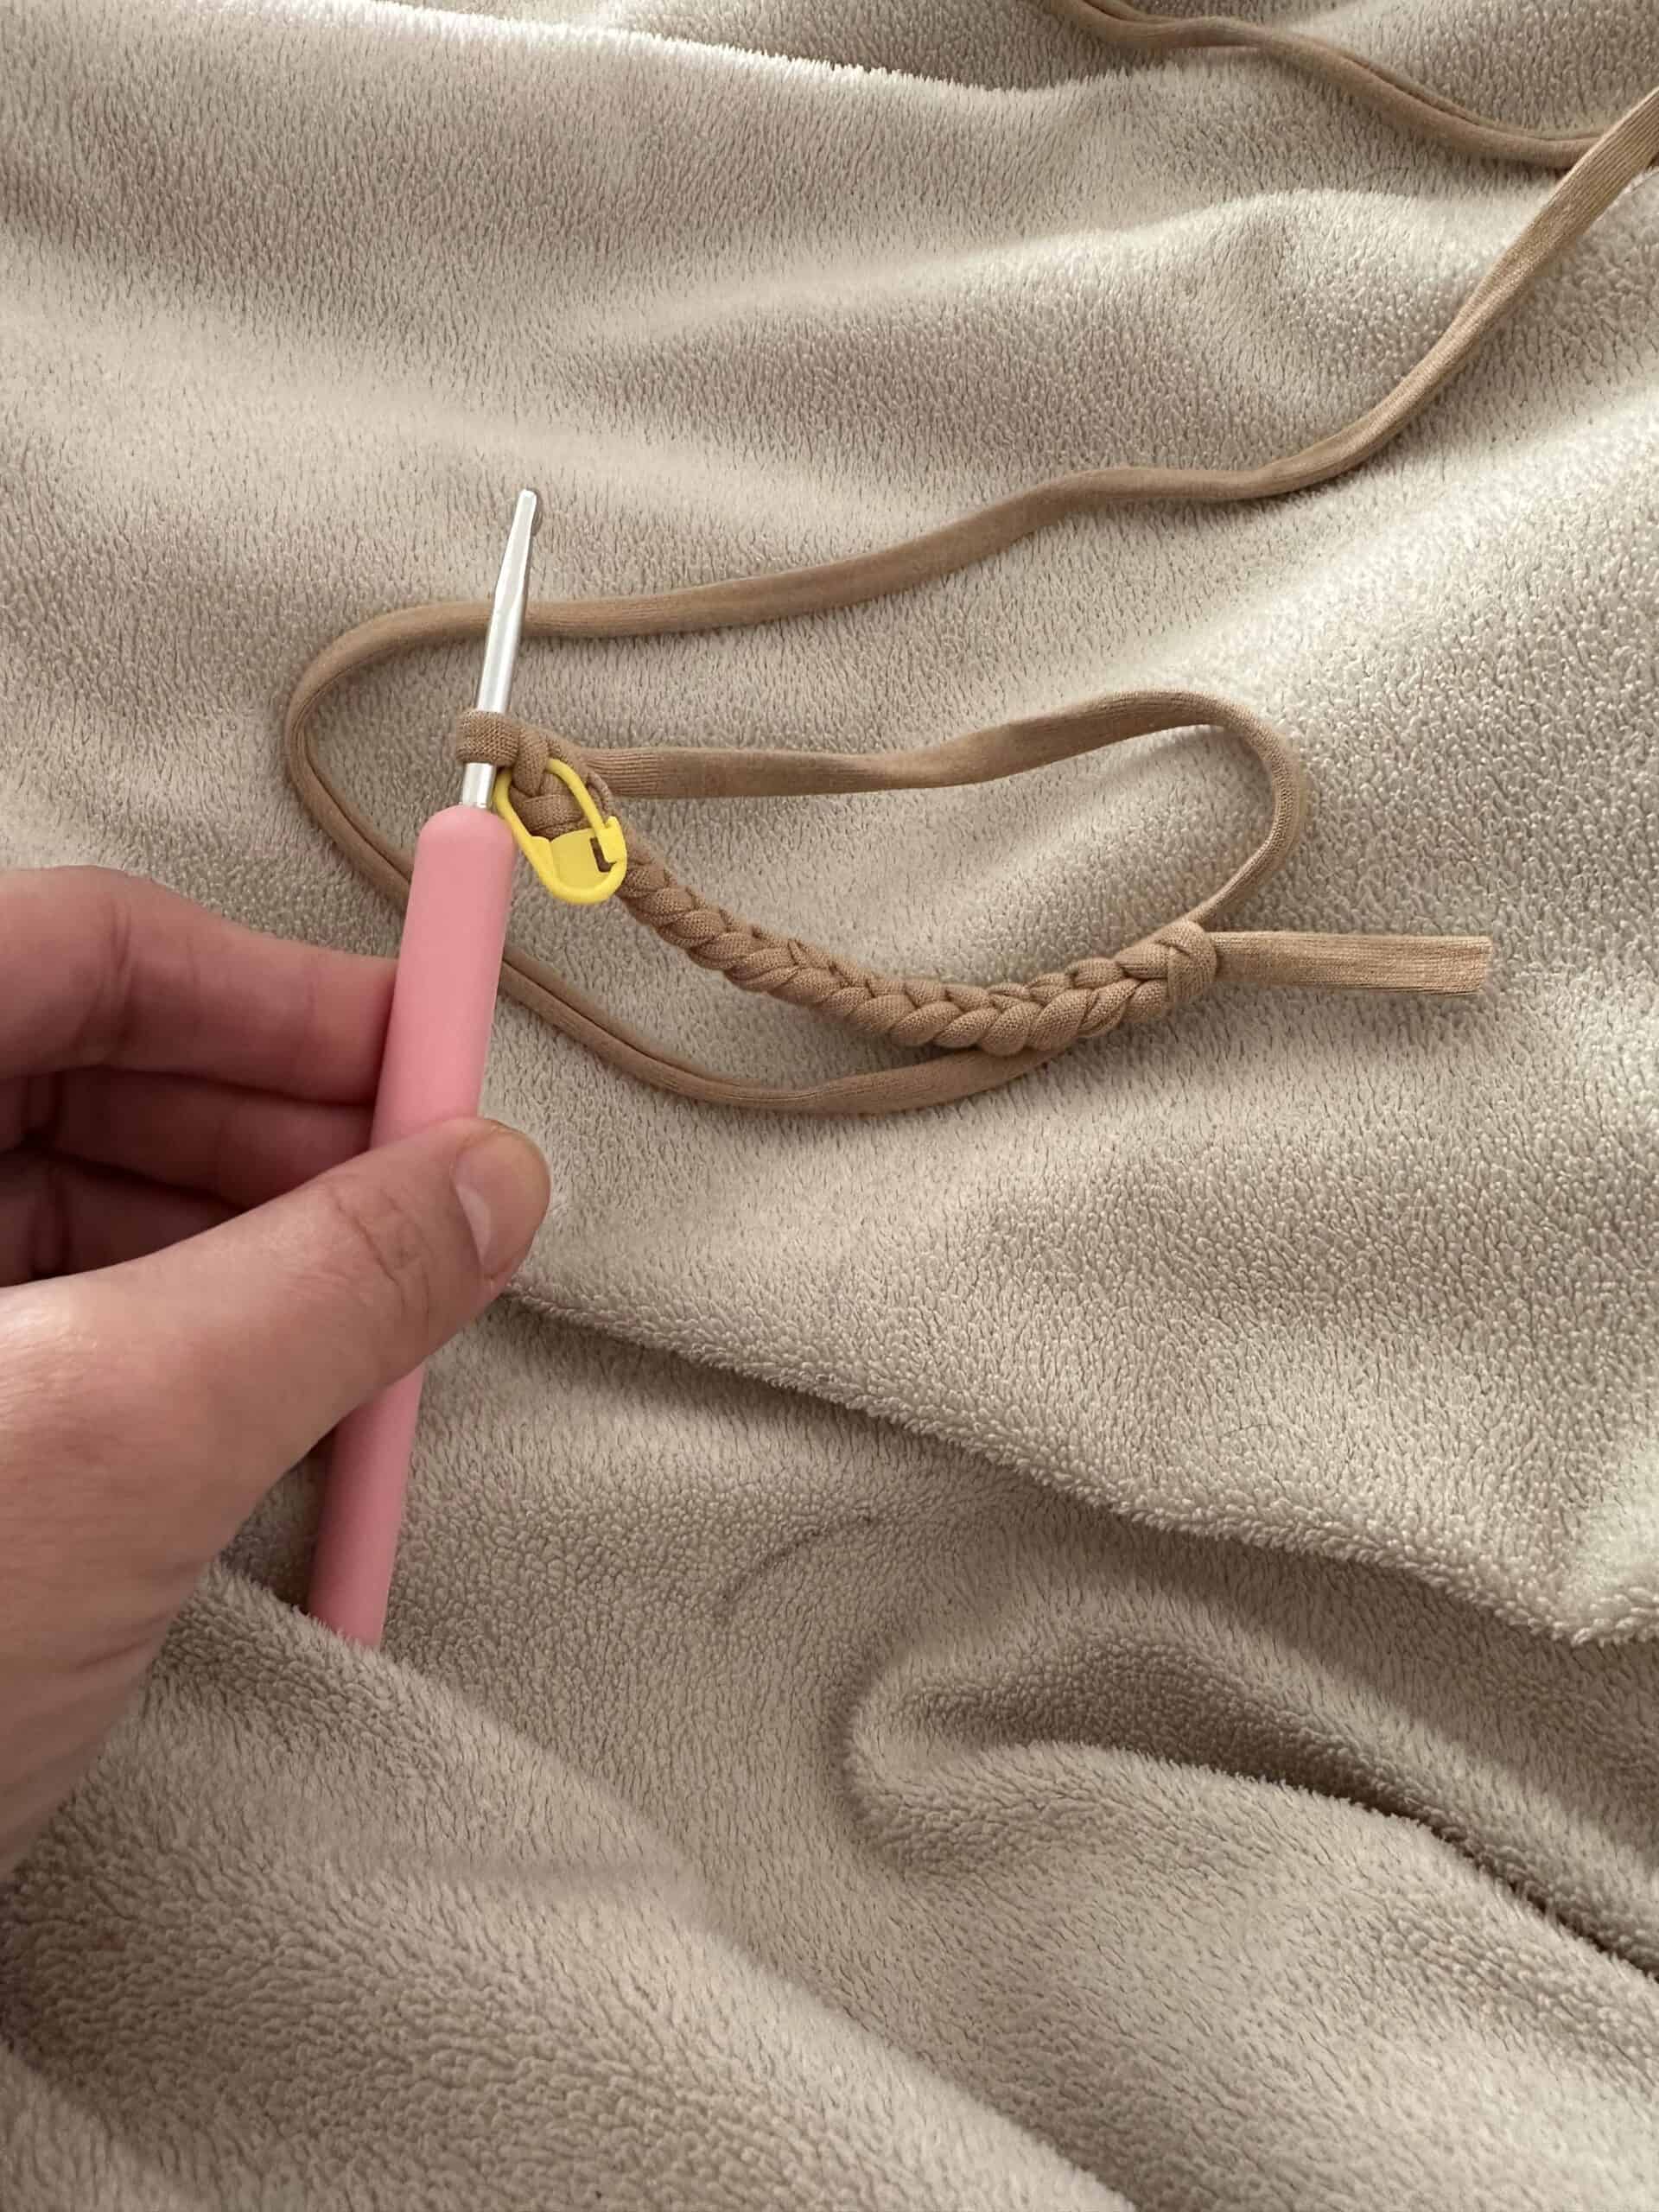
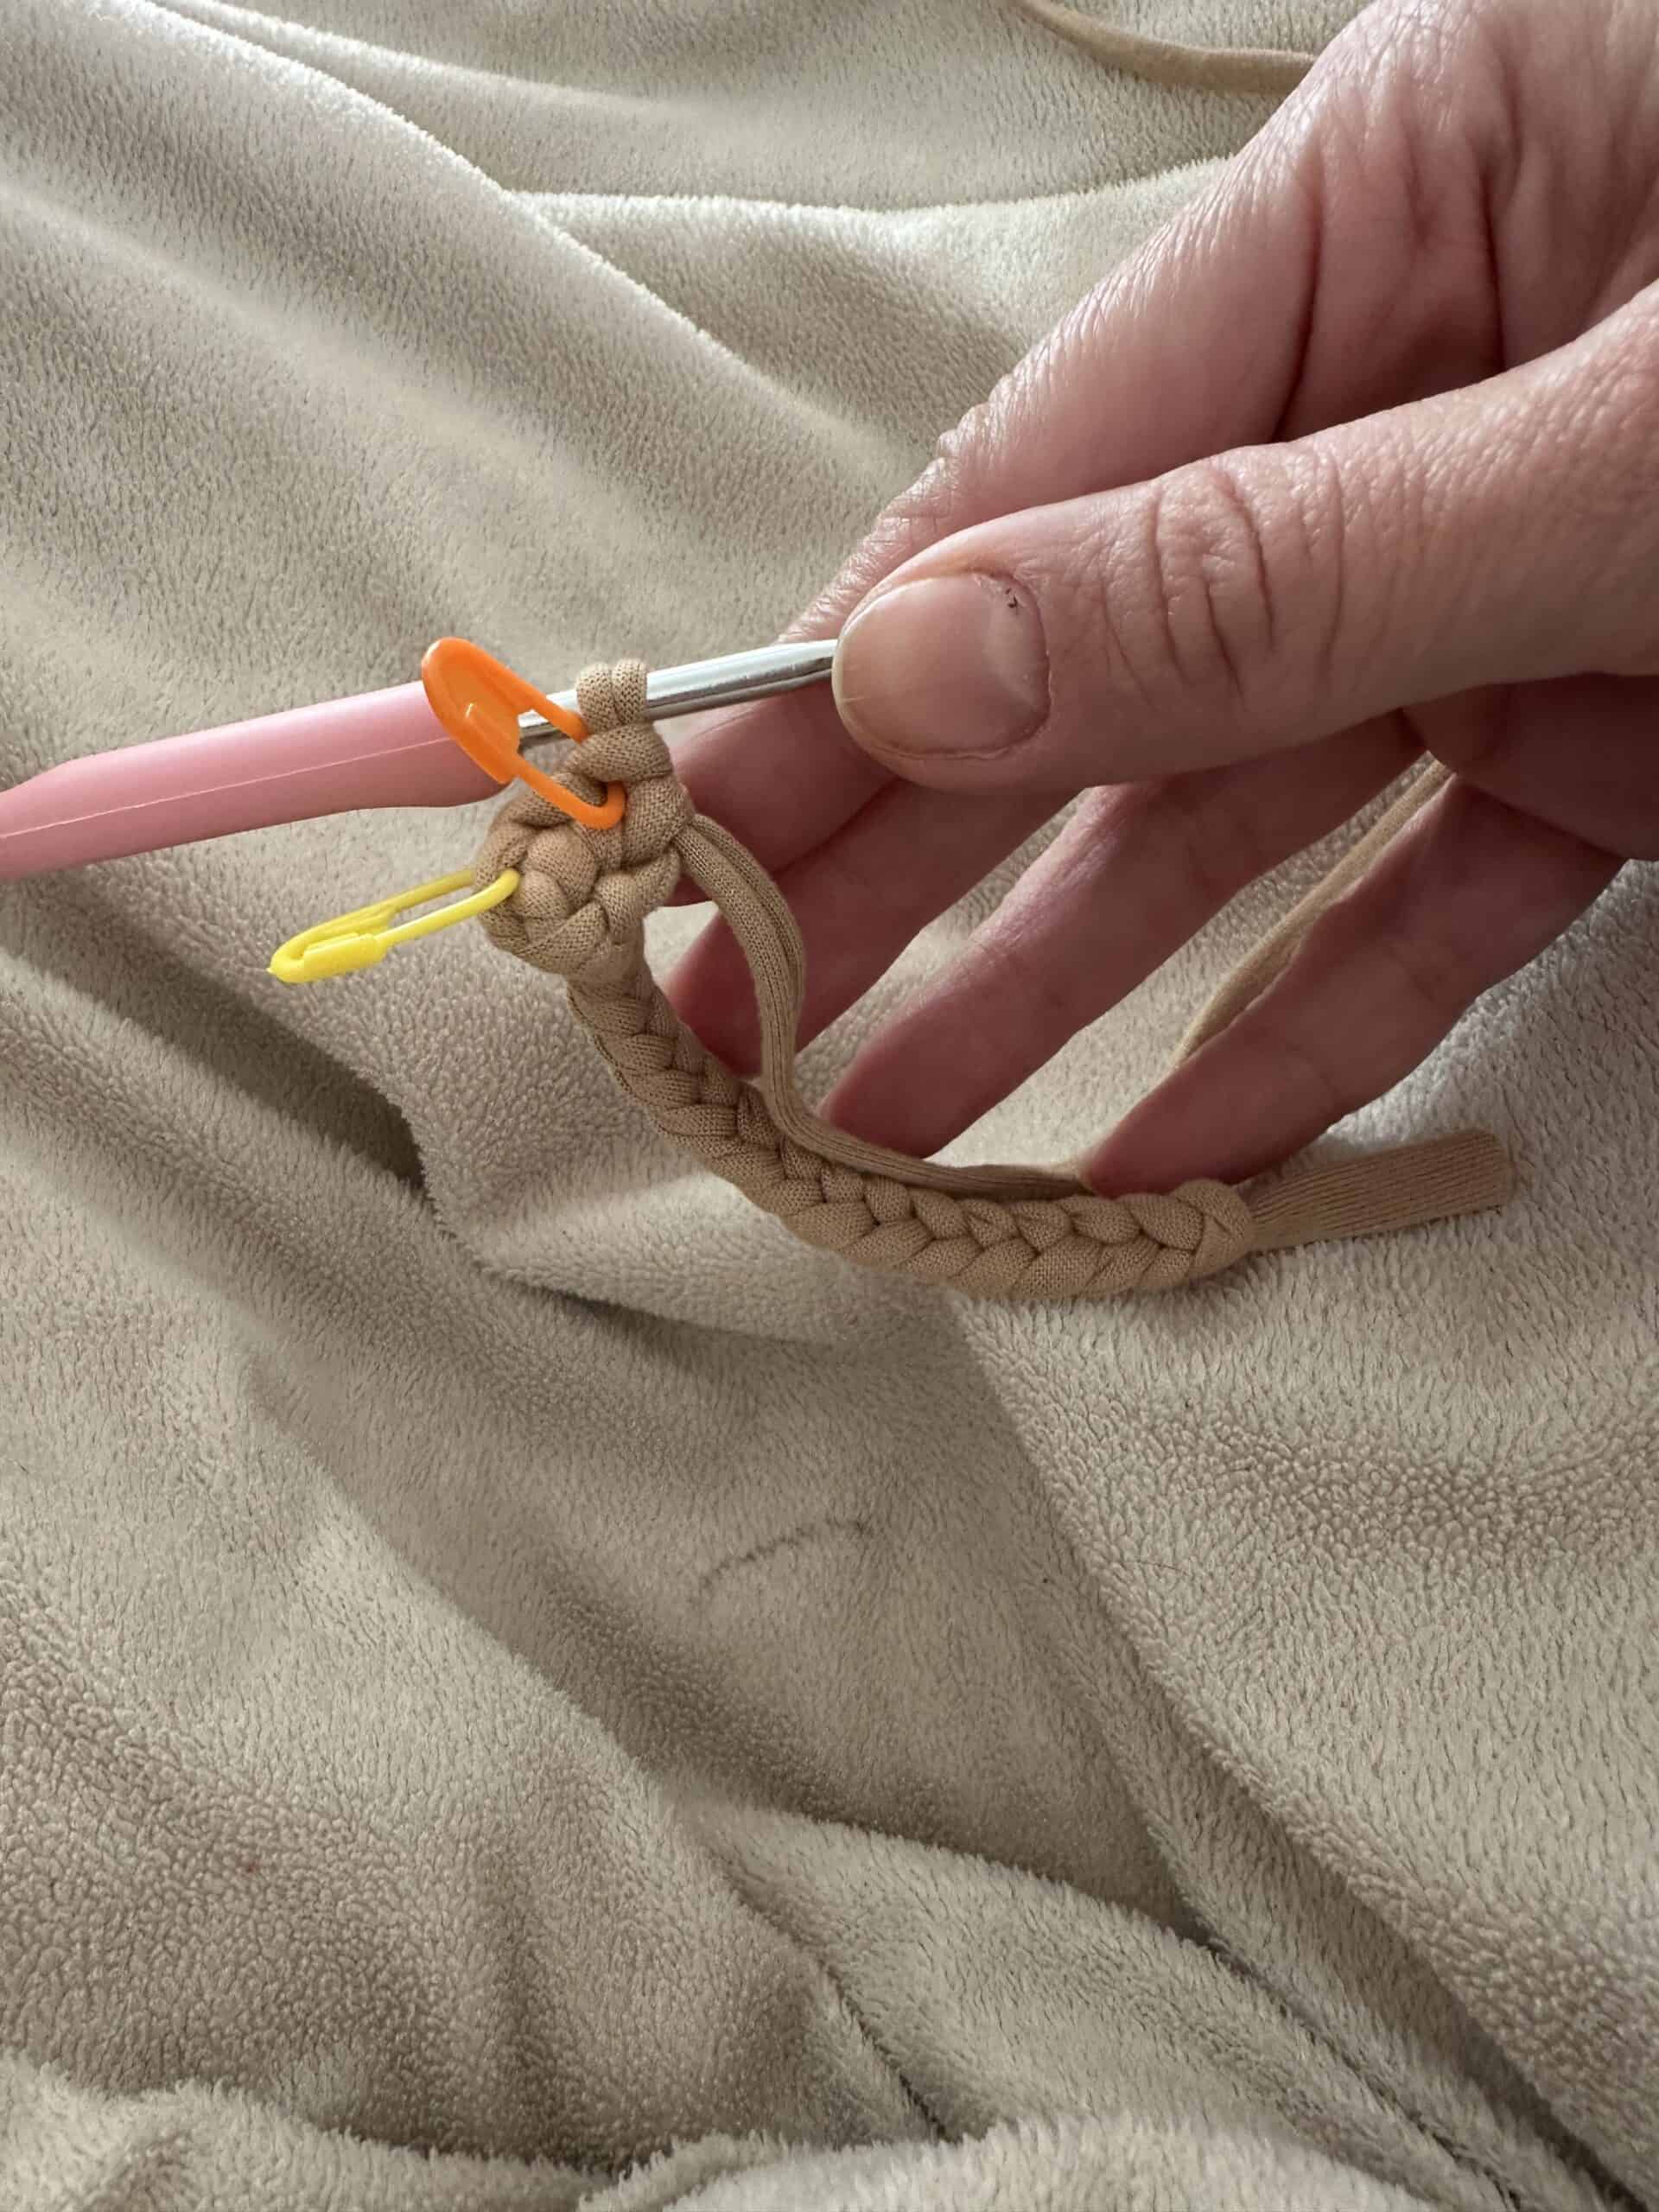
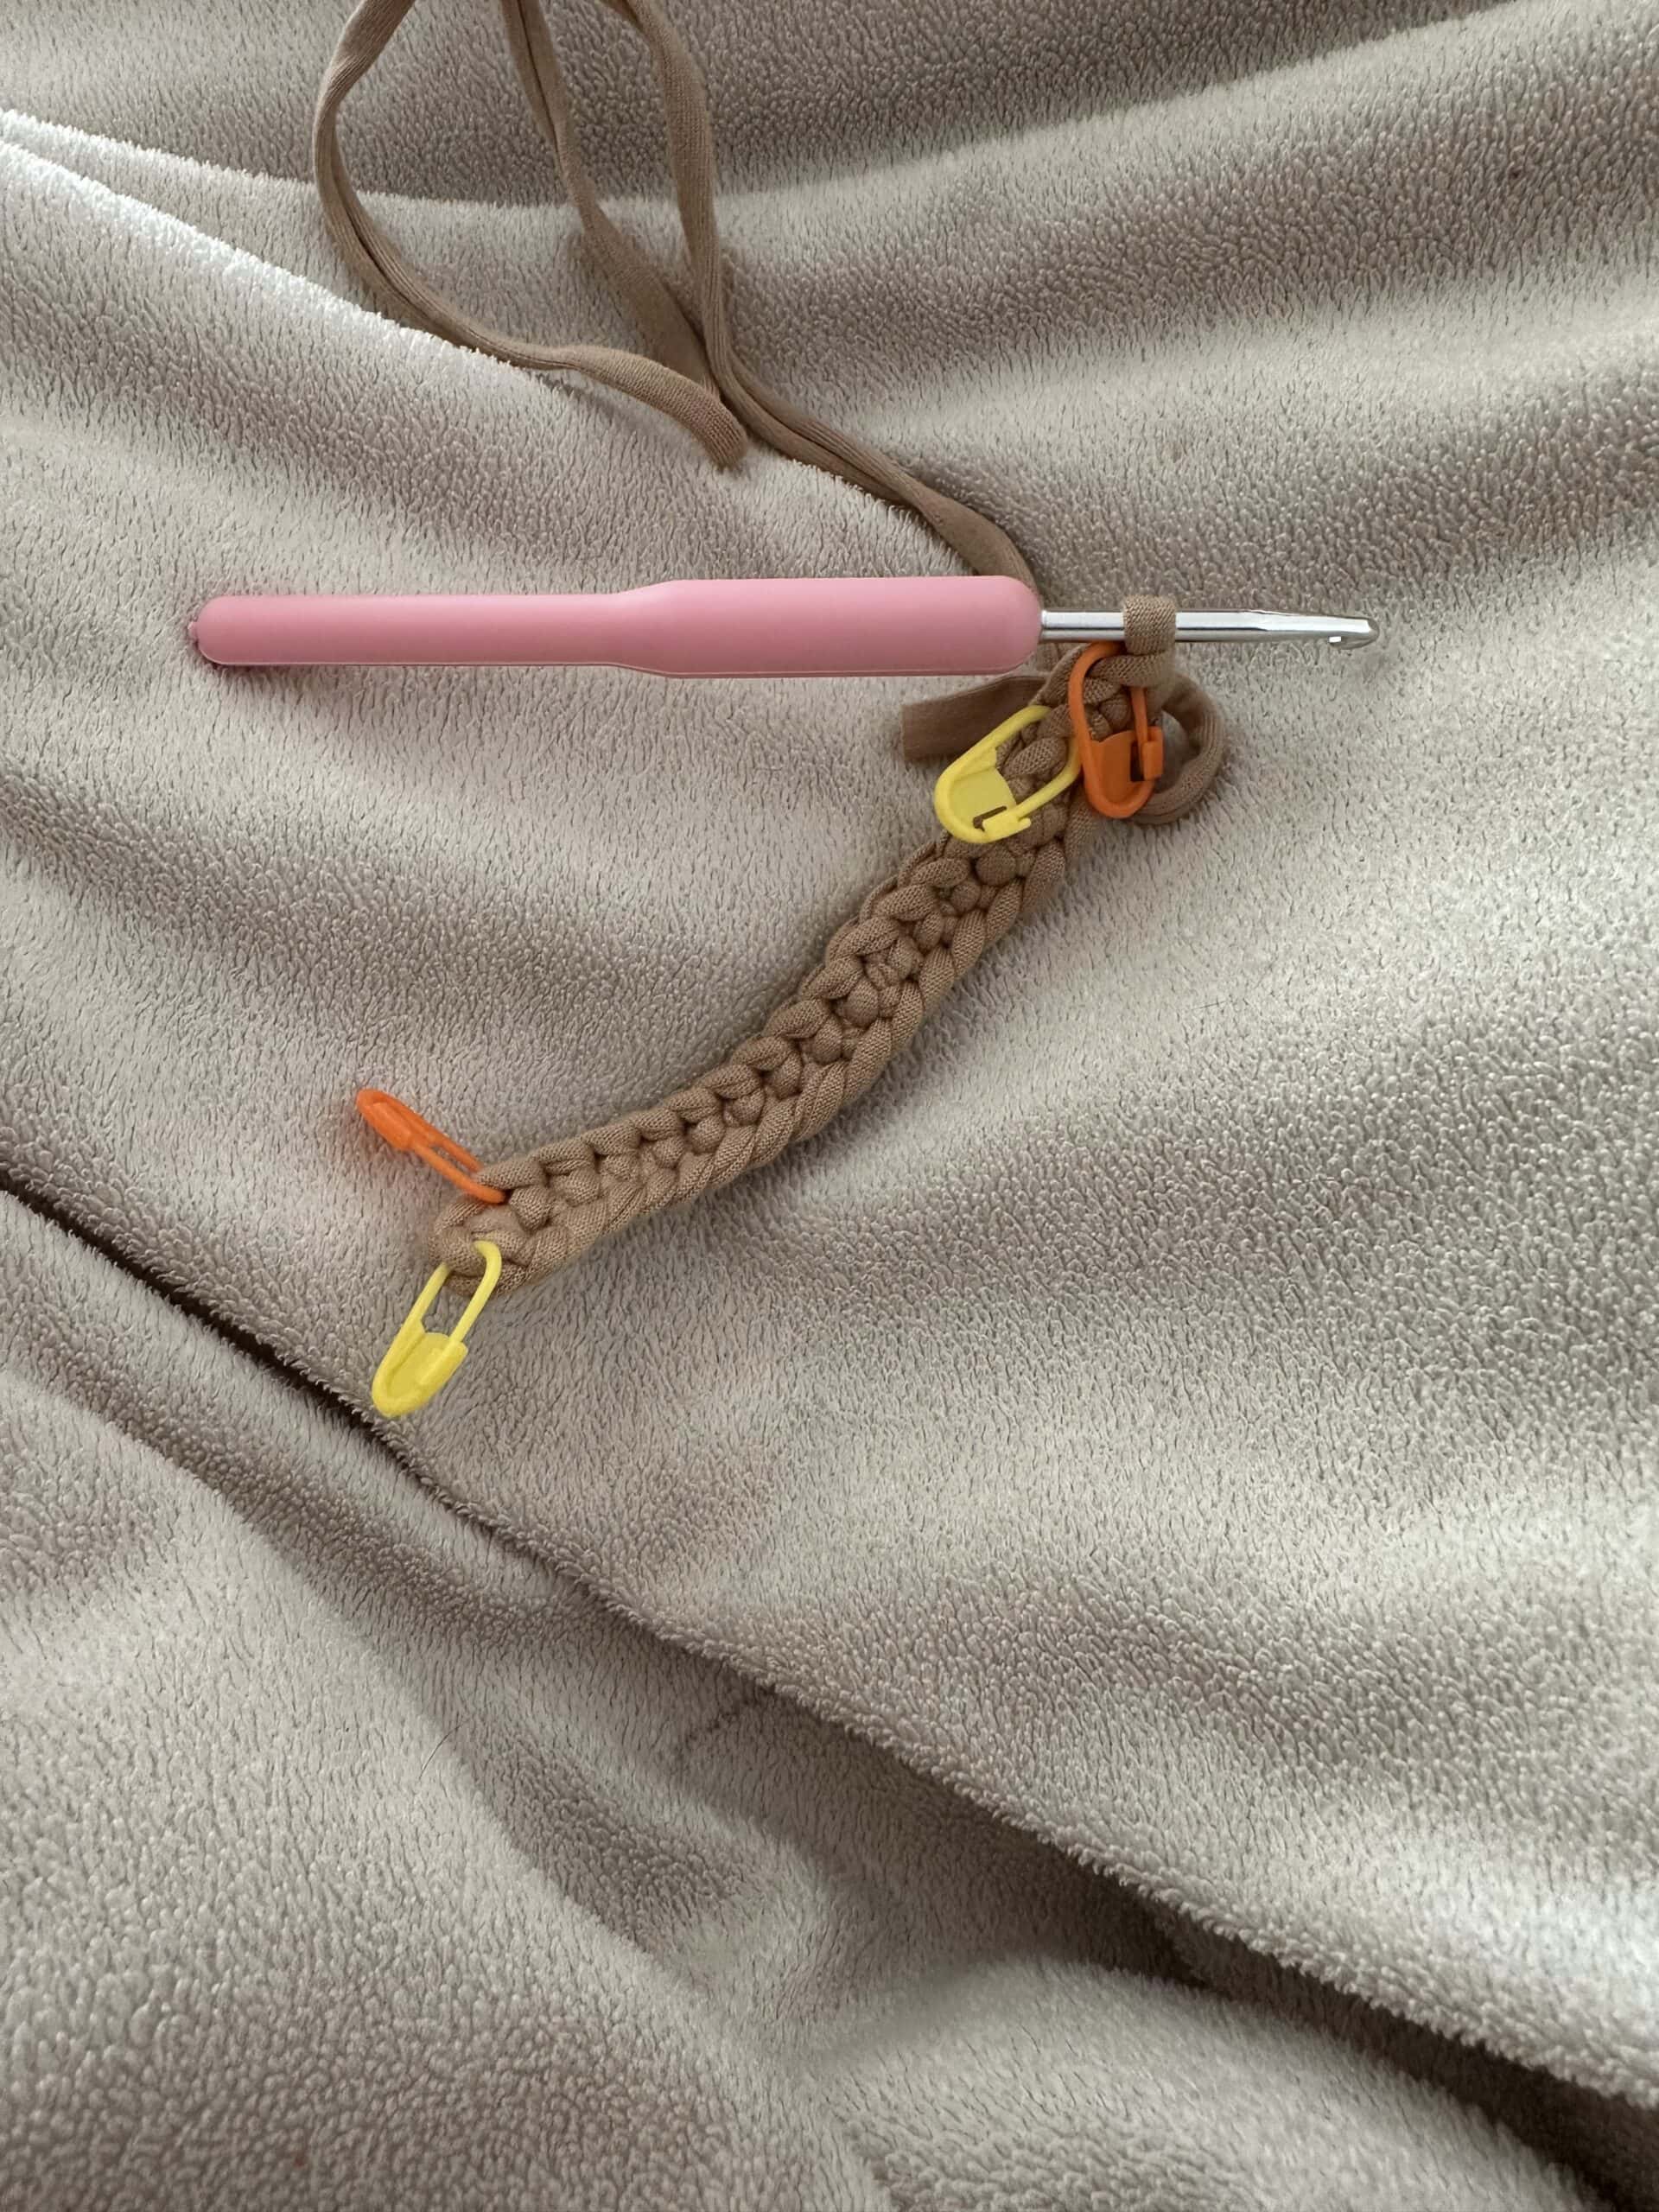
- Round 2: Work [2 sc in each of the next 3 sts], meaning increase 3x, 1 sc in each of the next 14 sts, [2 sc in each of the next 3 sts] again, meaning increase 3x, 1 sc in each of the next 14 sts. [40 sts]
- Round 3: Repeat [1 inc, 1 sc] 3 times over the end curves. Work 1 sc in each of the next 14 sts down the side. Repeat [1 inc, 1 sc] 3 times over the opposite end curve. Work 1 sc in each of the next 14 sts down the side. [46 sts]
- Round 4: Repeat [1 inc, 2 sc] 3 times over the end curves. Work 1 sc in each of the next 14 sts down the side. Repeat [1 inc, 2 sc] 3 times over the opposite end curve. Work 1 sc in each of the next 14 sts down the side. [52 sts]
- Round 5: Repeat [1 inc, 3 sc] 3 times over the end curves. Work 1 sc in each of the next 14 sts down the side. Repeat [1 inc, 3 sc] 3 times over the opposite end curve. Work 1 sc in each of the next 14 sts down the side. [58 sts]
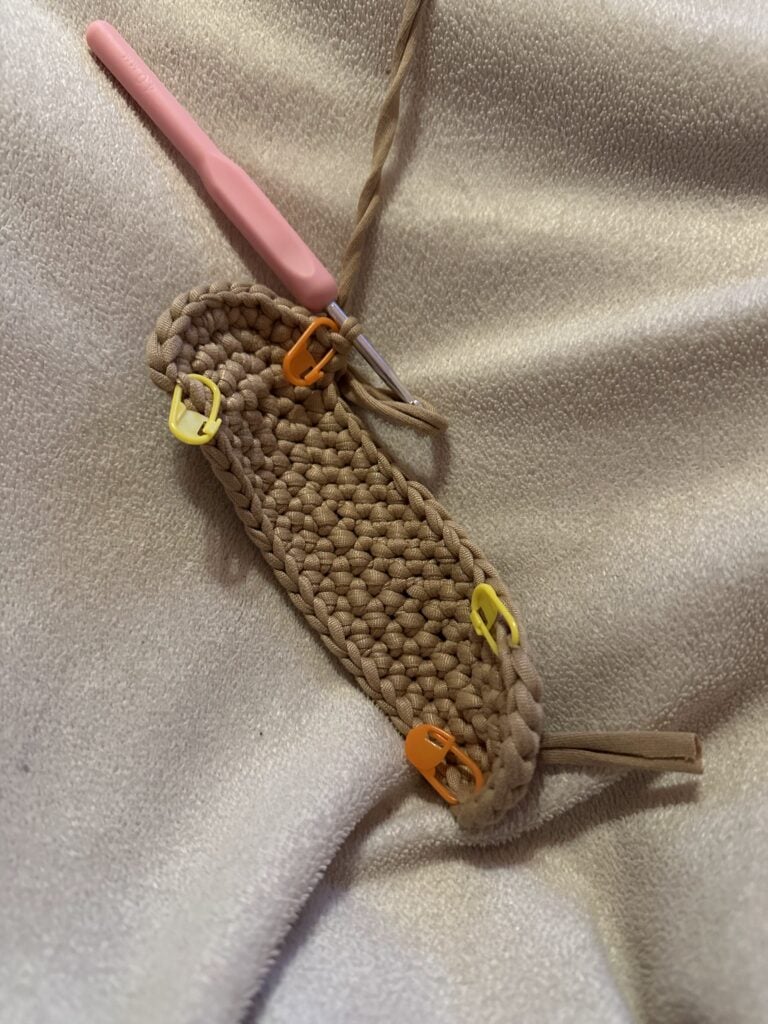
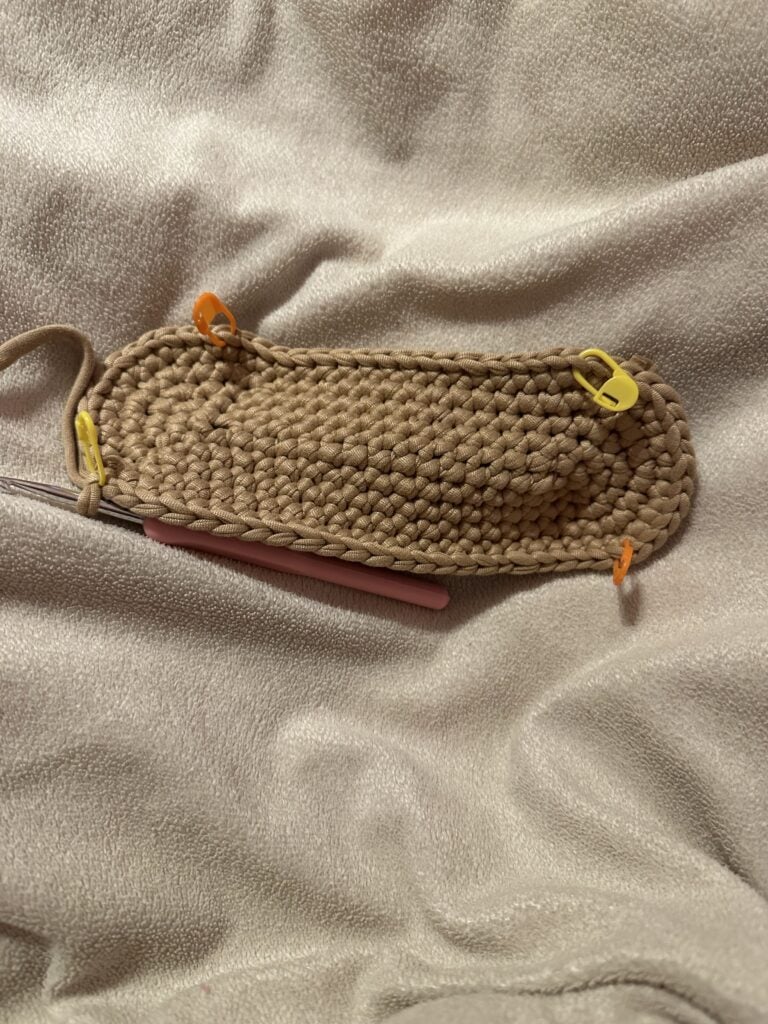
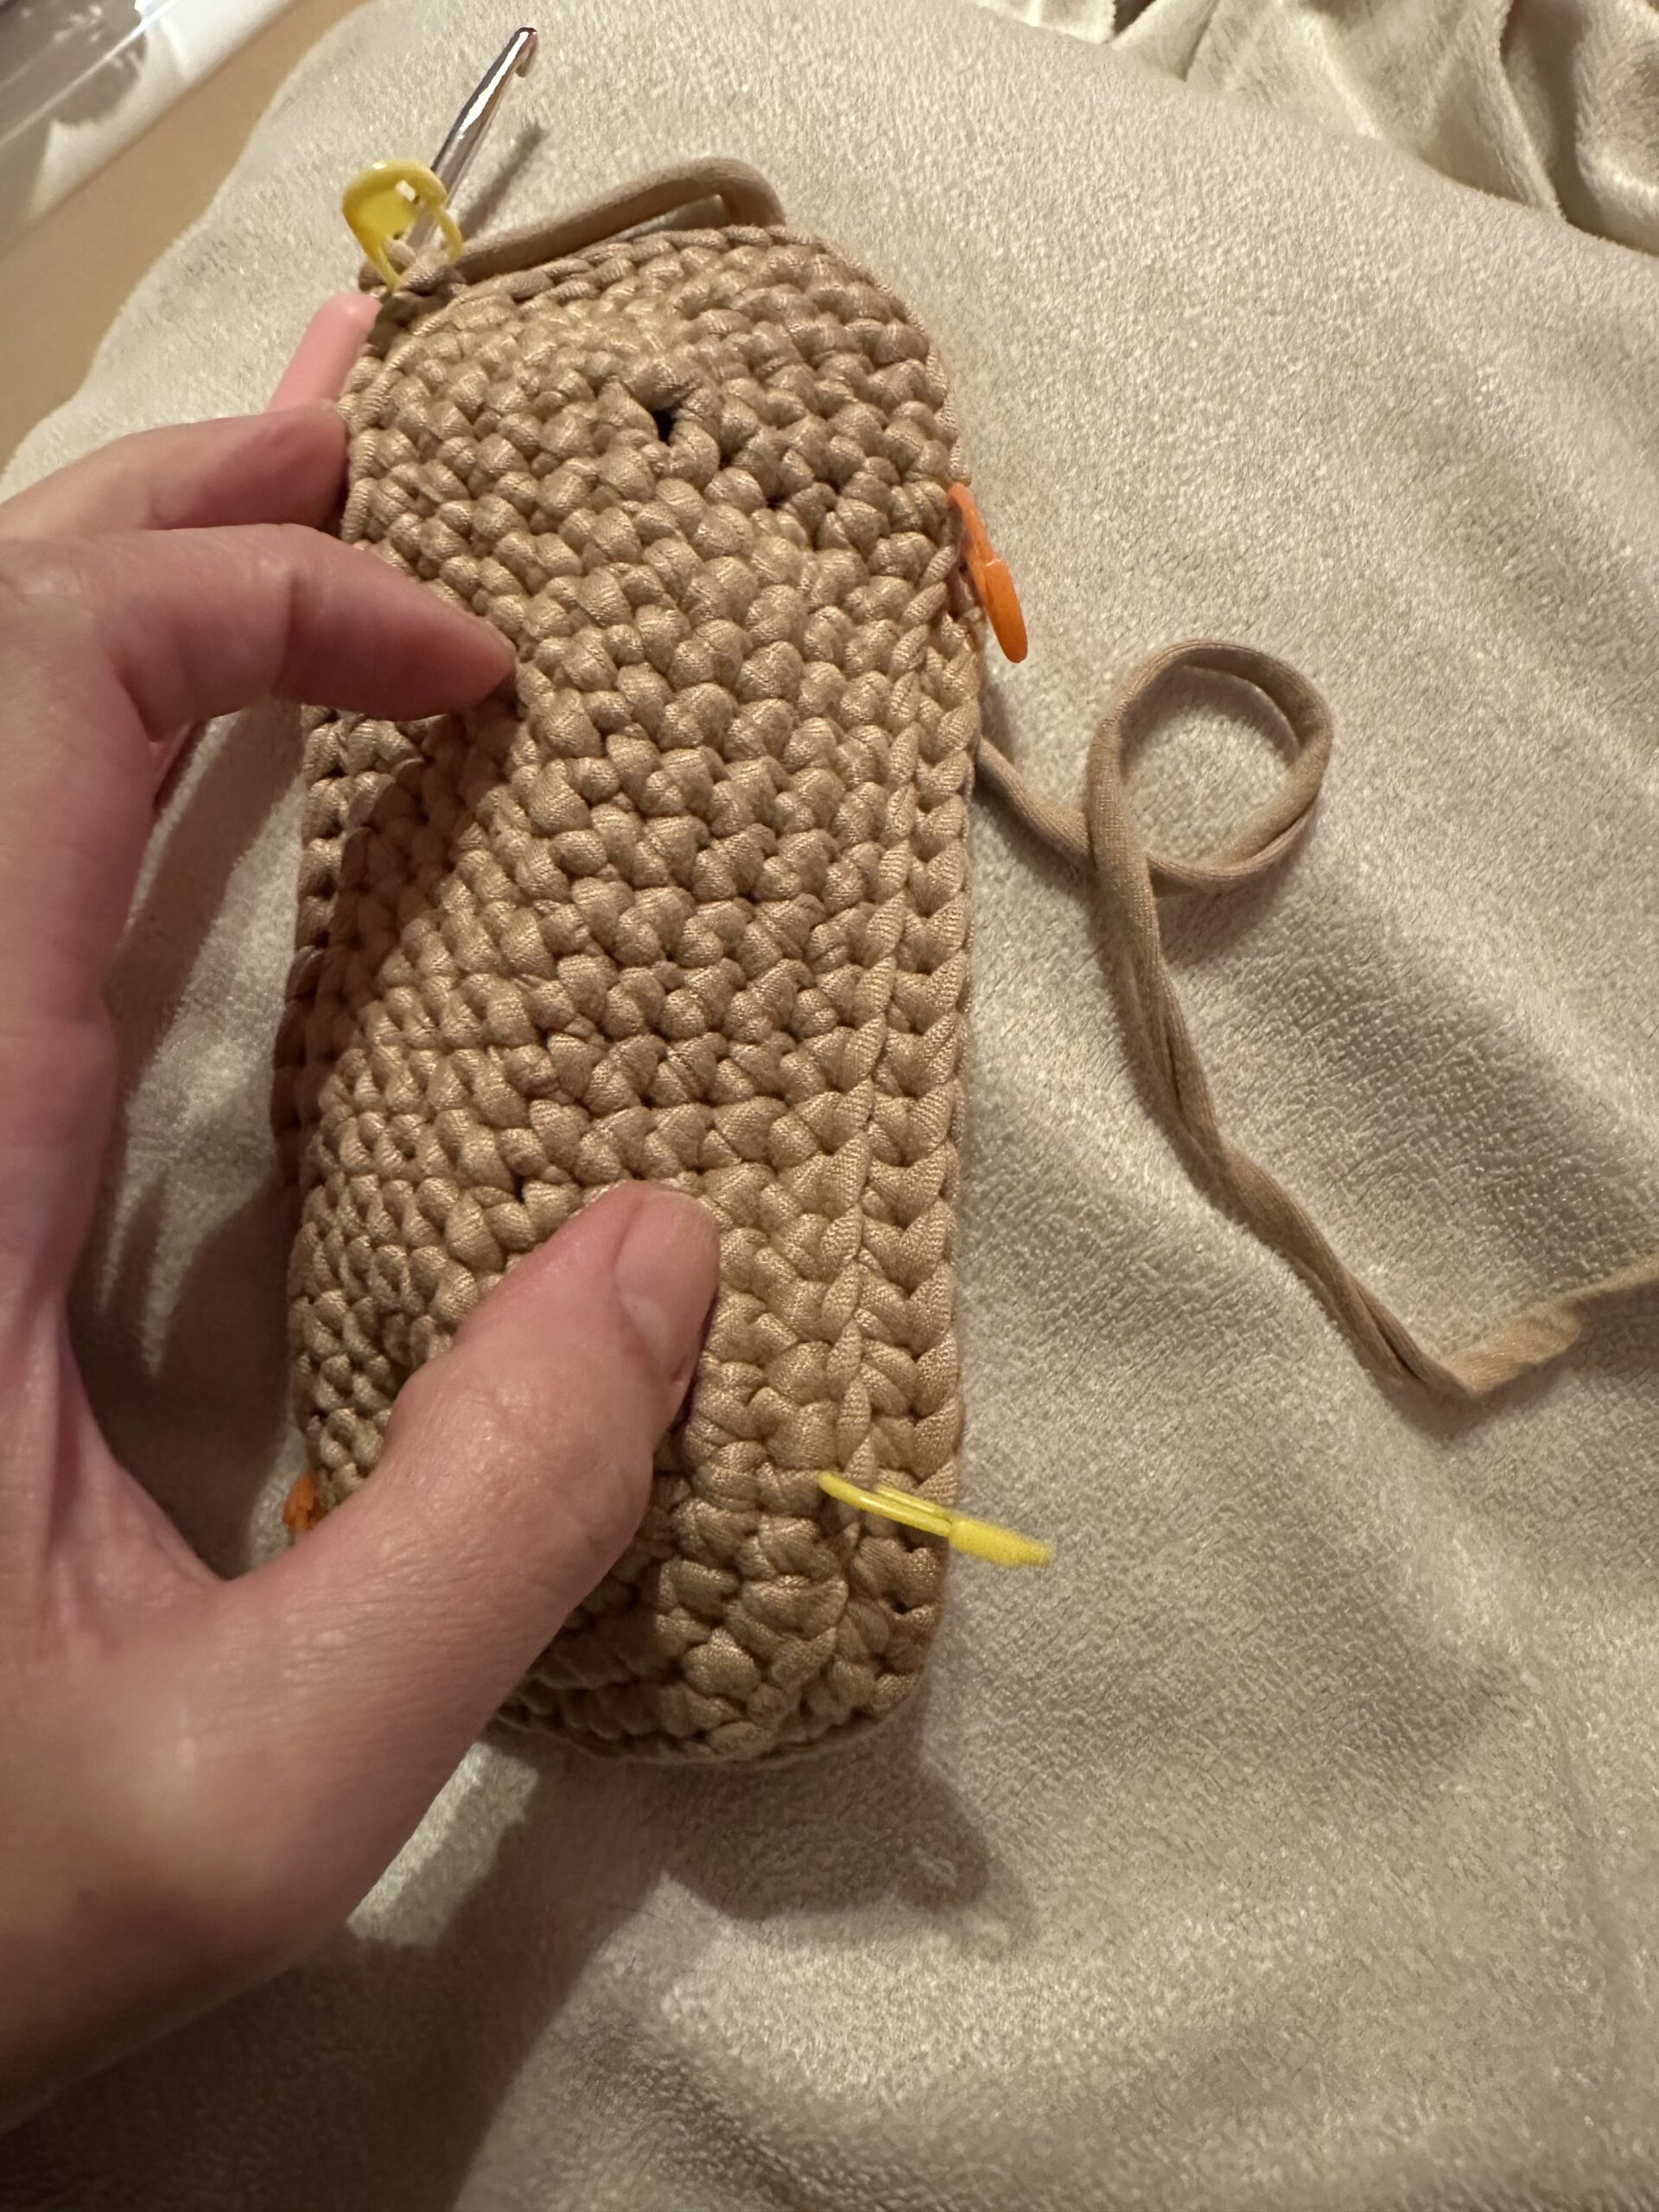
Phase 2: The Body of the Bag
- Round 6 (Base Ridge): Work 1 sc in the Back Loop Only (BLO) of every stitch around. [58 sts]
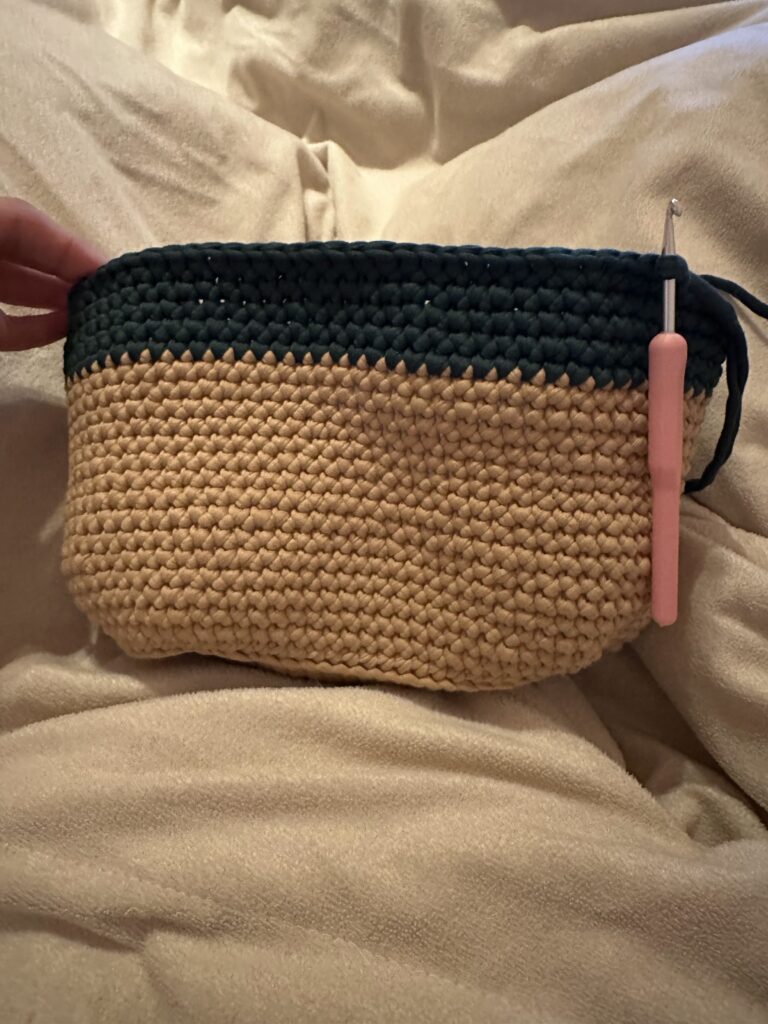
- Rounds 7 – 27 (Body Height): Working through both loops, work 1 sc in every stitch around in a continuous spiral. [58 sts for 19 rounds]
- Tip: If you prefer a taller or deeper donut bag, add 2–4 extra rounds here before moving on to the handles.
Phase 3: Forming the Donut Opening & Handles
Now, crochet the handles to give your bag the donut/egg shape. The handles are worked as two continuous handle tubes.
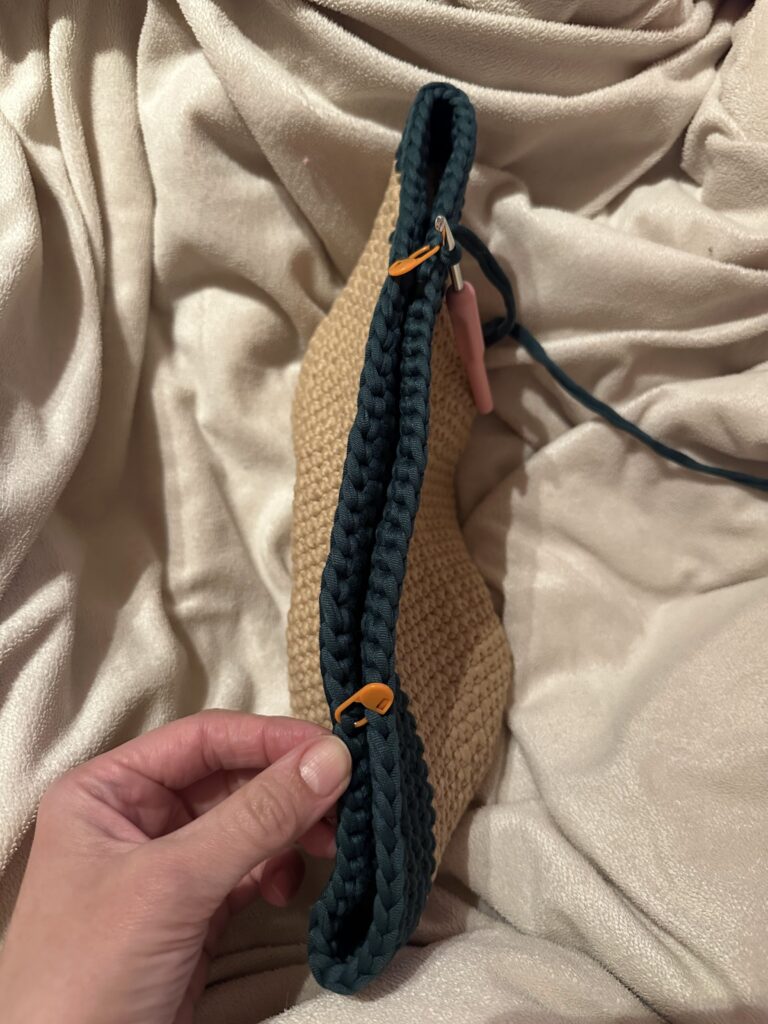
- Fold your bag flat. Identify the exact side edges.
- Count and mark 12 stitches on the Front Panel center and 12 stitches on the Back Panel center. These center 24 stitches will form the central inner hole of the donut bag.
- The remaining stitches on each outer edge (24 stitches per side) will form your handle tubes.
Pro Tip for forming the Handles of your Donut Bag: Crochet alternating on the left handle and the right handle to measure when you´ll meet the middle!
Left Handle Tube
- Round 21: Work 1 sc in each of the 24 sts of the left side. Skip the center 24 marked stitches, bring the back wall to the front, and sc directly into the 1st stitch of the back left side to join into a small tube loop. [24 sts]
- Rounds 22 – 38: Work 1 sc in each stitch around the 24-stitch tube in continuous rounds for 16 rounds (or until the tube reaches half of your desired handle arch). [24 sts]
- Fasten off, leaving a 12-inch tail for seaming.
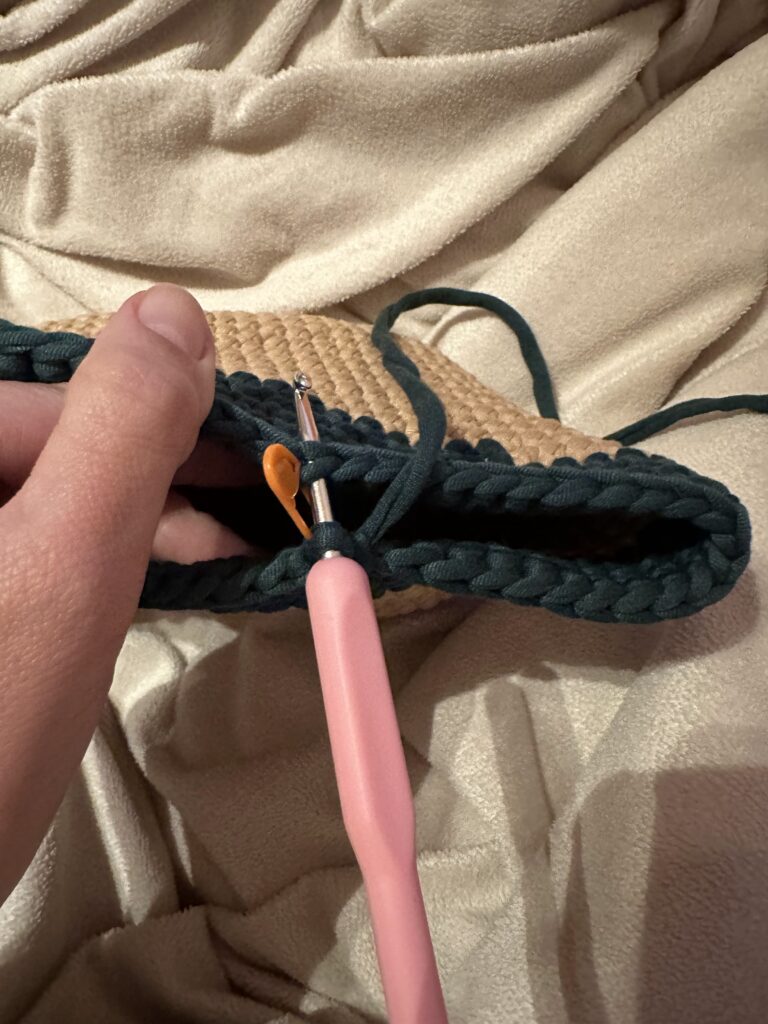
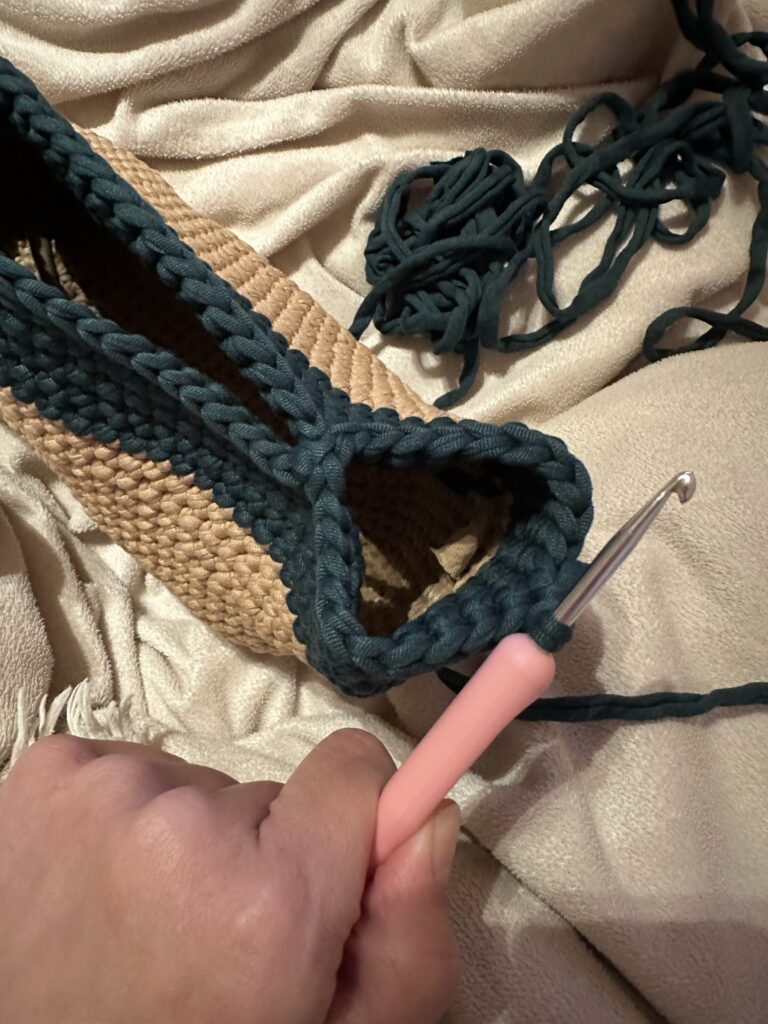
Right Handle Tube
- Slip stitch the yarn to the outer corner of the right side.
- Round 21: Work 1 sc in each of the 24 sts on the right side, joining the front and back outer walls to form the second tube. [24 sts]
- Rounds 22 – 38: Work 1 sc in each stitch around in continuous rounds for 16 rounds (matching the height of the left handle tube). [24 sts]
- Fasten off, leaving a 12-inch tail.
Phase 4: Assembly & Finishing
- Seam the Handles: Align the top open edges of both handle tubes. Using your tapestry needle and the yarn tails, join the two tubes using a whipstitch or mattress stitch through the inner loops to create a seamless top connection. Or use your crochet hook to close the handles by slip-stitching the FLO (front loop only) together. Either method works.
- Close the central hole gap: Use a short piece of yarn to neatly stitch any tiny gap left at the split where the handles meet the main bag body.
- Weave in Ends: Secure all yarn tails inside the interior of the handles and bag body using your tapestry needle.
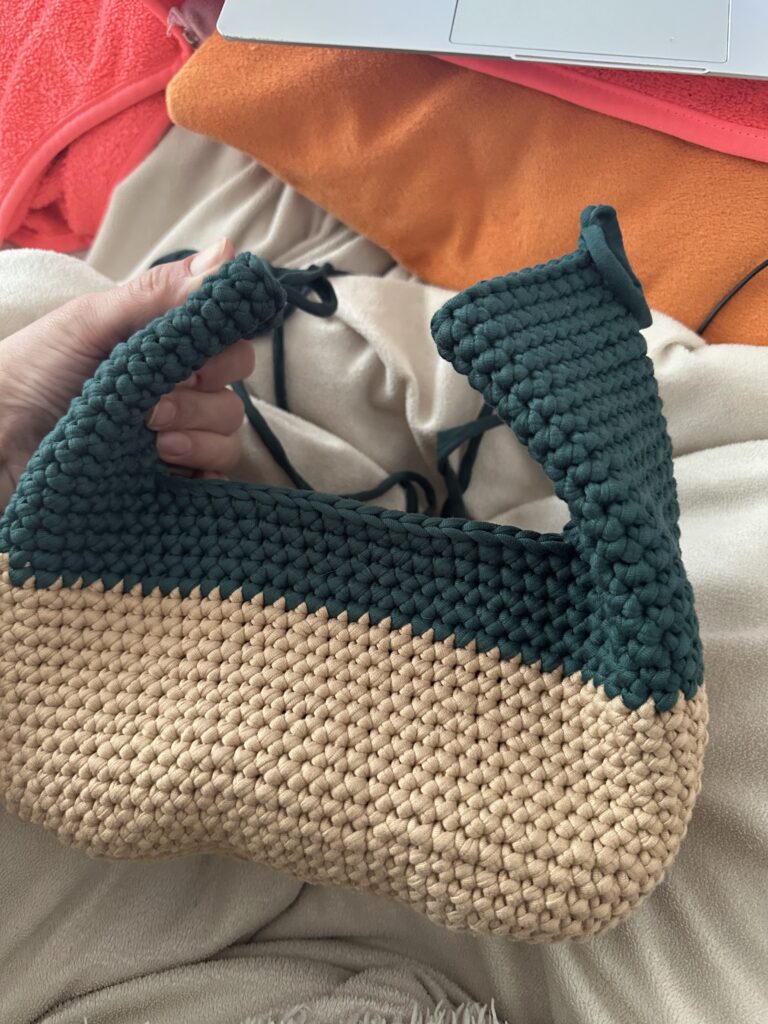
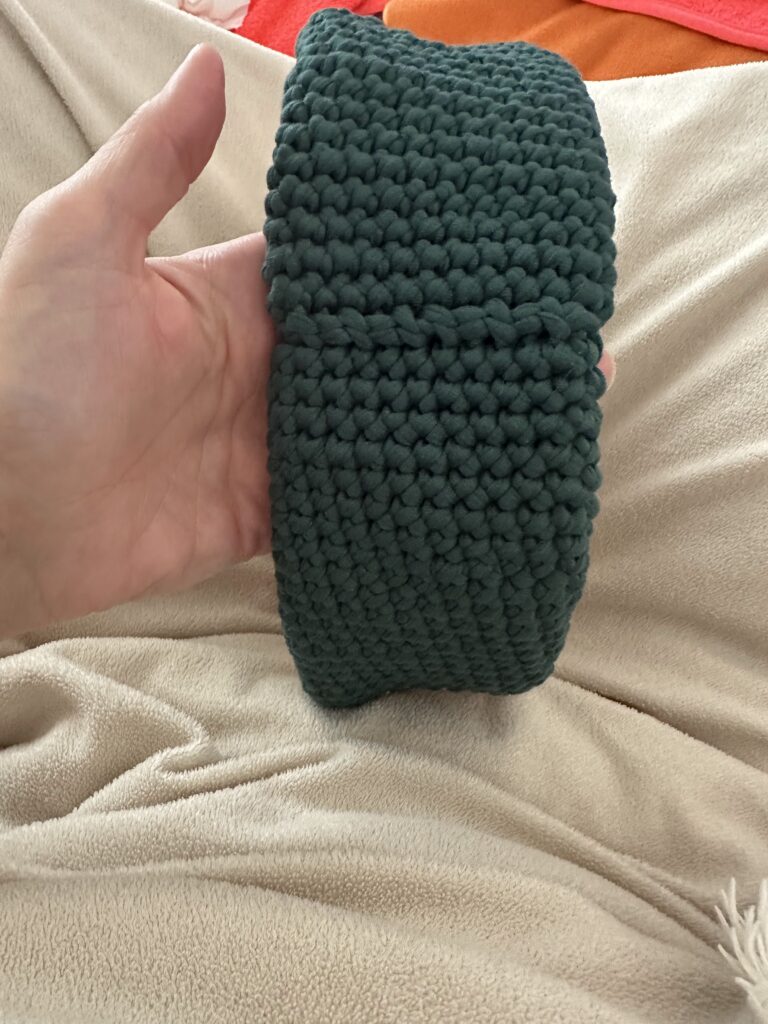
Congratulations! Your viral crochet donut bag is complete and ready to style!
Frequently Asked Questions (FAQ)
What is the best yarn for a crochet donut bag?
T-shirt yarn (recycled fabric yarn) or ribbon yarn is best for this design because it provides firm stitch structure, preventing the bag from stretching or sagging when holding items. You can also use double or triple strands of worsted-weight cotton yarn.
Can a beginner crochet this egg bag?
Yes! If you know how to make a single crochet, work in the round, and execute basic increases, you can complete this pattern easily.
How do I stop my crochet bag handles from stretching?
Working with a stiff yarn like T-shirt yarn or holding multiple strands together provides natural resistance. Alternatively, you can line the interior of the handles with fabric or crochet over a lightweight cord.